
User's Guide

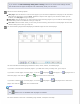


For further details on the tools in the Editing Page window, see Epson Scan Help.
When you have finished editing your pages, click OK. The pages are saved in one PDF file in Pictures, My Pictures,
or the location you selected in the File Save Settings window, and you return to the Professional Mode window.
Click Close to exit Epson Scan.
Top
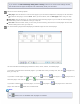
Double-sided Scanning
You can scan a 2-sided document using the ADF. First you scan the odd-numbered pages, then you turn the document
over and scan the even-numbered pages. Then you can use the Editing Page window to automatically sort the pages.
Note:
The following steps are for double-sided scanning in Office Mode.
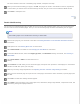
Place the first page of your document in the ADF. See Loading Documents in the Automatic Document Feeder for
instructions.
Start Epson Scan. See Starting Epson Scan for instructions.
Select Office Mode in the Mode list. See Changing the Scan Mode for instructions.
In the Office Mode window, select the Image Type, Size, and Resolution settings. For details, see Scanning in
Office Mode.
Select Auto Detect or ADF as the Document Source
setting.
Click Preview. The ADF loads your first document page, then Epson Scan prescans it and displays it in the Preview
window. The ADF then ejects your first page.
Make any necessary image adjustments. See Adjusting the Color and Other Image Settings for details.
Place your first document page on top of the rest of the pages, then load the entire document (up to 40 pages) into
the ADF.
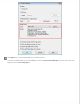
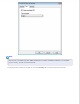
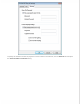
Click Scan. The File Save Settings window appears.
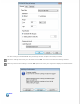
Select PDF as the Type setting. The current Paper Size, Orientation, Margin, Page Number, Compression Level, and
Text Setting settings are displayed below it.