
User's Guide

Home > Scanning Your Originals
Detailed Setting Instructions
Selecting the Scan Resolution
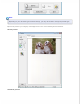
Previewing and Adjusting the Scan Area
Adjusting the Color and Other Image Settings
Selecting the Scan Size
Selecting the Scan Resolution
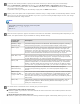
You can select a specific Resolution setting for your images. Keep in mind that higher resolution settings increase
scanning time, so do not select a higher resolution than you need. See the following table to reference the appropriate
resolution setting to use so that you do not have to take more time than necessary.
What you will do with the
scanned image
Suggested scan resolution
Send via e-mail, upload to web,
or view only on the screen
96 to 150 dpi
Print 300 dpi
Print, or convert to editable text
(OCR) (for documents only)
300 dpi
Fax 200 dpi
Enlarge after scanning at 100% Increase Resolution setting by same amount you will increase image
size after scanning.
For example, if the resolution is 300 dpi, but you will increase the
image size to 200%, change the resolution setting to 600 dpi.
To select the resolution setting, see one of these sections.
Home Mode: Selecting the Resolution in Home Mode
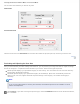
Office Mode or Professional Mode: Selecting the Resolution in Office Mode or Professional Mode
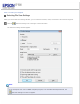
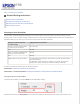
Selecting the Resolution in Home Mode
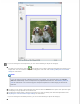
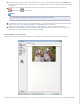
To change the resolution, first select Other as the Destination setting.
Click the arrow next to the Resolution list and select the number of dpi (dots per inch) at which you want to scan.