
User's Guide


Home > How to Scan
Scanning Using Document Capture Pro (for Windows)
This section explains basic scanning procedures using Document Capture Pro.
See help for details on Document Capture Pro.
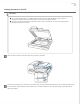
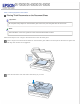
Place your original(s).
Loading Documents in the Automatic Document Feeder (ADF)
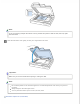
Placing Documents on the Document Glass
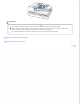
Placing Thick Documents on the Document Glass
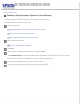
Start Document Capture Pro.
Document Capture Pro (for Windows)
Click Scan.
Select settings in the Main Settings window, and then click Scan.
Click Detailed Settings to make more detailed image adjustments using the “Epson Scan” scanner driver.
The document is scanned and displayed as an image in Document Capture Pro.
Check the scanned images (pages), and then edit as needed.
When you have finished checking the image, click the destination icon.