
Quick Reference Guide


Checking Ink Levels and Replacing Ink Cartridges
Checking Ink Levels and Replacing Ink Cartridges
Replacing Ink Cartridges
When one of the INK OUT lights is flashing and INK LOW
is displayed on the control panel, the corresponding
cartridge is nearly empty. Make sure you have the correct
replacement cartridge.
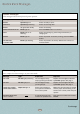
Photographic Dye ink:
Black T499201
Yellow T500201
Magenta T501201
Cyan T502201
Light Magenta T503201
Light Cyan T504201
Archival ink:
Black T511201
Yellow T512201
Magenta T513201
Cyan T514201
Light Magenta T515201
Light Cyan T516201
6
Before you begin a large print job, you should check your
ink levels. If one of your cartridges is low, you can replace it
before you start. Or, you can wait until the ink runs out,
replace the cartridge, and then continue the job without
any loss of print quality.
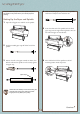
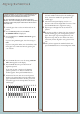
Checking Ink Levels
1 Press the SelecType button until PRINTER STATUS
MENU appears on the display.
2 Press the Item button. VERSION <number>
appears, indicating the firmware version installed in
your printer.
3 Continue pressing the Item button to display the
amount remaining for each of the 6 inks:
E*****F = full
E ****F = 3/4 full
E ***F = 1/2 full
E **F = 1/4 full
E *F = nearly empty
E F = empty
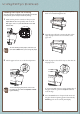
4 Press SelecType to exit the Printer Status menu.
When one of the
INK OUT lights stays on and INK OUT
is displayed, the cartridge is empty. To replace the
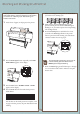
cartridge, first make sure the printer is on.
1 Push the indentation on the ink compartment cover
to release the lock and open the cover.
Continue
▲
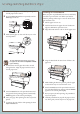
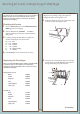
2 Locate the slot containing the empty ink cartridge
corresponding to the Ink Out light. Press down on
the top of the clamp and pull it forward.