
Quick Reference Guide
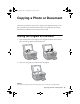


Editing Photos While You Copy 15
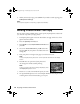
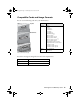
To auto-correct your photo, reduce red-eye, or select different paper settings,
press x
Menu. (See page 13 for a list of paper types; you can’t select Plain
Paper
when you’re copying photos.)
■ To correct a photo that is too light or too dark, press d until Enhance is
highlighted, then press r to select
PhotoEnhance and press OK. See
page 16 for more information about automatic photo correction.
■ To reduce red-eye, press d until Reduce Red Eye is highlighted, then
press r, select
On, and press OK.
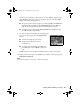
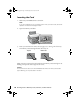
9. To crop your photos and enlarge the resulting image
area to fit on your paper, press the
Display/Crop
button.
■ To resize the image area, press + or –.
■ To move the image area, press the
arrow buttons.
■ To check the zoomed image, press OK, then
press
OK again or press y Back to adjust the
crop.
Press r to preview the next photo and repeat step 9 to crop it, if necessary.
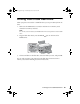
10. When you’re ready to copy, press x
Start. If you need to cancel copying, press
y
Stop/Clear Settings.
Note:
Do not pull out paper as it is printing; it ejects automatically.
sprx680_qg.book Page 15 Wednesday, June 6, 2007 8:40 AM