
Quick Reference Guide


14 Copying a Photo or Document
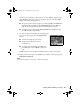
9. When you’re ready to copy, press x Start. If you need to cancel copying, press
y
Stop/Clear Settings.
Note:
Do not pull out paper as it is printing; it ejects automatically.
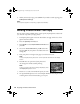
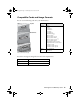
Editing Photos While You Copy
You can restore colors in faded photos, correct poorly exposed photos, reduce red-
eye, and even crop while you copy photos.
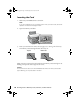
1. Load Epson photo paper in the rear sheet feeder. See page 10 for a list of the
papers and sizes available.
2. Press the
Specialty Print button.
3. Press l or r to select
Reprint/Restore Photos and
press
OK.
4. To turn on
Color Restoration, press r, select On,
and press
OK. (If your photo is not faded, leave this
setting off.)
5. Place your photo on the glass (see page 11) and close the cover.
Note:
To copy multiple photos, place them 1/4-inch apart as described on the display
screen.
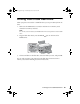
6. Press OK. You see a preview of your photo and
the settings that will be used for printing.
Note:
To see your photo without the settings displayed, press
the Display/Crop button twice.
7. Press + or – to select the number of copies you want.
8. To copy borderless photos on 4 × 6-inch Epson Premium Photo Paper Glossy
or Semi-gloss in the rear sheet feeder, go to step 10.
sprx680_qg.book Page 14 Wednesday, June 6, 2007 8:40 AM