
User's Manual
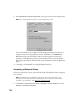
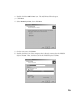


Table Of Contents
- Front Matter
- EPSON Stylus CX5400 User’s Guide
- EPSON Stylus CX5400 Parts
- Loading Paper
- Copying
- Printing With Windows
- Printing With Macintosh OS X
- Printing With Macintosh OS 8.6 to 9.x
- Selecting Your Paper Type
- Scanning
- Cleaning the Print Head
- Purchasing Ink Cartridges
- Replacing an Ink Cartridge
- Aligning the Print Head
- Cleaning the Stylus CX
- Transporting the Stylus CX
- Solving Problems
- Uninstalling Your Software
- Setting Up Network Printing
- Where To Get Help
- Specifications
- System Requirements
- Important Safety Instructions
- Legal Notices
81
5. In the Network dialog box, click OK.
Note: If a dialog box requesting the insertion of the Windows Me or 98 CD-ROM
appears, insert the CD into the CD-ROM drive and follow the on-screen
instructions.
If a dialog box requesting that you restart your computer appears, do so. Then,
open the Printers folder, and continue from step 7.
6. In the Control Panel, double-click the Printers icon.
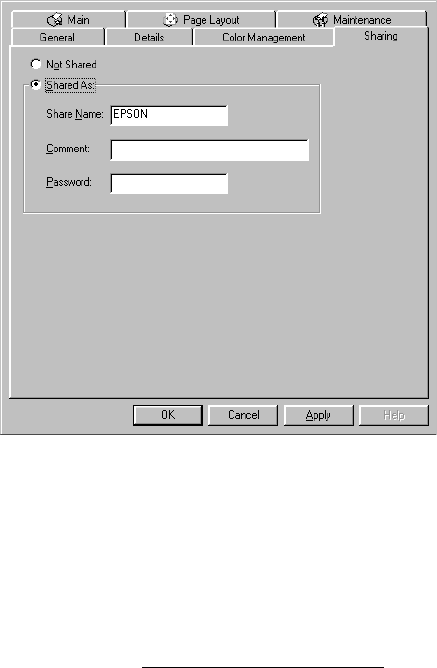
7. Right-click the icon for the EPSON Stylus CX5400, then click Share As.
8. Type a name for the shared printer, then click OK.
Accessing a Networked Printer
Follow the steps below to print to the EPSON Stylus CX5400 from other computers
on a network.
Note: The EPSON Stylus CX5400 must be set up as a shared resource on the
computer to which it is directly connected before you can access it from another
computer. For instructions, see Setting Up a Shared Printer
.
1. Click Start > Settings > Printers.