
User's Manual
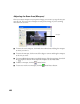
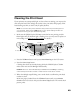
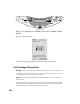
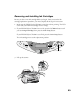
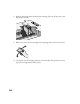
Table Of Contents
- Front Matter
- EPSON Stylus CX5400 User’s Guide
- EPSON Stylus CX5400 Parts
- Loading Paper
- Copying
- Printing With Windows
- Printing With Macintosh OS X
- Printing With Macintosh OS 8.6 to 9.x
- Selecting Your Paper Type
- Scanning
- Cleaning the Print Head
- Purchasing Ink Cartridges
- Replacing an Ink Cartridge
- Aligning the Print Head
- Cleaning the Stylus CX
- Transporting the Stylus CX
- Solving Problems
- Uninstalling Your Software
- Setting Up Network Printing
- Where To Get Help
- Specifications
- System Requirements
- Important Safety Instructions
- Legal Notices
53
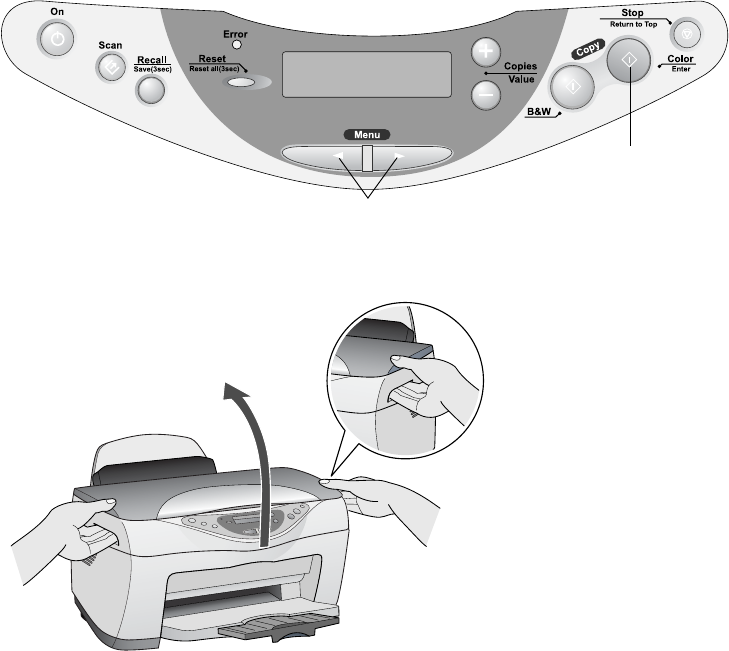
Removing and Installing Ink Cartridges
Be sure you have a new ink cartridge before you begin. Once you start the ink
cartridge replacement procedure, you must complete all the steps in one session.
1. Make sure the EPSON Stylus CX5400 is turned on and not printing. The LCD
screen tells you which ink cartridge is low or empty.
2. If your EPSON Stylus CX5400 is low on ink, press the left Menu button until
you see Change Cartridge, then press the Color Copy button.
If your EPSON Stylus CX5400 is out of ink, press the Color Copy button.
The ink cartridges move to the replacement position.
3. Lift up the scanner.
Color Copy button
Menu buttons