
User's Manual
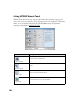
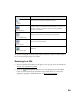
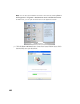
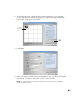
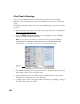
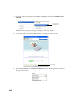
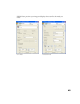
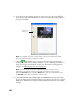
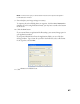
Table Of Contents
- Front Matter
- EPSON Stylus CX5400 User’s Guide
- EPSON Stylus CX5400 Parts
- Loading Paper
- Copying
- Printing With Windows
- Printing With Macintosh OS X
- Printing With Macintosh OS 8.6 to 9.x
- Selecting Your Paper Type
- Scanning
- Cleaning the Print Head
- Purchasing Ink Cartridges
- Replacing an Ink Cartridge
- Aligning the Print Head
- Cleaning the Stylus CX
- Transporting the Stylus CX
- Solving Problems
- Uninstalling Your Software
- Setting Up Network Printing
- Where To Get Help
- Specifications
- System Requirements
- Important Safety Instructions
- Legal Notices
46
6. If you don’t see an automatic preview of your scan to the right of the EPSON
Scan window, click the Preview button. After a moment, your image appears in
the Preview window.
Note: If you placed more than one document or photo on the document table,
you see multiple images in the preview window.
7. Click the Auto Detect icon to crop the scan to the edges of your image,
creating a movable outline called a “marquee.” If you’re scanning more than one
image, the marquee surrounds all of them. (For information on adjusting the
marquee, see Adjusting the Scan Area (Marquee).)
Note: If your Home Mode preview image has a blue box around it, you’re
previewing in Thumbnail mode and can’t create a marquee. Click the arrow
beside the Preview button and select Normal from the menu that appears. Click
the Preview button again to preview in normal mode.
8. Choose Document Type, Image Type, and Destination settings that match
the type of image you’re scanning and the way you want to print or view it. (Click
Help on the EPSON Scan screen for detailed information about all the available
settings.)
Click the Auto
Detect icon