
User's Manual
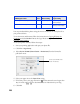
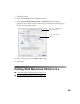


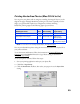

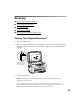
Table Of Contents
- Front Matter
- EPSON Stylus CX5400 User’s Guide
- EPSON Stylus CX5400 Parts
- Loading Paper
- Copying
- Printing With Windows
- Printing With Macintosh OS X
- Printing With Macintosh OS 8.6 to 9.x
- Selecting Your Paper Type
- Scanning
- Cleaning the Print Head
- Purchasing Ink Cartridges
- Replacing an Ink Cartridge
- Aligning the Print Head
- Cleaning the Stylus CX
- Transporting the Stylus CX
- Solving Problems
- Uninstalling Your Software
- Setting Up Network Printing
- Where To Get Help
- Specifications
- System Requirements
- Important Safety Instructions
- Legal Notices
30
Before you begin, make sure you selected your printer in the Chooser as described on
the Start Here sheet.
1. From the File menu, select Page Setup. Select the following settings:
2. Click OK to close the Page Setup window.
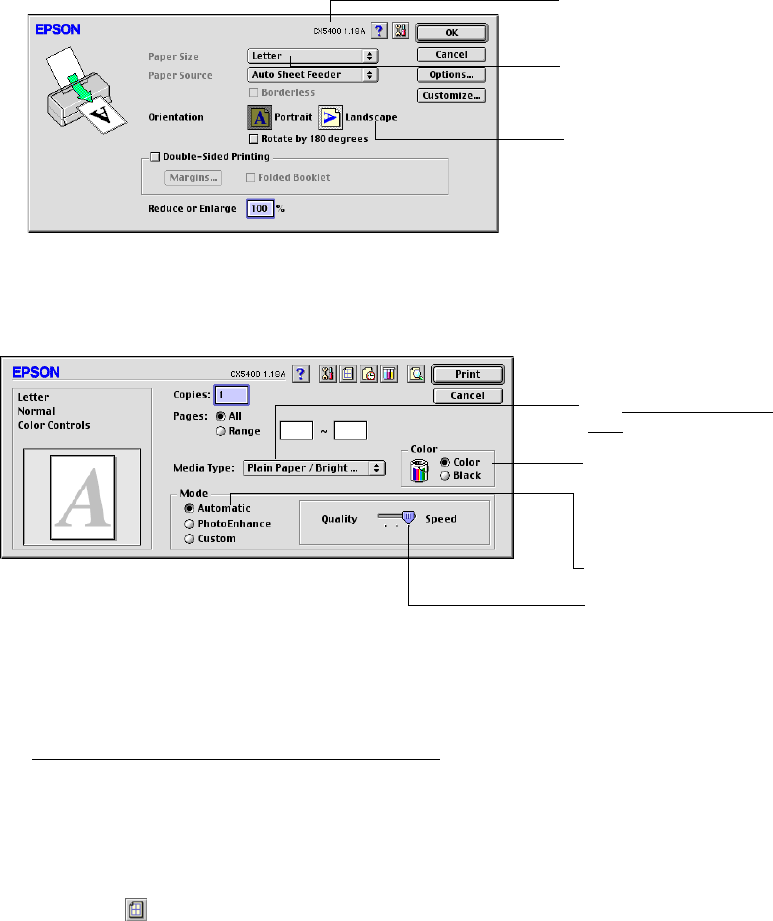
3. From the File menu, select Print. Select the following settings:
Note: The Quality setting on this screen gives you the best combination of quality
and print speed for most prints. For the highest print quality (Photo RPM) on
selected papers, click Custom and click the Advanced button. Then see
Customizing Print Settings (Mac OS 8.6 to 9.x)
for instructions on selecting Photo
RPM.
For more information about printer settings, click the ? button.
4. You can also do the following:
■ Click to reduce/enlarge your printed image, print multi-page layouts, or
add a watermark.
Make sure you see CX5400
Select your paper size
Select the orientation of
your document or image
Select Quality, Speed, or
an in-between setting
Select your paper type
(see Selecting Your Paper
Type)
Select Automatic mode
Select Color (for color
documents and black and
white photographs) or
Black (for black text
documents)