Art837QG.book Page 1 Wednesday, April 27, 2011 4:07 PM Artisan® 837 Quick Guide About Your Product . . . . . . . . . . . . . . . . . . . . . . . . . . . . . . . . . . . . . . . . . . . . . 2 Using Special Papers . . . . . . . . . . . . . . . . . . . . . . . . . . . . . . . . . . . . . . . . . . . . 5 Placing Originals for Copying, Scanning, or Faxing. . . . . . . . . . . . . . . . . . . . . . 7 Printing From a Memory Card . . . . . . . . . . . . . . . . . . . . . . . . . . . . . . . . . . . . .
Art837QG.book Page 2 Wednesday, April 27, 2011 4:07 PM About Your Product After you set up your Artisan® 837 (see the Start Here sheet), turn to this Quick Guide and your online User’s Guide for instructions on using your product. Features Where to find information Copy, scan, and fax from the easy-to-use touch panel. See this Quick Guide for the basics. See the online User’s Guide for details. Easy networking—Wi-Fi and Ethernet®. See the Start Here sheet and the online User’s Guide.
Art837QG.book Page 3 Wednesday, April 27, 2011 4:07 PM Using the Touch Panel The touch panel makes it easy to use all the features of your product. To save energy, the screen goes dark after several minutes of inactivity. Touch the screen to wake it up.
Art837QG.book Page 4 Wednesday, April 27, 2011 4:07 PM ■ Press x Menu to make special settings. The touch panel retains the settings from the last time it was used. If you want to start over, simply press Reset to clear settings for the mode you’re using. ■ The blue status light at the bottom of the touch panel flashes when the product is printing or performing routine maintenance. If it flashes rapidly, check the product for error messages.
Art837QG.book Page 5 Wednesday, April 27, 2011 4:07 PM Using Special Papers Epson offers a wide array of high quality papers, making it easy to maximize the impact of your documents, photos, presentations, and creative projects. You can purchase genuine Epson ink and paper at Epson Supplies Central® at www.epson.com/ink3 (U.S. sales) or www.epson.ca (Canadian sales). You can also purchase supplies from an Epson authorized reseller. To find the nearest one, call 800-GOEPSON (800-463-7766).
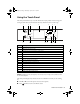
Art837QG.book Page 6 Wednesday, April 27, 2011 4:07 PM Part number Sheet count Letter (8.5 × 11 inches [216 × 279 mm]) S041062 100 Legal (8.5 × 14 inches [216 × 356 mm]) S041067 100 Epson Bright White Paper Letter (8.5 × 11 inches [216 × 279 mm]) S041586 500 Epson Photo Quality Self-adhesive Sheets A4 (8.3 × 11.7 inches [210 × 297 mm]) S041106 10 Epson Iron-on Cool Peel Transfer paper Letter (8.
Art837QG.book Page 7 Wednesday, April 27, 2011 4:07 PM Placing Originals for Copying, Scanning, or Faxing Before you copy, scan, or fax, place your documents on the scanner glass or in the Automatic Document Feeder (ADF). Place photos on the scanner glass only. Using the Scanner Glass You can place a photo or a document up to letter-size (or A4-size) on the scanner glass. 1. Open the document cover. 2. Place your original facedown on the scanner glass, with the top against the back left corner. 3.
Art837QG.book Page 8 Wednesday, April 27, 2011 4:07 PM 3. Insert the originals faceup, top edge first. The ADF icon appears on the screen. Note: If you’re using the 2-up Copy layout, make sure the originals are loaded as shown below. 4. Slide the edge guide against the originals, but not too tight.
Art837QG.book Page 9 Wednesday, April 27, 2011 4:07 PM Printing From a Memory Card Your product lets you print photos directly from your digital camera’s memory card; just insert it into the memory card slot and you’re ready to print. See the online User’s Guide for instructions on copying memory card files between your product and a computer, and printing photos directly from your camera. Inserting the Card 1. Make sure the product is turned on. 2. Insert your card into the correct slot as shown.
Art837QG.book Page 10 Wednesday, April 27, 2011 4:07 PM Printing Photos From the LCD Screen You can select individual photos for printing as you view them on the LCD screen. See the online User’s Guide for instructions on printing photo greeting cards, layout sheets, and proof sheets. 1. Load several sheets of Epson photo paper in the cassette. 2. Press the 3. Select View and Print Photos. 4. Touch off. 5. Press l or r to scroll through your photos and display one that you want to print. 6.
Art837QG.book Page 11 Wednesday, April 27, 2011 4:07 PM Printing From Your Computer This section describes the basic steps for printing from a Windows or Mac® computer. For detailed instructions on printing, see the online User’s Guide. The auto duplexer lets you print on both sides of the page automatically. You can use the auto duplexer with letter- or A4-size plain paper or Epson Bright White Paper. For detailed instructions on two-sided printing from Windows or Mac OS X, see the online User’s Guide.
Art837QG.book Page 12 Wednesday, April 27, 2011 4:07 PM 3. On the Main tab, select the basic print settings. Make sure you choose the correct paper Type setting for the paper you are using (see page 14 for details). Select the type of document you’re printing (choose Photo or Best Photo for pictures) Select your paper Type Select your paper Size Select your document or photo Orientation Note: For quick access to the most common settings, click the Shortcuts tab and select one of the presets.
Art837QG.book Page 13 Wednesday, April 27, 2011 4:07 PM Printing with Mac OS X Follow the steps below to print from Mac OS X 10.5 to 10.6. If you’re printing from Mac OS X 10.4, see your online User’s Guide for instructions. 1. Open a photo or document in an application. 2. Open the File menu and select Print. 3. Select your product as the Printer setting. Select your Epson product Click to expand, if necessary 4. Select basic copy and page settings.
Art837QG.book Page 14 Wednesday, April 27, 2011 4:07 PM 5. Choose Print Settings from the pop-up menu, and select your Media Type, Print Quality, and other print settings. 6. Choose any other printing options you may need from the pop-up menu. See the online User’s Guide for details. 7. Click Print. 8. To monitor your print job, click the icon in the Dock. Selecting the Correct Paper Type Select the correct Type (Windows) or Media Type (Mac OS X) setting in your printer software.
Art837QG.book Page 15 Wednesday, April 27, 2011 4:07 PM Faxing a Document Your product lets you send faxes by entering fax numbers or selecting entries from a speed dial list. Using the Automatic Document Feeder, you can fax up to 30 pages at a time. Note: You can also send and receive a fax from your computer using the Epson FAX Utility. For more information, see the online User’s Guide. Breakdown or repair of this product may cause loss of fax data and settings.
Art837QG.book Page 16 Wednesday, April 27, 2011 4:07 PM In Auto Answer mode, if the incoming call is a fax and you pick up the phone or the answering machine answers, the product automatically begins receiving the fax. If the other party is a caller, the phone can be used as normal or a message can be left on the answering machine. Note: Any phone or answering machine must be connected to the EXT. port for your product to detect an incoming fax call when the phone is picked up.
Art837QG.book Page 17 Wednesday, April 27, 2011 4:07 PM Entering Your Phone Number 1. Select Your Phone Number from the Header menu. 2. Use the keypad to enter your phone number, up to 20 digits (see below). You don’t need to use dashes. Use the # button to type the + symbol for an international number. 3. Press OK to return to the Header menu. Using the Keypad to Enter Numbers and Characters ■ To enter a fax number, use the numeric keypad.
Art837QG.book Page 18 Wednesday, April 27, 2011 4:07 PM Sending a Fax From the Touch Panel You can send a fax by manually entering a fax number, as described below. Note: To set up and use a speed dial list or send a fax from your computer using the Epson FAX Utility, see your online User’s Guide. 1. Place your original(s) for faxing (see page 7). 2. Press 3. Press , then use the numeric keypad to enter the fax number (up to 64 digits). Then press OK. 4. Select Color or B&W.
Art837QG.book Page 19 Wednesday, April 27, 2011 4:07 PM Receiving Faxes Before receiving faxes, make sure you load plain paper and select the correct settings for the paper you’ve loaded. 1. Press 2. Press l or r and select Fax Settings. 3. Select Receive Settings. 4. Select the Paper Size you want to use for printing faxes, then press OK. Home, if necessary, then press l or r to select Setup.
Art837QG.book Page 20 Wednesday, April 27, 2011 4:07 PM Scanning a Document or Photo You can use your product to scan original documents or photos and save them on your computer. The Scan function lets you scan quickly using preselected settings, or you can use the Epson Scan software to access more advanced features. For example, you can use Epson Scan to restore faded colors in old photos. Note: For detailed scanning instructions, see the online User’s Guide.
Art837QG.book Page 21 Wednesday, April 27, 2011 4:07 PM 5. If you’re scanning to a memory card, select your scan settings then press OK to begin scanning. If you’re scanning to your computer, select USB Connection if your product is connected by a USB cable, or select the name of your computer if your product is connected over a network. Once your image is scanned, you see its icon in Windows Explorer or Mac OS X Finder, or as an attachment in your email application.
Art837QG.book Page 22 Wednesday, April 27, 2011 4:07 PM Scanning with Mac OS X 10.6 You can scan original documents and photos and save them as files on your computer. 1. Open an image editing application such as Image Capture, select your product, if necessary, then press the Scan button. 2. If you would like to select scan settings, such as Color Restoration and file save settings, click Show Details. 3. Click the Scan button to begin scanning.
Art837QG.book Page 23 Wednesday, April 27, 2011 4:07 PM Maintaining Your Product Follow the instructions in this chapter for checking and cleaning the print head nozzles and replacing ink cartridges. To align the print head, if necessary, see your online User’s Guide. Caution: To keep your product looking like new, don’t place anything on top of the cover or use it as a writing surface. If you need to clean the cover, use only a soft, nonabrasive microfiber-type cloth.
Art837QG.book Page 24 Wednesday, April 27, 2011 4:07 PM Cleaning the Print Head If print quality has declined and the nozzle check indicates clogged nozzles, you can clean the print head. Print head cleaning uses ink, so clean it only if necessary. Note: You cannot clean the print head if an ink cartridge is expended, and may not be able to clean it when a cartridge is low. You must replace the cartridge first (see page 26). 1. Load letter- or A4-size plain paper in the main paper cassette. 2.
Art837QG.book Page 25 Wednesday, April 27, 2011 4:07 PM Checking Ink Levels You can check the ink levels anytime right on the LCD screen. To check the ink levels with your Windows or Mac OS X software, see the instructions in your online User’s Guide. Note: You cannot print or copy when an ink cartridge is expended even if the other cartridges are not expended. Replace any expended cartridges before printing or copying. 1. Press Home, if necessary, then press l or r and select 2. Select Ink Levels.
Art837QG.book Page 26 Wednesday, April 27, 2011 4:07 PM Use the following list when you order or purchase new ink cartridges (you can mix Standard- and High-capacity cartridges): Ink color Standard-capacity High-capacity Black — 98 Cyan 99 98 Magenta 99 98 Yellow 99 98 Light Cyan 99 98 Light Magenta 99 98 Note: We recommend that you use genuine Epson cartridges and do not refill them. The use of other products may affect your print quality and could result in printer damage.
Art837QG.book Page 27 Wednesday, April 27, 2011 4:07 PM 3. Open the scanner. 4. Squeeze the tab on the cartridge and lift it up. Dispose of it carefully. Do not take the used cartridge apart or try to refill it. Warning: If ink gets on your hands, wash them thoroughly with soap and water. If ink gets into your eyes, flush them immediately with water. Keep ink cartridges out of the reach of children and don’t drink the ink. 5. Remove the new cartridge from its package. 6.
Art837QG.book Page 28 Wednesday, April 27, 2011 4:07 PM 7. Insert the new cartridge into the holder and push it down until it clicks into place. 8. Once you replace all the cartridges that need replacing, close the scanner to begin charging the ink. This takes about 2 minutes. When you see a completion message on the display screen, ink charging is finished. Caution: Never turn off your product while ink is charging or you’ll waste ink.
Art837QG.book Page 29 Wednesday, April 27, 2011 4:07 PM Solving Problems Check the messages on the display screen to diagnose the cause of most problems. Press Home, if necessary, then press l or r and select Problem Solver. Press l or r to see all the help topics. You can also check the basic troubleshooting suggestions below, or your online User’s Guide. Problems and Solutions Check the solutions below if you’re having trouble using your Epson product.
Art837QG.book Page 30 Wednesday, April 27, 2011 4:07 PM The product cannot find or connect to the wireless router access point ■ Try connecting to the wireless router or access point with your computer or another device to confirm that it is working correctly. ■ Make sure that the product is within range of your router or access point. ■ If your wireless router or access point doesn’t broadcast its network name (SSID), manually enter your wireless network name.
Art837QG.book Page 31 Wednesday, April 27, 2011 4:07 PM WiFi light is on but you can’t print ■ Your router might not be assigning IP addresses automatically using DHCP. If it isn’t, you will need to set the product’s IP address manually. Make sure it is set correctly for your network. Contact your router manufacturer for assistance. ■ Make sure your firewall or security software is not set to block port 3629 (TCP/ UDP). Contact your firewall manufacturer for assistance.
Art837QG.book Page 32 Wednesday, April 27, 2011 4:07 PM ■ Make sure the type of paper you loaded matches the paper size and paper type settings on the touch panel when copying (see page 7), when receiving faxes (see page 19), or when printing with your printer software (see page 11). ■ Legal-size documents can be scanned, faxed, or copied using the Automatic Document Feeder. If your copies are cropped, make sure you’ve loaded legal-size paper in the paper cassette.
Art837QG.book Page 33 Wednesday, April 27, 2011 4:07 PM 2. Pull back on the tabs to remove the cover inside the product. Remove jammed paper, including any torn pieces. 3. Reattach the cover and close the scanner. 4. You may also need to check other locations for jammed paper, such as the auto duplexer (on the back of the printer), the paper cassette, and underneath the printer. See the online User’s Guide for more information.
Art837QG.book Page 34 Wednesday, April 27, 2011 4:07 PM Faxing Problems ■ Make sure the recipient’s fax machine is turned on and working. ■ Make sure the LINE port on the product is connected to a telephone wall jack. Verify that the telephone wall jack works by connecting a phone to it. ■ If you use a voicemail service, you should turn off Auto Answer. Otherwise, calls or faxes may be inadvertently received by your voicemail (see page 19 for details on manually receiving faxes).
Art837QG.book Page 35 Wednesday, April 27, 2011 4:07 PM Where to Get Help Internet Support Visit epson.com/support (U.S.) or epson.ca/support (Canada) for solutions to common problems. You can download drivers and documentation, get FAQs and troubleshooting advice, or e-mail Epson.
Art837QG.book Page 36 Wednesday, April 27, 2011 4:07 PM Notices Important Safety Instructions Before using your Epson product, read and follow these safety instructions: ■ Be sure to follow all warnings and instructions marked on the product. ■ Use only the type of power source indicated on the product label. ■ Use only the power cord that comes with the product. Use of another cord may cause fires or electric shock. Do not use the cord with any other equipment.
Art837QG.book Page 37 Wednesday, April 27, 2011 4:07 PM ■ Allow space behind the product for the cables, and space above the product so that you can fully raise the document cover. ■ Leave enough space in front of the product for the paper to be fully ejected. ■ Leave enough room around the product for sufficient ventilation. Make sure the product is at least 4 inches (10 cm) away from the wall. ■ Do not block or cover openings in the product case or insert objects through the slots.
Art837QG.book Page 38 Wednesday, April 27, 2011 4:07 PM ■ If the touch panel is damaged, contact Epson. If the liquid crystal solution gets on your hands, wash them thoroughly with soap and water. If the liquid crystal solution gets into your eyes, flush them immediately with water. If discomfort or vision problems remain after a thorough flushing, see a doctor immediately. Memory Card Safety Instructions ■ Use only compatible memory cards (see the User’s Guide for a detailed list).
Art837QG.book Page 39 Wednesday, April 27, 2011 4:07 PM ■ If you remove an ink cartridge for later use, protect the ink supply area from dirt and dust and store it in the same environment as the product. Note that there is a valve in the ink supply port, making covers or plugs unnecessary, but care is needed to prevent the ink from staining items that the cartridge touches. Do not touch the ink cartridge ink supply port or surrounding area. Store ink cartridges with their labels facing upward.
Art837QG.book Page 40 Wednesday, April 27, 2011 4:07 PM FCC Compliance Statement For United States Users This equipment complies with Part 68 of the FCC rules and the requirements adopted by the ACTA. On the back side is a label that contains, among other information, the FCC registration number and the ringer equivalence number (REN) for this equipment. You must, upon request, provide this information to your local telephone company.
Art837QG.book Page 41 Wednesday, April 27, 2011 4:07 PM entity, or other individual sending the message and the telephone number of the sending machine or such business, other entity, or individual. In order to program this information into your fax machine, follow the instructions in “Entering Fax Header Information” on page 16. According to the FCC’s electrical safety advisory, we recommend that you may install an AC surge arrestor in the AC outlet to which this equipment is connected.
Art837QG.book Page 42 Wednesday, April 27, 2011 4:07 PM L’indice d’équivalence de la sonnerie (IES) sert à indiquer le nombre maximal de terminaux qui peuvent être raccordés à une interface téléphonique. La terminaison d’une interface peut consister en une combinaison quelconque de dispositifs, à la seule condition que la somme d’indices d’équivalence de la sonnerie de tous les dispositifs n’excède pas 5. This Class B digital apparatus complies with Canadian ICES-003.
Art837QG.book Page 43 Wednesday, April 27, 2011 4:07 PM electrical current, software problems, interaction with non-Epson products, or service other than by an Epson Authorized Servicer. If a claimed defect cannot be identified or reproduced, you will be held responsible for the costs incurred.
Art837QG.book Page 44 Wednesday, April 27, 2011 4:07 PM In addition to software program rights owned by Seiko Epson Corporation, this product also includes open source software. Refer to OSS.pdf on your product software CD-ROM for a list of open source software and software license terms applied to this printer. Responsible Use of Copyrighted Materials Epson encourages each user to be responsible and respectful of the copyright laws when using any Epson product.