
User`s guide


e
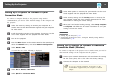
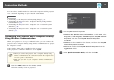
Press the Menu button on the remote control or the control panel,
select the Network menu, and select Network Configuration.
f
Select Wired LAN.
A screen like one of the following is displayed.
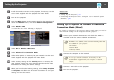
g
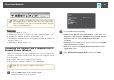
Select IP settings as necessary.
• DHCP is available: Turn on the DHCP setting.
• DHCP is not available: Turn off DHCP and enter the projector's IP
Address, Subnet Mask, and Gateway Address values as necessary.
h
When you have finished making settings, select Setup Complete
or Complete and follow the on-screen instructions to save your
settings and exit the menus.
Related Links
• "Setting Up the Projector" p.12
• "Connecting the Projector and a Computer over a Network System
(Wired)" p.21
Setting Up the Projector
16