EasyMP.net Operation Guide Contents Projector Functions 1 3 Displaying Motion Pictures and Video Images (EasyPlayer) .4 Selecting a File............................................................................ 4 Playing Motion Pictures.............................................................. 5 Playing Sounds............................................................................ 6 Displaying a Digital Camera Image (Still Image) ......................
EasyMP.net Operation Guide 2 Contents Appendices 44 Examples Network Connection Configurations ....................45 Local Area Network (LAN) Environments .............................. 45 If No Local Area Network (LAN) is Available ........................ 49 Installing Additional Software ...............................................50 Installation Procedure ............................................................... 50 Executing an Installed Program ............................................
S N P O E S EP O S EP EP SON EPS EP Projector Functions N O PS O S P E N ON N O S N O S P The EasyMP.net installed in the projector provides the functions required for presentation. The following explains how to use each of these simple but powerful software functions. Displaying Motion Pictures and Video Images (EasyPlayer) ........4 Operating a Network PC (Remote Desktop) ................................. 15 • Selecting a File.........................................................................
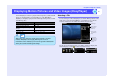
EasyMP.net Operation Guide Displaying Motion Pictures and Video Images (EasyPlayer) Use the EasyPlayer software to play back motion pictures, sounds and still images. To start EasyPlayer, click "EasyPlayer" on the Main Menu. EasyPlayer can display or play back the following motion pictures, sounds and still image files. File format/type Windows media (audio/video file) Windows audio/video file MPEG (Moving Picture Experts Group) MP3 Still image file File extension .asf, .asx, .wma, .wmv, .wmx .avi, .wav .
EasyMP.net Operation Guide 5 Displaying Motion Pictures and Video Images (EasyPlayer) Playlist By double-clicking a motion picture file, audio file or playlist file, the listing information is stored in the ASX file is displayed in the playlist. You can also open the playlist by clicking the "Playlist" tab. To play a playlist item, double-click its tab. If you skip item selection and click "Play", the first item in the playlist is played. When the playback ends, the next item is played.
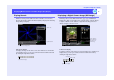
EasyMP.net Operation Guide 6 Displaying Motion Pictures and Video Images (EasyPlayer) Playing Sounds Displaying a Digital Camera Image (Still Image) Similar to motion pictures, MP3 and other sound files can be Paused, Previous, Rewound or Fast Forwarded. EasyPlayer displays the following image during sound play. Still image files such as JPEG-format files (.jpg, .jpeg) and Windows bitmap files (.bmp) can be displayed.
EasyMP.net Operation Guide Displaying Motion Pictures and Video Images (EasyPlayer) Adding a Comment to the Projected Still images A comment can be added by using the EasyMarker feature. Right-click the full screen image ( p.6) and select "EasyMarker". Start EasyMarker The image with comments can be saved. "Save Tool" p.11.
EasyMP.net Operation Guide Copying/Moving/Deleting/Executing a File (EasyFile) Use EasyFile to process a file. Click "EasyFile" on the Task Manager. Selecting a File To select a file from EasyFile, click "EasyMP.net", then "NetWork", then a folder to select the file location. The file list is switched from large icon display to small icon display and detailed display, each time is clicked (as shown below). Deleting a File To delete a file, select it and click "Delete".
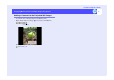
EasyMP.net Operation Guide Displaying a Web Page (EasyBrowser) To display a Web page, use EasyBrowser. Click "EasyBrowser" on the Main Menu. EasyBrowser is a tab browser that can display multiple Web pages. During a presentation, you can display other Web pages in other windows and you can switch and project the required page one after the other. Button Name Go Start EasyMarker Page End Fixed Menu Operation Click the toolbar buttons and tabs at the top of the screen to display Web pages.
EasyMP.net Operation Guide Displaying a Web Page (EasyBrowser) Adding a Comment to the Displayed Page Click "Start EasyMarker" on the toolbar to add a marking or a comment to the currently displayed page. You can save the page with the markings and comments in an image file and use it later. See "Adding Markings and Comments during a Presentation" p.
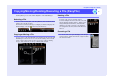
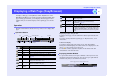
EasyMP.net Operation Guide Adding Markings and Comments during a Presentation Adding Markings and Comments to the Image (EasyMarker) When EasyBrowser or EasyPlayer projects an image on the screen, a marking or comment can be added to the image using EasyMarker. If you are using EasyMP.net during a presentation, you can add text markings in any colour, as well as arrows (by using the stamp feature). You can also highlight characters. Button Name Eraser Function Partially erases an entry.
EasyMP.net Operation Guide 12 Adding Markings and Comments during a Presentation Pen Tool Stamp tool A line can be drawn by dragging the pencil pointer. The line thickness and colour can be selected from the properties. The initial value for the pen colour can be changed by using EasyConfiguration ( p.21). One of 14 different symbols can be stamped in any position by clicking this tool.
EasyMP.net Operation Guide 13 Adding Markings and Comments during a Presentation Text Tool Eraser and Return to original state Tools When you drag from a left upper position to a right lower position, a character input frame appears into which you can enter text. The size and colour of the text can be selected from the properties. You can erase an image drawn by EasyMarker by dragging the eraser pointer. The width of the eraser can be selected from the properties.
EasyMP.net Operation Guide 14 Adding Markings and Comments during a Presentation Quit Tool When this tool is clicked, EasyMarker is closed and the previous screen appears. All of your entries are cleared. Your entries are only stored in a file when they are saved using the Save tool. (If you have forgotten to select Save, no warning message will be sent to the screen before EasyMarker closes.) Using the Projector as a Whiteboard (EasyBoard) EasyBoard allows you to use the projector as a whiteboard.
EasyMP.net Operation Guide Operating a Network PC (Remote Desktop) Remote Desktop allows you to operate a network PC from a remote EasyMP.net location running Windows XP Professional. You can log onto any network PC from a remote location and start projection using applications installed on the PC. 15 2 Click "Remote" and check the "Allow the user to connect to the PC from a remote location" box.
EasyMP.net Operation Guide 16 Operating a Network PC (Remote Desktop) 2 Click "New...". 3 When the connection setup dialogue box appears, set the following items (see the table below) and click "OK" Item Registration name PC User name Password Domain Item Screen color Explanation Enter a name that you can easily understand. Enter the name or an IP address of the remote PC (running Windows XP OS). Enter the user name who has been authorised by Windows XP OS. Enter the user password.
EasyMP.net Operation Guide Operating a Network PC (Remote Desktop) When the connection is established, the "Windows Logon" screen is projected and you are ready to operate the Windows XP desktop PC from EasyMP.net. To terminate the remote connection, move the mouse pointer ( ) to the top of the screen and click .
EasyMP.net Operation Guide Setting EasyMP.net Options (EasyConfiguration) Various network parameters and application defaults can be set using EasyConfiguration. Click the left-hand side menu to start the setup. EasyMP.net administrator Change the password. Check this box to define the current user as the EasyMP.net administrator. Then this user can set and change the EasyConfiguration data without any access restrictions. This box appears during user editing. Check this box to change the password.
EasyMP.net Operation Guide 19 Setting EasyMP.net Options (EasyConfiguration) Basic System Setup Setting the Date Naming the Projector "System Management" - "Date and Time" The projector's built-in clock can be set. Year Month Day Hours Minutes Time Zone Daylight Savings Time Network Setup (LAN Setup) Set the current calendar date and clock time. The hours can be set between 0 and 23 (24-hour system). Select an area.
EasyMP.net Operation Guide 20 Setting EasyMP.net Options (EasyConfiguration) Establishing the Wireless LAN Establishing the Mail Notification Function "Network" - "Wireless LAN" The following networking parameters must be set if a wireless LAN card is inserted into the PC card slot of the projector and used for networking. The wireless LAN cannot be set if the wireless LAN card is not mounted on the projector.
EasyMP.net Operation Guide 21 Setting EasyMP.net Options (EasyConfiguration) Functions Setup (Application Setup) Network Screen Setup "Application" - "NetworkScreen" Specify whether to use Network Screen or not. When an image from a PC is projected by Network Screen, the use of a projector keyword (optional) is set for PC connection. NetworkScreen Projector keyword Easy connection Select "Use" to use Network Screen. Select "Use" to use a projector keyword.
EasyMP.net Operation Guide 22 Setting EasyMP.net Options (EasyConfiguration) Buffer Set a network buffer size. This is the amount of information that is stored before a file or a stream file is played back by EasyPlayer. Specify the buffer size within the range of 1 to 60. Connection speed Select a network connection speed. Protocols Select a protocol for streaming file reception. We recommend you select all protocols here.
S N P O E S EP O S EP EP SON EPS EP Operations from the PC (via Network) N O PS O S P E The following explains how to project images of a network PC and how to change the system setup using the browser. The integrated management by EMP Monitor is also explained. Projecting PC Images (Network Screen).......................................24 • Deleting a Projector from the List............................................................................. 41 • EasyConnection Mode ........................
EasyMP.net Operation Guide Projecting PC Images (Network Screen) If the projector is connected to a PC via a network, images stored in the PC can be projected after a simple setup process. PC EMP NS Connection This projector PC System Configuration Example EasyConnection Mode Network Screen allows you to easily connect a PC to the projector in Easy Connection mode.
EasyMP.net Operation Guide 25 Projecting PC Images (Network Screen) If you click "Yes", the process continues but the display speed drops. If the PC uses a special screen size such as 1280 × 600 pixels, the resolution that matches the number of pixels in the horizontal direction is selected for projection. Blank areas in the vertical direction will be projected in black. Connecting to the Projector Start EMP NS Connection in Windows and connect the PC to the projector.
EasyMP.net Operation Guide 26 Projecting PC Images (Network Screen) TIP • • 2 If no IP address has been set on the projector, a message showing "No network adapter is found" may appear. The reason for this is that it takes time to determine an IP address if the connection to DHCP server has failed. Wait for approximately 60 seconds, and repeat the procedure from Step 1.
EasyMP.net Operation Guide 27 Projecting PC Images (Network Screen) 3 To use data ciphering, click "Extension". If you do not want to use ciphering, go to Step 5. 4 Check the "Use encrypted" box and click "OK". 5 Click "Connect". 6 Enter the projector keyword in the "Keyword" field and click "OK". The keyword is shown on the projector's standby screen. If the projector keyword is not set to "Use" in EasyConfiguration ( p.21), the keyword input screen is not displayed.
EasyMP.net Operation Guide 28 Projecting PC Images (Network Screen) 2 Click "Extension". 3 Check the "Use IP connect mode" box and click "OK". 5 The projector name with specified IP address is displayed in the "Registered Projectors" field. To search for another projector, repeat Step 5. 6 4 Click "IP connection". Enter the IP address of the projector you wish to connect to in the "IP address" box and click "Search". Select the projector you want to connect to, and click "Connect".
EasyMP.net Operation Guide 29 Projecting PC Images (Network Screen) TIP 3 Check "Use IP-specified connection" and "Use group list", and click "Advanced". 4 To add a group, click "New". The next time EMS NS Connection is started, the projector you have added to the "Registered Projectors" in the last operation is NOT displayed. If you wish to display the same projector in the next and subsequent operations, you must create a group and register the desired projector in it. ( p.
EasyMP.net Operation Guide 30 Projecting PC Images (Network Screen) 6 7 8 Enter an IP address of the projector you wish to register in "IP Address", and click "Add". The projector name with the specified IP address will be added to the registered projector list. If you with to register another projector, repeat Step 6. Up to 16 projectors can be registered in a single group. To delete a projector from its list, select the projector name and click "Delete". Click "OK".
EasyMP.net Operation Guide 31 Projecting PC Images (Network Screen) Exporting and Importing a Group 4 Select a group you wish to export from "Connection Group", and click "Export". 5 Select the destination folder, enter a file name (with an ".ini" extension), and click "Save". The group information will be exported as the specified file name. The information of a group can be saved (or exported) in a file, and it can be used on multiple PCs.
EasyMP.net Operation Guide 32 Projecting PC Images (Network Screen) Importing a Group TIP While you are creating or editing a group, you cannot import. PROCEDURE 1 Select "Start"- "Program" (or "All Programs")"EPSON Projector"-"EMP NS Connection" to start in this order EMP NS Connection. 2 Click "Extension". 3 Check "Use IP-specified connection" and "Use group list", and click "Advance". 4 Click "Import". 5 Select a file you wish to import, and click "Open".
EasyMP.net Operation Guide 33 Projecting PC Images (Network Screen) Using the Toolbar Button The projector is usually controlled by the remote control. However, if EMS NS Connection is used, the projector can be controlled by using the toolbar on the desktop of the connected PC. Name Display projector operation URL Pause TIP Use the remote control to set up and operate the projector. "Selecting the Projection Quality (Colour Mode Selection)", "Advanced Operations" in the User’s Guide .
EasyMP.net Operation Guide 34 Projecting PC Images (Network Screen) Button Name Switch PC sources Disconnect Operation status indicator Quit Minimize Function Switches the PC input source between the"DV1" [DV1", "Computer1] or "Computer2" ports on the projector rear panel or to the image of the connected PC. This function is the same as the "Computer/DVI" button on the projector control panel. p.38 "Turning the Power On and Projecting Images" in the User’s Guide.
EasyMP.net Operation Guide 35 Projecting PC Images (Network Screen) Option Name Function Color mode Selects one of 5 colour modes to suit the images you are projecting. The brightness level will also vary between the modes. The next mode is selected each time "Color Mode" is clicked according to the following sequence. Presentation → Theatre Dynamic ←sRGB ← Livingroom Selected Displays the name of the selected projector.
EasyMP.net Operation Guide Projector Setup from the PC (EasyWeb) A projector can be set up and operated using a Web browser through a network connection. 36 Before Operations Preparing the Projector Before using EasyWeb, check the following points. - Prepare both the PC and the projector for connection to the network. Volume is lowered. Operating Environment Supported browser software:Internet Explorer (Version 5.
EasyMP.net Operation Guide 37 Projector Setup from the PC (EasyWeb) 3 Enter the administrator's ID and password, and click "LOGON". EasyConfiguration EasyConfiguration allows you to operate the projector using a Web browser in a similar way as EasyConfiguration in EasyMP.net. For details of the settings that can be made, see the "Setting EasyMP.net Options (EasyConfiguration)" section ( p.18) and following sections. Click the menu you wish to set up. Click to log on. The setup items are displayed.
EasyMP.net Operation Guide 38 Projector Setup from the PC (EasyWeb) EasyMenu EasyRemote EasyMenu allows you to set up the system environment using a Web browser in the same way as the configuration menus of the projector. For a description of the setup elements. p.74 "Using the Configuration Menu Functions" in the User’s Guide. The EasyRemote option allows you to adjust the projector from the PC. For details of the settings that can be made. See the User’s Guide. Click the menu you wish to set up.
EasyMP.net Operation Guide Integrated Management for Projector Status Check and Control (EMP Monitor) EMP Monitor allows you to check the status of multiple projectors on the network, switch them on or off, and switch between video sources simultaneously. Up to 64 projectors can be monitored and controlled simultaneously. • Only the administrator can start a PC running Windows 2000/NT4.0/XP OS.
EasyMP.net Operation Guide 40 Integrated Management for Projector Status Check and Control (EMP Monitor) The "Register projector" dialogue box will appear. 2 Select the projector(s) you wish to register, and click "Add". Multiple projectors can be selected simultaneously. If the projector you want to register is not displayed in the list, use "Registration Using the Projector's IP Address (Manual Registration)" ( p.41). Register the projector with "Registration Using Auto Detection" ( p.
EasyMP.net Operation Guide Integrated Management for Projector Status Check and Control (EMP Monitor) Registration Using the Projector's IP Address (Manual Registration) 41 Editing the Manually Registered Projector List If the name or IP address of a manually registered projector has been changed, use the following procedure to edit the projector list. PROCEDURE 1 2 In the "Register projector" dialogue box, click "Manual Registration".
EasyMP.net Operation Guide 42 Integrated Management for Projector Status Check and Control (EMP Monitor) EMP Monitor Main Screen Button The projector status is displayed on the EMP Monitor main screen. To operate a projector, select it from the projector list and press the button of the function you want. Function Switches the video source to the "Computer1" port. Switches the video source to the "Computer2" port. Switches the video source to the "BNC" port.
EasyMP.net Operation Guide 43 Integrated Management for Projector Status Check and Control (EMP Monitor) Error information: If the projector has failed, its status is identified by the following icons. Lamp replacement notification High-speed cooling in progress Lap cover open error High internal temperature Internal problem Replace the lamp with a new one. p.115 "Replacing the Lamp" in "Replacing Consumables" in the User’s Guide. See the p.
S N P O E S EP O S EP EP SON EPS EP Appendices N O PS O S P E These appendices give several network configuration examples for guidance in relation to the environment setup and application hints. It also explains how to install the software on the EasyMP.net location and how to use it. Examples Network Connection Configurations ...........................45 • Local Area Network (LAN) Environments ................................................. 45 • Example 1: Connection Using Network Cables .........
EasyMP.net Operation Guide Examples Network Connection Configurations Local Area Network (LAN) Environments Notes • The network cable layout must first be checked if the projector is fixed to the ceiling or other fixed areas. Example 1: Connection Using Network Cables Connecting the Network Cable Connection DNS DHCP Connection Using Network Cables PROCEDURE Local Area Network Wireless LAN 1 Plug the network cable into the Network port on the projector. 2 Set up the network connection on EasyMP.
EasyMP.net Operation Guide 46 Examples Network Connection Configurations Example 2: Connection Using a Wireless LAN Access Point Connection using a wireless LAN Windows Client (Wireless Connection) • The status of the projector can be monitored from a PC connected to the connector. If multiple projectors have been installed, they can all be monitored from a network PC. You do not need to go to the classroom or the conference room where the projector is installed.
EasyMP.net Operation Guide 47 Examples Network Connection Configurations Example 3: Connection Using a Wireless LAN Access Point and Network Cables Wireless and Wired Network Cable Connection Windows Client (Wireless Connection) DNS DHCP Wireless LAN Access Point • A presenter can use files stored on the network PC for a presentation. They do not need to bring their computer to the presentation room. • The status of the projector can be monitored from a PC connected to the LAN.
EasyMP.net Operation Guide 48 Examples Network Connection Configurations Example 4: Connection using Wireless Adhoc Mode and Network Cables Wireless and Wired LAN Cable Connection DNS DHCP Windows Client (Wireless Connection) Adhoc Mode Wireless LAN Local Area Network This projector Wired LAN Windows Server Windows Client (Wired Connection) • A presenter can use files stored on a network PC for a presentation. They do not need to bring their computer to the room.
EasyMP.net Operation Guide 49 Examples Network Connection Configurations 2 Set up a wireless LAN connection with EasyMP.net. "Establishing a Network Connection (via Wireless LAN)" in the EasyMP.net Setup Guide. * Always check "Enable" for "Adhoc mode" during wireless LAN setup.
EasyMP.net Operation Guide Installing Additional Software Some software applications supported by Windows XP, including Microsoft PowerPoint, can be installed in the projector. You can install the following software by means of a pre-installed release program ("Software Extension"): • Application Installer • Adobe Acrobat Reader • Microsoft Office XP • Real One Player For detailed information about the application software that can be installed, see the EPSON Web Site.
EasyMP.net Operation Guide 51 Installing Additional Software 5 Restart the projector when the PowerPoint installation has finished. 6 To install Adobe Acrobat Reader, you must check both "Application Installer" and "Adobe Acrobat Reader" boxes during application selection in Step 2. The "Application Installation" function is required for the installation of certain applications. Executing an Installed Program PROCEDURE 1 Click "External Application Launcher" on the Task Manager.
EasyMP.net Operation Guide When You Receive a Projector Error E-mail The e-mail heading or subject will be "EPSON Projector". The following information is contained in the e-mail text. Line 1: The name of the projector which is not functioning properly. Line 2: The IP address of the projector which is not functioning properly. Subsequent lines: Information about the problem that has been encountered. A single problem is shown on a single line of the e-mail.
EasyMP.net Operation Guide 53 All rights reserved. No part of this publication may be reproduced, stored in a retrieval system, or transmitted in any form or by any means, electronic, mechanical, photocopying, recording, or otherwise, without the prior written permission of SEIKO EPSON CORPORATION. No patent liability is assumed with respect to the use of the information contained herein. Nor is any liability assumed for damages resulting from the use of the information contained herein.