
Operation Guide


Starting Easy Interactive Tools
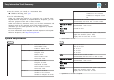
Make the following preparations before starting Easy Interactive Tools.
a
The projector's setting method and items varies depending on the
model being used. Also, models that do not support network
connection cannot be connected to over a network. For more details,
see the projector's User's Guide.
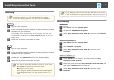
When connecting a computer to the projector with a USB cable
• Connect the USB cable to the computer's USB port and the projector's
USB-B port.
• Set the Extended settings from the projector's Configuration menu.
When connecting a computer to the projector over a network
• Make network settings so that the computer can connect to the
network.
• Connect a wireless LAN unit or a LAN cable so that the projector can
connect to the network.
• Set the Network settings from the projector's Configuration menu.
• Install EasyMP Network Projection or EasyMP Multi PC Projection
from the EPSON Projector Software CD-ROM supplied with the
projector.
• If you are connecting using EasyMP Network Projection, open the Set
options screen, select the General settings tab, and then select Use
Interactive Pen and Use Easy Interactive Tools.
• If you are connecting using EasyMP Multi PC Projection, open the Set
options screen, select the General settings tab, and then select Use Easy
Interactive Tools.
a
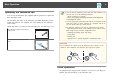
Turn on the projector and project images from the computer.
b
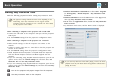
Start Easy Interactive Tools on the computer.
• Windows XP/Windows Vista/Windows 7: Select Start - Programs
(or All Programs) - EPSON Projector - Easy Interactive Tools
Ver.X.XX.
• Windows 8/Windows 8.1: On the Start screen or the App screen,
click (tap) Easy Interactive Tools Ver.X.XX.
• OS X: From the Applications folder, double-click Easy Interactive
Tools Ver.X.XX.
Easy Interactive Tools starts, and the Home screen is displayed.
a
If you start Easy Interactive Tools while playing a movie, the movie
playback screen may turn black. Restart the application software that is
playing the movie.
Basic Operation
7