
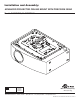
Installation Guide

4 of 11
Visit the Peerless Web Site at www.peerless-av.com For Technical Support Contact Peerless Mounts at 1-800-865-2112
ISSUED: 04-01-08 SHEET #: 055-9254-19 02-28-14
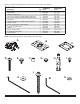
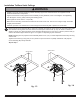
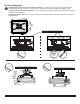
NOTE: Refer to accompanying instructions for ELPMBP01, ELPMBP02, ELPMBP03 or CMJ and ACC Series
Ceiling Mounts (sold separately) for installing these models to ceiling.
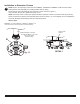
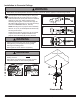
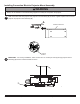
Screw projector mount assembly (A)ontoextensioncolumnasshowningure1.1.
Use 4 mm allen wrench (J) to tighten swivel stop screw.
NOTE: Swivelstopscrewisusedtojamagainstthreadsofextensioncolumnorushmounttubetopreventany
excess movement of projector mount assembly (A) as shown in detail 1. Do not overtighten screw; overtightening
screwwilldamagethreadsmakingitdifculttoseparateproducts.
Skip to step 2.
1
Installation to Extension Column
SWIVEL STOP
SCREW
DETAIL 1
A
g. 1.1
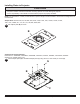
A
EXTENSION COLUMN
(UL Listed ELPMBC01 or UL Listed
EXT and ADJ Series)
(Sold Separately)
Not Shown: UL Listed ELPMBP01, ELPMBP02, ELPMBP03 or UL
Listed CMJ and ACC Series Ceiling Mounts (Sold Separately).