
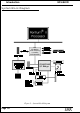
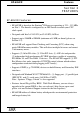
Specifications


Installation EP-68LXR
Page 3-2
Easy Installation Procedure
Easy Installation Procedure
The following must be completed before powering on your new system:
3-1. Configure DIP Switch and Jumper to match your hardware
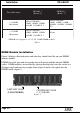
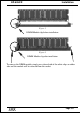
3-2. Install memory chips
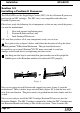
3-3. Install Pentium II Processor
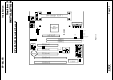
3-4. Device Connectors
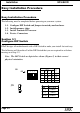
Section 3-1
Configure DIP Switch
EPoX designs all motherboards with a DIP Switch to make your install fast and easy.
The following will describe all of the DIP Switch that you are required to set before
moving on to step 3-2.
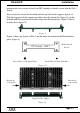
Note: The DIP Switch as depicted as shown (Figure 1) in their correct
physical orientation.
SW1
1234
CPU
ON ON 233
ON ON ON 266
ON ON 300
ON ON 333
1234
ON
S
W1
JP4
JP4 Bus Clock
1-2 68MHz
2-3 75MHz
OPEN 66MHz