
User guide
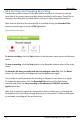


Recording
76
Lecture Recorder x2 User Guide
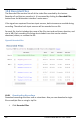
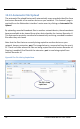
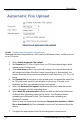
Figure 49 Configuring the Automatic File Upload Feature
10.10.1 Configuring Automatic File uploads
Recorded files can be uploaded to a CIFS server (a Windows share), an RSync server,
or an FTP server.
1. Select Enable Automatic File Upload.
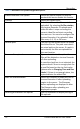
2. Set Protocol to FTP Client, RSync Client, or CIFS client depending on what
upload server is being used.
3. If the How often option is set to On file rotation, the Lecture Recorder x2
will upload each video file after it stops recording to it. Alternatively, the
Lecture Recorder x2 can be set to upload all video files every 1, 6, 12, or 24
hours.
4. Set Remote Path to the path on the upload server to upload the video files
to. This path must match an actual path on the server. If a path is not
provided, the files are uploaded to the root location.
5. Select the Remove after upload checkbox to delete all video files on the
Lecture Recorder x2 after uploading them.
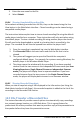
6. Select Mark file as downloaded to keep the files on the Lecture Recorder
x2 device after uploading copies to the server. The filenames before
uploading are displayed in blue. The filenames after uploading are
displayed in purple.
Note: In case you select both checkboxes (Remove after upload and Mark
file as downloaded) the files uploaded to server will be removed from the
device.
7. Configure the appropriate client for the designated upload server: