
User guide

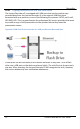

Recording
67
Lecture Recorder x2 User Guide
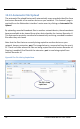
10.5 Starting and Stopping Recording
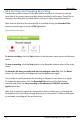
The recorder status is shown in the Web Admin interface. It is located on the left
hand side of the screen above the Web Admin interface’s main menu. The ability to
manage a recording with the Web Admin interface is done using these buttons.
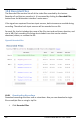
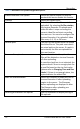
Note that the format of the recorded file is specified clicking the Recorded Files
button and selecting the required File Type value.
Figure 43 Recorder Status
To start a recording, click the Start button in the Recorder status section of the main
menu.
To stop a recording, click the Stop button in the Recorder status section of the main
menu.
To close the file being recorded and start recording to a new file, click the Reset
button. Or, alternatively click Stop and click the Start button again.
It is possible to specify whether the recording is stopped in case there is no signal.
To enable this parameter, click the Recorded Files button of the Web admin
interface and select the Stop recording in the absence of VGA/DVI and video
signals check box.
Note that in case both signals are streamed via DVI and video ports, recording will
be stopped only if streaming through both ports is interrupted. If either video signal
is continued, recording will be continued too.