
User guide


Getting Started
16
Lecture Recorder x2 User Guide
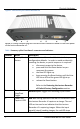
Regardless of the power source once connected, the Lecture Recorder x2 now
powers up. Its power and activity LEDs will now light up following their start up
sequence.
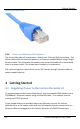
4.2 Confirm Input Signals are Received
Confirming that the input signals are being received by the Lecture Recorder x2 can
be done once the Lecture Recorder x2 has been powered on and the input sources
have been started.
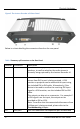
First, check that the Lecture Recorder x2’s red LED is blinking. A blinking LED
indicates that the Lecture Recorder x2 is capturing images. If the red LED does not
start flashing, check the input sources to ensure that they are transmitting a signal.
Additionally, check that all cables from the input sources to the Lecture Recorder x2
are connected correctly.
Depending on the input source, the Lecture Recorder x2’s output signal ports can be
used to confirm that data from specific input sources are being captured
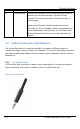
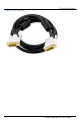
4.2.1 Checking the Signal from a DVI/VGA or HDMI Input source
The Lecture Recorder x2 has a DVI output port that is used to confirm that the signal
from any of the above sources is being captured. In order to perform this
verification ensure that there is an input source streaming to the Lecture Recorder
x2 using its DVI input port. If yes, then connect a monitor to the Lecture Recorder x2
using the DVI output port and the appropriate DVI cable. The monitor will then
display any data being captured by the Lecture Recorder x2 via its DVI input port.
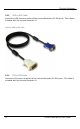
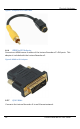
4.2.2 Checking the Signal from an S-Video or Composite Source
The Lecture Recorder x2 does not come equipped with a mechanism to confirm the
quality of the video input being received via its S-Video input video source.
However, you can trouble shoot by this source by connecting an S-Video or
composite receiver such as a TV or monitor to confirm that a high quality signal is
being generated by the video source prior to connecting the S-Video or composite
source to the Lecture Recorder x2.