
Specifications


Lecture Recorder x2 User Guide 7-7 Control with RS-232 / Serial Port
7-7
Control with RS-232 / Serial Port
The Lecture Recorder x2 presents an RS-232 / serial port control interface for integration with existing control
room and board room equipment. This section covers the following topics:
l Connect and Configure the RS-232 cable
l Control the Lecture Recorder x2 with RS-232
l RS-232 / SerialPort Command Examples
Connect and Configure the RS-232 cable
To connect your control equipment to the Lecture Recorder x2 you will need a standard RS-232 null-modem
cable and a USB to RS-232 serial adapter cable. Adapter cables are not included with the Lecture Recorder x2.
Only certain adapter chipsets are supported, Epiphan recommends this adapter cable.
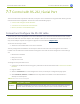
To connect the serial port cable:
1. Attach the null modem cable to the control interface.
The only configuration available for the serial port is flow control. Flow control changes the rate of data
transfer over the cable. Some communication settings are static and cannot be changed. The static settings
are:
l Baud rate set at 19200
l Parity set to none
l Stop bits set to one
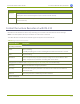
To configure serial port flow control:
1. Connect to the admin interface using your preferred connection mechanism. See Connect to the Admin
Interface.
2. Login as admin.
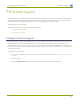
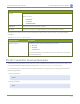
3. Select the Serial Port link in the Configuration menu; the serial port configuration page opens.
4. Select Hardware, Software, or None from the drop-down menu. Refer to the table below for a
description of the options.
Table 27 Serial Port Flow Control Options
Label Description / Options
Hardware A hardware handshake mechanism is used for flow control. This is also called RTS / CTS flow
control. Select this when your control terminal requires it (see control terminal manual).
169