
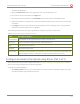
Specifications


Lecture Recorder x2 User Guide 5-3 File and Recording Transfer
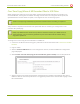
10. Repeat the steps to select a channel or recorder and copy or move files to the external drive until you
have copied all the files you wish. The green LED blinks to indicate copy/move operations.
11. Follow the steps to Safely Eject the USBDrive.
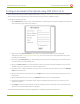
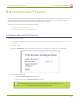
View Available USBStorage Space
When you insert a USBdrive in an available port of the Lecture Recorder x2, the total and free space are
calculated and displayed in the Web Interface.
To see the available USB storage space:
1. Connect to the admin interface using your preferred connection mechanism. See Connect to the Admin
Interface.
2. Login as admin.
3. Insert your USB drive in an available USB port on the device. (It is recommended you only use one USB
drive at a time.)
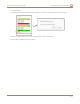
4. Scroll to the bottom of the Web Interface page; external USBstorage is displayed under internal storage
space.
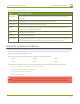
Safely Eject the USBDrive
When you have completed work with the USBdrive you can safely eject it by using the link at the bottom of the
Web Interface page.
To safely eject the USBdrive:
1. Connect to the admin interface using your preferred connection mechanism. See Connect to the Admin
Interface.
129