
Specifications

Lecture Recorder x2 User Guide 5-1 Create Recordings
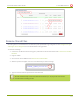
To disable the button and prevent accidental control of the recording:
1. Connect to the admin interface using your preferred connection mechanism. See Connect to the Admin
Interface.
2. Login as admin.
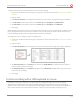
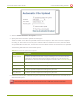
3. Select Button Actionsin the Configuration section; the button action configuration page is displayed.
4. Pick No Action from the drop-down lists for Down, Up, and LongPress for Right Button.
5. Pick No Action from the drop-down lists for Down, Up, and LongPress for Left Button.
6. Click Apply.
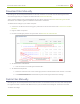
When configuring one button to start recording and the other button to stop recording, set the Down actions
for the appropriate buttons. Down action is chosen so the recording starts or stops as soon as the button is
pressed, avoiding any delay that may happen before the button is released.
To configure a start recording and stop recording button:
1. Connect to the admin interface using your preferred connection mechanism. See Connect to the Admin
Interface.
2. Login as admin.
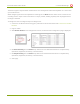
3. Select Button Actions in the Configuration section; the button action configuration page is displayed.
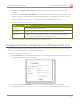
4. Pick Start Recording from the Down drop-down list for Right Button (or Left Button if you prefer to
have the left button start recording).
5. Pick Stop Recording from the Down drop-down list for Left Button (or Right Button if you set the left
button to start recording.)
6. Click Apply.
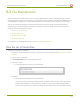
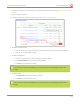
Control recording with a USB keyboard or mouse
In addition to using the red button or on-device buttons to toggle recording, you can set up custom
configurations that determine how an attached USB keyboard or mouse works to control recordings. By
default the left mouse button or the keyboard Enter key toggles recording in the same way as the default on-
device button behaves. Press and release the button or key once to start recording and again to stop.
113