Lecture Recorder x2 User Guide Version 3.12.
Terms and Conditions This document, the Epiphan web site, and the information contained therein, including but not limited to the text, videos and images as well as Epiphan System Inc.’s trademarks, trade names and logos are the property of Epiphan Systems Inc. and its affiliates and licensors, and are protected from unauthorized copying and dissemination by Canadian copyright law, United States copyright law, trademark law, international conventions and other intellectual property laws.
Thank You for Choosing Epiphan! At Epiphan Systems Inc. (“Epiphan”), product function and quality are our top priority. We make every effort to make sure that our products exceed your expectations. Product Feedback Your feedback is important! We regularly contact our customers to ensure our products meet your performance and reliability requirements. We strive to continually enhance our products to accommodate your needs.
What's New in Release 3.12.0 The following features were introduced or in some cases enhanced in release 3.12.0. For a description of new and changed features in previous releases refer to Releases and Features . New Streaming Features RTMP live streaming Your can now stream live video to a content delivery network using Real Time Messaging Protocol (RTMP).
Table Of Contents Thank You for Choosing Epiphan! Product Feedback Specifications Warranty Technical Support Welcome About this Guide ii ii ii ii ii 1 1 Lecture Recorder x2 Overview 3 What's in the Box? 4 Lecture Recorder x2 Overview Quick Start Step 1: Physical setup and power on Step 2: Confirm signals from input sources Step 3: Admin discovery and login Step 4: Setup the video source Step 5: Configure the channel Step 6: Record the stream What’s Next? 5 8 8 9 9 10 10 11 11 PART 1: Setup 13
Verify Date and Time Settings Change the Time Zone Configure Synchronized Time (NTP, PTP v1, and RDATE) Manually Configure the Date and Time 1-5 Restrict Viewers by IP Address Examples 32 34 34 36 37 38 PART 2: Sources 41 2-1 Identify sources 42 2-2 Configure a video source 43 2-3 Configure an audio source 45 Add an audio source to a channel Configure audio settings Set audio volume View audio signal strength 2-4 Fine-tune source configuration Force the video source to use a specific resolution
Retrieve stream URLs Configure streaming ports Stream content using HTTP or RTSP Stream content using a Content Distribution Network Stream content using multicast streaming Stream content using UPnP 4-2 Samples of stream settings Streaming video content Streaming slide content 88 89 90 90 97 101 105 105 106 PART 5: Record 107 5-1 Create Recordings 108 Recording basics Control recording via the web interface Configure the type and length of recording files Close the current recording file while reco
7-0 Mobile / Tablet Operator Interface Connect to the tablet interface Confidence monitoring using the tablet interface Verify disk space via the tablet interface Control recording via the tablet interface Switch to the full admin interface 7-1 Power Down and System Restart Restarting the Device via the Web Interface 7-2 Save and Restore Device Configuration Save device configuration Load a saved device configuration 7-3 Restoring Factory Configuration Restore Factory Configuration via the Web Interface
Broadcast Configuration Keys Channel Encoder Configuration Keys Channel Logo Configuration Keys Channel Layout Configuration Keys Audio Configuration Keys Stream Publishing Configuration Keys RTSP Announce Configuration Keys (Publish Type 2) RTP/UDP Configuration Keys (Publish Type 3) MPEG-TS Configuration Keys (Publish Types 4 and 5) RTMP Push Configuration Keys (Publish Type 6) Content Metadata Configuration Keys 180 181 182 183 184 184 185 186 186 186 187 7-10 Troubleshooting 188 PART 8: Releases and
Welcome Welcome, and thank you for buying Epiphan’s Lecture Recorder x2™. This guide will help you configure your new system. To get started, review the Lecture Recorder x2 Overview and What's in the Box? sections. Next, a Quick Start guide walks you through the basic steps to get a single video (and optional audio) source configured as a streamable, recordable output from the Lecture Recorder x2.
This is a tip. Throughout this guide there are situations where more than one solution will complete a task. In those cases the guide describes the simplest or most common variation first.
Lecture Recorder x2 Overview Lecture Recorder x2 is a small, silent, portable video recording and video streaming device that captures and streams audio, SD video sources like camera feeds, and HD video sources such as computer monitors, RADAR displays, or ultrasound machines. You can use it to capture, record, and stream one input or both inputs simultaneously as synchronized time-stamped streams or a picture-in-picture stream.
What's in the Box? The following is included in the Lecture Recorder x2 box: 1. The Lecture Recorder x2 device 2. One "Big Red Button" 3. One VGA to DVI-I cable 4. One HDMI to DVI-I adapter 5. One DVI-I to DVI-I cable 6. One composite to S-Video cable 7. One Ethernet cable 8. One Power over Ethernet injector Table 2 Description of Included Cables Image Name Description Big Red Button Starts and Stops recording when connected to the device.
Image Name Description Power over Ethernet injector Injects power over an Ethernet cable. Used to power the device when the network connection is not powered. Lecture Recorder x2 Overview The Lecture Recorder x2 is suitable for setting on a desktop, shelf or podium. It’s small size (202mm x 105mm x 35mm (7.95” x 4.13” x 1.38”) provides the user with the flexibility of having it within arm’s reach, yet remain inconspicuous.
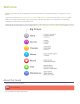
Label Name Description Status LEDs Three LEDs on the front panel indicate the following Lecture Recorder x2 status: Solid blue LED indicates device is starting up or indicates a recording error during a recording session. Solid green LED indicates the device is ready to capture images. Flashing green LED indicates files are copied to an external USB drive. Flashing blue LED indicates: l a video signal test is in progress; l system tuning, or l Lecture Recorder x2 is recording received images.
Table 4 Lecture Recorder x2 Back Panel Descriptions Label Name Description Audio Out Connect to audio equipment, such as headphones or speakers, to confirm the audio stream is captured. DVI Out Connect to video equipment, such as a monitor or projector to confirm the video stream is captured. Connect one of the following sources: DVI output, use the DVI to DVI cable (included) VGA output, use the VGA to DVI cable (included) Note: This connection can convert a VGA input signal to DVI output signal.
Quick Start This section helps you get up and running quickly with your Lecture Recorder x2: l Step 1: Physical setup and power on l Step 2: Confirm signals from input sources l Step 3: Admin discovery and login l Step 4: Setup the video source l Step 5: Configure the channel l Step 6: Record the stream Before you get started, make sure you have: l an HD source (i.e.
4. Wait for the system to complete the power up sequence. The green power LED is illuminated when boot up is complete. Step 2: Confirm signals from input sources Once the Lecture Recorder x2 is powered up, you can confirm that signals from input sources are received by the device. 1. To ensure an input source is properly connected to the DVI input port, connect a monitor to the DVI output port on the Lecture Recorder x2. 2. View the monitor to confirm a signal is sent to the DVI input port. 3.
You are able to access the system's web interface on the local network by specifying its serial number in a web browser on your admin computer. 1. Find the system’s serial number. It is printed on a sticker on the back of the device. 2. Type the following string into the address bar of your web browser on your admin computer and press Enter. ( is the serial number of your Lecture Recorder x2): http://.local/admin For example: http://3D24A1.local/admin 3.
1. From the web interface, click Stream Setup. The Steam Setup page opens displaying configuration settings for DVI and S-Video channels. 2. No need to change anything right now. Review some of the default settings. The four most useful settings to know about are codec, frame size, frame rate and bitrate. a. The codec is set to H.264 by default. b. The frame size should reflect the resolution provided by your source.
l File and Recording Transfer l User Administration When you have completed system tuning, make sure to back up the device configuration using the procedure described in: l Save and Restore Device Configuration Refer to the table of contents for a complete list of the topics covered.
Lecture Recorder x2 User Guide PART 1: Setup PART 1: Setup If you followed through the quick start guide, you already have a basic configuration and possibly a recording of an input. Before you tweak the channel this part of the manual helps you to get your Lecture Recorder x2 properly configured for your network.
Lecture Recorder x2 User Guide 1-1 Connect to the Admin Interface 1-1 Connect to the Admin Interface The Lecture Recorder x2 is managed from a web interface. If you know the IP address of the device you may type it into the address bar of your web browser. http:///admin The first time you access the web interface you may not know the IP address of the device. The Lecture Recorder x2 supports a number of ways to determine the IP address.
Lecture Recorder x2 User Guide 1-1 Connect to the Admin Interface System Action Needed Mac OS X The Bonjour software used for service discovery is built into the Mac OS. No special actions are needed. Linux The Avahi implementation used for DNS-based discovery is shipped with most Linux distributions. If necessary, check with your administrator to ensure you have the Avahi package installed. To access the Lecture Recorder x2 web interface via DNS service discovery: 1.
Lecture Recorder x2 User Guide 1-1 Connect to the Admin Interface Connect via the Epiphan Discovery Utility Epiphan provides a utility for discovering Epiphan devices on your network. The Epiphan network discovery utility is a 32-bit Windows executable that works on most 32-bit and 64-bit Windows operating systems. Download and install the utility via the download link on this web page: http://www.epiphan.com/products/broadcasting/resources.
Lecture Recorder x2 User Guide 1-1 Connect to the Admin Interface Connect via Persistent Static IP Address This section discusses how to directly connect to the Lecture Recorder x2 using the factory default persistent network settings. Use this method if your network does not have a DHCP server or if you prefer to connect directly to the device for initial configuration. The Lecture Recorder x2 is pre-configured with the following static address defaults: l IP Address: 192.168.255.250 l Netmask: 255.
Lecture Recorder x2 User Guide 1-1 Connect to the Admin Interface 7. Select the radio button to use a static address and configure the device with a static IP address and network settings relevant to the network being used. For specific details about the settings presented, see Configure Network Settings. 8. Restore the previously saved network configurations on the workstation.
Lecture Recorder x2 User Guide 1-2 User Administration 1-2 User Administration The Lecture Recorder x2 has three configured users: l admin l operator l viewer By default, none of these users have passwords. For security purposes you should add passwords to the admin and operator accounts.
Lecture Recorder x2 User Guide 1-2 User Administration Current User When logged in to the web interface, the current username is displayed at the top right corner of the screen.
Lecture Recorder x2 User Guide Action or Menu Option 1-2 User Administration viewer operator admin Configure Network Address ü Configure USB Tethering ü Perform Network Diagnostics ü ü Configure Date and Time preferences ü Set or Change User Passwords ü Configure Serial Port Flow Control ü Upload Branding Images ü Upload Branding Templates ü Select Branding Template ü Enable Remote Support ü Backup Device Configuration ü Restore Device Configuration ü Restore Factory Configura
Lecture Recorder x2 User Guide 1-2 User Administration Passwords are case sensitive and can use all alpha-numeric keys in the ASCII range. Your password can be up to 255 characters long, but should not include any spaces. Setting a user’s password causes the user to be logged out. Be ready to log back in with the new admin password or have operators and viewers log in with the appropriate new password. Viewers may need to refresh their browser window or press play in their media player.
Lecture Recorder x2 User Guide 1-2 User Administration Clearing a user’s password will cause that user to be logged out. Be ready to log back in with the new admin password. If viewers are watching the broadcast when the viewer password is cleared they will be logged out. Viewers may need to refresh their browser window or press play in their media player to trigger the login prompt. To clear a user’s password: 1. Connect to the admin interface using your preferred connection mechanism.
Lecture Recorder x2 User Guide 1-2 User Administration Sometimes you need to change from operator to admin, or vice versa. To change the logged-in user: 1. Exit your browser completely, or open a different browser (i.e. Internet Explorer, Chrome, and Safari are different browsers). 2. Connect to the admin interface using your preferred connection mechanism. See Connect to the Admin Interface. 3. You are prompted for a username and password.
Lecture Recorder x2 User Guide 1-3 Configure Network Settings 1-3 Configure Network Settings By default the Lecture Recorder x2 uses DHCP to obtain an IP Address via an Ethernet-based network.
Lecture Recorder x2 User Guide 1-3 Configure Network Settings Label Description/Options Current IP Address Reflects the current internet protocol address (IP address) of the system. This value is either obtained from the DHCP server (if using DHCP) or is the configured static IP address. The Lecture Recorder x2 supports IPv4 addresses. It does not support IPv6 addresses. Configure a Static IP Address Your network administrator may require you to use a static IP address for your VGADVI Broadcaster Pro.
Lecture Recorder x2 User Guide 1-3 Configure Network Settings The default gateway cannot be left blank. If no default gateway is specified, unexpected behavior occurs. 7. Enter the DNS Server address. If you do not have a DNS server, enter the new static IP address of the device. The DNS Server address cannot be left blank. If no DNS Server is specified, unexpected behavior occurs. 8. Change the MTU Size value only if needed. See the table below for information on maximum transmission unit (MTU) values.
Lecture Recorder x2 User Guide 1-3 Configure Network Settings Label Description/Options Default Gateway The network node that serves as an access point to the rest of the network. This value cannot be blank. Specify the system’s IP address if you don’t have a default gateway on your network. DNS Server The domain name system server (DNS server) translates human-readable hostnames into corresponding IP addresses. Specify the system’s IP address if you don’t have a DNS server on your network.
Lecture Recorder x2 User Guide 1-3 Configure Network Settings 7. Select the Maintenance link under the Configuration menu; the maintenance page appears. 8. Click the Reboot Now button near the bottom of the page. 9. Wait for the system to reboot. 10. Connect to the admin interface using your preferred connection mechanism. See Connect to the Admin Interface. 11. Log as admin and reload the Networking page to verify all changes were applied.
Lecture Recorder x2 User Guide 1-3 Configure Network Settings 4. Login as admin. 5. Select the Network link in the Configuration menu; the network configuration page opens. 6. Click the dropdown box next to Use phone/tablet connection in the USB phone/tablet section; the following choices appear: Table 11 Mobile Tethering Options Label Description/Options Disabled Specifies that no USB tethering is permitted.
Lecture Recorder x2 User Guide 1-3 Configure Network Settings 4. Click ping or traceroute; an animation appears to the left of the address to indicate processing is underway. 5. Upon completion of the command, read the results from the console-like display is shown below the Network Diagnostics setting.
Lecture Recorder x2 User Guide 1-4 Configure Date and Time 1-4 Configure Date and Time The Lecture Recorder x2 uses the current date and time in naming recorded files and when synchronizing and timestamping inputs from multiple sources (i.e. when synchronizing an audio and a video source). The admin interface lets you specify date and time settings to ensure they are correctly configured for your time zone and your network.
Lecture Recorder x2 User Guide 1-4 Configure Date and Time The date and time configuration page also indicates whether the device is currently using synchronized or manually set time, and whether or not a local network time protocol (ntp) server is running. The following table describes the date and time configuration fields. Table 12 Date and Time Options Label Description/Options Time Zone The currently selected time zone.
Lecture Recorder x2 User Guide 1-4 Configure Date and Time Label Description/Options Date The current date. (This is the current date even if the radio button Set time manually is not selected.) Time The current time. (This is the current time even if the radio button Set time manually is not selected.) Change the Time Zone By default the device has the Canada/Eastern time zone set.
Lecture Recorder x2 User Guide 1-4 Configure Date and Time Table 13 Synchronized Time Options Label Description/Options NTP Network Time Protocol (NTP) is used for clock synchronization over the internet. There are many publicly available NTP servers you can use, or your company may have its own NTP server. For more information about NTP and to find NTP servers, refer to http://support.ntp.org/bin/view/Servers/WebHome. RDATE RDATE is a tool for querying the current time from the network.
Lecture Recorder x2 User Guide 1-4 Configure Date and Time Manually Configure the Date and Time By default the Lecture Recorder x2 uses NTP for time synchronization. If your system does not have access to a time synchronization server, or if you do not wish to use one, you can choose to manually set the date and time. To manually set the date and time: 1. Connect to the admin interface using your preferred connection mechanism. See Connect to the Admin Interface. 2. Login as admin. 3.
Lecture Recorder x2 User Guide 1-5 Restrict Viewers by IP Address 1-5 Restrict Viewers by IP Address The Lecture Recorder x2 permits you to restrict which computers can access broadcasts by building a list of allowed and/or denied IP addresses. IP address restriction is valid for the viewer only and does not affect the web interface or the mobile configuration interface.
Lecture Recorder x2 User Guide 1-5 Restrict Viewers by IP Address Table 14 IP Based Restriction Fields Label Description/Options Allow IP's Enter individual IP Addresses or IP Address ranges, separated by commas. To specify a range, use a hyphen (-). Optional spaces improve readability. Users connecting from addresses in this list are permitted to view broadcasts from the device, provided their IP address is not in the Deny IP’s list.
Lecture Recorder x2 User Guide 1-5 Restrict Viewers by IP Address Allow: 192.168.1.200-192.168.1.250 Note that we could have specified two of the IP addresses in the previous example as a range. Allow List with a Range of IP Addresses and One or More Specific IP Addresses Putting the first two examples together, we want to permit access to IP addresses in the range of boardroom computers (192.168.1.200-192.168.1.
Lecture Recorder x2 User Guide 1-5 Restrict Viewers by IP Address Allow: 192.168.1.200-192.168.1.250, 192.168.1.50-192.168.1.51, 192.168.1.75 Deny: 192.168.1.211 Both lists can have multiple ranges and multiple distinct IP addresses, provided they are separated by commas.
Lecture Recorder x2 User Guide PART 2: Sources PART 2: Sources Now that you know how to connect to the admin interface, you are ready to configure your input sources. The following sections provide an overview of the types of sources you can connect to your Lecture Recorder x2 and how to configure each source.
Lecture Recorder x2 User Guide 2-1 Identify sources 2-1 Identify sources A source can be an image, video, or audio from a camera, a computer screen or any device that provides a VGA, DVI, HDMI, S-Video and audio signal output.
Lecture Recorder x2 User Guide 2-2 Configure a video source 2-2 Configure a video source To configure a source: The following adjustments cannot be made for S-Video sources. 1. Connect to the admin interface using your preferred connection mechanism. See Connect to the Admin Interface. 2. Login as admin. 3. Ensure a source is connected to the input port, see Table Configure a video source. 4. From the web interface, click Frame Grabber from the Configuration menu; the Frame Grabber Adjustments page opens.
Lecture Recorder x2 User Guide 2-2 Configure a video source Value Description PLL adjustment Changing the value adjusts the horizontal resolution of the image. Adjust the value using small increments until the image is sharper. The value ranges from 0999 to 999. Offset The Offset and Gain parameters function as contrast control for an image. The Offset controls the darker parts of the image and the gain controls the bright parts of the image. Adjust both values to optimize image quality.
Lecture Recorder x2 User Guide 2-3 Configure an audio source 2-3 Configure an audio source The Lecture Recorder x2 web interface automatically discovers all input sources and displays them in the Stream Setup section of the web interface. Audio input devices such as a microphone and portable music players can send audio signals to the Lecture Recorder x2 using the audio input port. All available video formats support audio except Motion JPEG.
Lecture Recorder x2 User Guide 2-3 Configure an audio source 3. From the web interface, scroll to the channel section and click the channel to which you want to configure audio settings; the menu expands. 4. Click Stream Setup; the Stream setup configuration page opens. 5. Scroll to Audio settings. 6. Check Enable audio check box. 7. If the default audio format (PCM 22KHz) is not desired, click the Audio format drop-down menu to elect an audio codec.
Lecture Recorder x2 User Guide 2-3 Configure an audio source 4. From the web interface, scroll to the Configuration section. 5. Click Audio; the following window opens. 6. Select the Input source from the drop-down menu. Choose Line (default setting), to capture system audio, or choose Mic to capture audio from a microphone connected to the audio input port. 7. Click on the Input Amplifier volume drop-down menu. A list of percentages is displayed.
Lecture Recorder x2 User Guide 2-3 Configure an audio source 5. Scroll to the Input section. The Audio meter is displayed. 6. View the strength of the audio signal. The following example shows an audio input with a strong signal.
Lecture Recorder x2 User Guide 2-4 Fine-tune source configuration 2-4 Fine-tune source configuration In addition to fine tuning channel settings such as frame rate, resolution and bit rate to ensure optimal use of resources while streaming a quality video, there may be circumstance when you must fine tune the video input source. Changing how source images are displayed may cause undesired results, for example experimenting with the PLL setting may result in the image not being displayed properly.
Lecture Recorder x2 User Guide 2-4 Fine-tune source configuration 7. Click Apply after each change to confirm the results. 8. To move the video up or down, scroll to Vertical shift . 9. Enter incremental values to shift the video image down (use a negative value) or up (use a positive value). 10. Click Apply.View the output by clicking on the Snapshot link in the Info window. You may need to make further adjustments to move the video up or down.
Lecture Recorder x2 User Guide 2-4 Fine-tune source configuration 8. Click Apply. View the output by clicking on the Snapshot link in the Info window. You may need to make further adjustments to fine tune the brightness and contrast. Video looks squished The image is squeezed horizontally on the screen. This distortion occurs when there's a mismatch between the aspect ratio the Lecture Recorder x2 detects and the aspect ratio that is sent from the source signal.
Lecture Recorder x2 User Guide 2-4 Fine-tune source configuration Remove the combing effect on images When frames are interlaced, artifacts from one frame may appear on the next frame. This occurs when a fast motion video is interlaced. Since each frame is captured from a different point in time, the action captured in one frame is carried over to the next frame. The result is a blurred image and horizontal lines running across the video. To convert an interlaced source signal to a non-interlaced signal.
Lecture Recorder x2 User Guide 2-4 Fine-tune source configuration 3. To download a new EDID file, go to Epiphan Downloads. The downloads page opens. 4. Click EDID; a page displaying a list of EDIDs opens. 5. Click on an EDID from the list. The file is saved to your downloads folder on your C: drive. 6. From the web interface, click Frame Grabber from the Configuration menu; the Frame Grabber Adjustments page opens. 7. Scroll to EDID upload. 8. Click Choose File. A browser page opens. 9.
Lecture Recorder x2 User Guide PART 3: Channels PART 3: Channels Channels organize and display content captured from DVI, VGA, HDMI, audio and camera input sources. A channel can be set up to display the content from one input source, or may capture, stream and record content from two input sources. You can identify your channel by adding a corporate logo, company information, corporate color and time stamps.
Lecture Recorder x2 User Guide 3-1 Configure channels 3-1 Configure channels Channels make your sources available for viewing and recording. You choose how you want to configure the sources to make a channel.
Lecture Recorder x2 User Guide 3-1 Configure channels 6. Scroll to the DVI Channel section. 7. Check the Enable DVI channel checkbox. 8. If you're not sure what Codec to pick, keep the default, H.264. For help selecting a codec, refer to Finetune channel configuration 9. Keep the default video encoding preset and video encoding profile for help selecting these values, refer to Fine-tune channel configuration 10. Perform one of the following steps: a.
Lecture Recorder x2 User Guide 3-1 Configure channels If you choose to keep the aspect ratio of the source and your selected output frame size aspect ratio is wider than the source aspect ratio, bars will appear on the sides of the video. If the frame size aspect ratio is taller than the source, bars will appear at the top and bottom of the output. See Control the matte (black bars) in the video output. 13.
Lecture Recorder x2 User Guide 3-1 Configure channels 5. If you're not sure which codec to pick, keep the default, H.264. For help selecting a codec, refer to Finetune channel configuration 6. Keep the default video encoding preset and profile, or for help selecting these values, refer to Fine-tune channel configuration 7. Scroll to the Video Channel section. 8. Select the Enable video channel check box, if not already selected. 9. Perform one of the follow: a.
Lecture Recorder x2 User Guide 3-1 Configure channels b. Change the frame size, follow the steps below. 10. Set the Frame size to reflect the same dimensions as your sharing destination. Default values cover common sharing destinations such as websites or choose one of the following. a. Type a frame size in the field; or b. Select an option from the sizes shown, the dimensions will appear in the frame size field. 11.
Lecture Recorder x2 User Guide 3-1 Configure channels Configure picture in picture or picture with picture layout When your Lecture Recorder x2 has two attached video sources, you can create a layout for the recording/broadcast and specify how each video is positioned on the screen. You can choose one of the following layouts: l l l A single stream that combines both video and DVI channels into a traditional picture in picture layout.
Lecture Recorder x2 User Guide 3-1 Configure channels 10. Click the Video signal type drop-down menu to specify if the video signal from the input source is composite or S-video. 11. To choose a background color or to add a brand to your streaming video, see Customize your channel. 12. To set the frame size of the streaming video, see Upscale or downscale your video image 13. To add a timestamp to your streaming video, see Add a time stamp to your channel. 14. Click Apply.
Lecture Recorder x2 User Guide 3-1 Configure channels Independent streams are supported when the codec value is H.264 and the Video encoding profile value is Main or High. Otherwise the option is greyed out. 9. Click the Video signal type drop-down menu to specify if the video signal from the input source is composite or S-video. 10. To choose a background color or to add a brand, go to Customize your channel. 11.
Lecture Recorder x2 User Guide 3-2 Fine-tune channel configuration 3-2 Fine-tune channel configuration In addition to adjusting typical features such as frame rate, resolution and bit rate to reduce bandwidth and system resource usage, choose the following settings to maximize your stream quality, while minimizing your processing requirements and bandwidth: l Choose a codec to maximize your stream quality l Codec and file format compatibility l Adjust video quality l Upscale or downscale your video
Lecture Recorder x2 User Guide 3-2 Fine-tune channel configuration 2. Login as admin. 3. From the web interface, click the Stream Setup menu option; the Stream setup configuration page opens. 4. Click the Codec drop-down menu to change the size and speed of the compression and decompression and the quality of the image. Choose one of the following options from the Codec drop-down menu. Value Description H.264 H. 264 is the default value and provides high quality video while using low bandwidth.
Lecture Recorder x2 User Guide 3-2 Fine-tune channel configuration Value Description G.711 8KHz (a-Law) Used primarily in North America for streaming and recording voice. This codec uses only 64kbps of bandwidth. G.711 8KHz (µ-Law) Used in counties outside North America. Codec and file format compatibility The following table displays the compatibility between the video/audio codecs and formats supported for streaming. Video Codec selected Audio Codec selected H.264 No audio codec ü ü ü H.
Lecture Recorder x2 User Guide 3-2 Fine-tune channel configuration Video Codec selected Audio Codec selected AVI MOV H.264 MP3 ü ü ü H.264 AAC ü ü ü MPEG-4 No audio codec ü ü MPEG-4 LPCM ü ü MPEG-4 G.711 ü ü MPEG-4 MP3 ü ü MPEG-4 AAC ü ü MJPEG No audio codec MPEG-TS Adjust video quality After sources are connected and channels are created, adjustments can be made to address the different bandwidth and devices used by the sharing destinations.
Lecture Recorder x2 User Guide 3-2 Fine-tune channel configuration 5. Click Video encoding profile to limit or include video formats that are supported. Choose one of the following: Value Description Baseline Choose this option when streaming to an application that requires robustness and cannot tolerate data loss, for example video-conferencing. Main Choose this option for standard-definition broadcasts. This is the default.
Lecture Recorder x2 User Guide 3-2 Fine-tune channel configuration Upscale or downscale your video image If your source input is larger than your desired output frame size or if you want to stream a less bandwidthhungry version of the content, you can downscale the source by specifying a frame size that uses the same aspect ratio. By contrast you can also enlarge the image by selecting a value that is larger than the source resolution.
Lecture Recorder x2 User Guide 3-2 Fine-tune channel configuration 6. Choose a resolution from the links on the right, or type a frame size into the Frame size fields. 7. Click Apply. The final frame size can be larger when Picture in Picture layouts are used. Control the matte (black bars) in the video output By default, the Lecture Recorder x2 makes sure that the aspect ratio of input signals is preserved when the output is streamed.
Lecture Recorder x2 User Guide 3-2 Fine-tune channel configuration For example: l Input signal resolution is 720×480 (a 3:2 aspect ratio) l encoded resolution is 1280×800 (a 16:10 aspect ratio that is wider than the input resolution) Borders are added to the left and right of the image to preserve the narrower ratio of the input. The left and right side border are not guaranteed to be of equal width.
Lecture Recorder x2 User Guide 3-2 Fine-tune channel configuration 6. Look for the source aspect ratio in the list of aspect ratios provided. a. If the source resolution is on the list, choose another resolution on the same line (i.e. with the same aspect ratio). b. If the source resolution is not on the list, use a calculator to get a factor of the source resolution and enter it in the Frame size fields. 7. Click Apply.
Lecture Recorder x2 User Guide 3-2 Fine-tune channel configuration Unstretch the output video By default, the Lecture Recorder x2 makes sure that the aspect ratio of input signals is preserved when the output is streamed. If this default was overridden or if the channel was created in a version of the software earlier than 3.11.0, the image is stretched to match the output frame size. The effect may be subtle and may not be problematic for you, but if you want to resolve this it is very simple to do.
Lecture Recorder x2 User Guide 3-2 Fine-tune channel configuration When adjusting the frame rate, you may need to try different values to achieve the best outcome. The following table provides the performance expectations when typical settings are used. Table 16 Performance expectations Setting H.264 MPEG 1920×1200 1920×1080 Video encoding preset: Quality 25-26 fps 13 fps Video Encoding preset: Speed 27-28 fps 17-18 fps Resolution To change the frame rate: 1.
Lecture Recorder x2 User Guide 3-2 Fine-tune channel configuration Choosing Key frames only option increases bandwidth and system resource usage.
Lecture Recorder x2 User Guide 3-3 Customize your channel 3-3 Customize your channel Adding a corporate logo, company information, corporate color and time stamps are easy ways to identify your broadcast.
Lecture Recorder x2 User Guide 3-3 Customize your channel l title of the presentation; l company logo; l company website; l presenter’s name; l copyright date or other labels such as proprietary information, preliminary etc; and l additional information about the broadcast, such as time of the broadcast, or change to the schedule. Transparency is not supported for logo image. 1. Connect to the admin interface using your preferred connection mechanism. See Connect to the Admin Interface. 2.
Lecture Recorder x2 User Guide 3-3 Customize your channel 10. Click Upload; the file is uploaded and displayed in the Other files section. 11. Now you can apply the logo to a stream as well as add metadata information such as presentation title, presenter’s name, and other corporate information. To apply company information and logo to a channel 1. Connect to the admin interface using your preferred connection mechanism. See Connect to the Admin Interface. 2. Login as admin. 3.
Lecture Recorder x2 User Guide 3-3 Customize your channel 5. Enter metadata such as: presentation title, presenter name(s), any copyright dates and additional information about the broadcast that you want the viewer to know. How metadata is displayed depends on the media player. For example VLC stores the metadata in a media information file, while other media players scroll the text horizontally from right to left along the bottom of the media player window, similar to a ticker message bar. 6.
Lecture Recorder x2 User Guide 3-3 Customize your channel 9. Select where the image appears on the broadcast page using Position and Margin values. a. Choose a corner of the broadcast page where the image is placed: l left /right top l Left/ right bottom b. Choose how far you want the image from the margin. For example if you chose the starting position of left top and you want the image closer to the center of the broadcast page, enter margin values to move the image.
Lecture Recorder x2 User Guide 3-3 Customize your channel 7. Click Apply. Go to the live broadcast page to confirm the message location on the broadcast page. To remove a logo or no signal image from a channel 1. Connect to the admin interface using your preferred connection mechanism. See Connect to the Admin Interface. 2. Login as admin. 3. Click on the Branding menu option; the configuration page opens. 4. From the web interface, click on the Branding menu option; the configuration page opens. 5.
Lecture Recorder x2 User Guide 3-3 Customize your channel 5. Click the Author, Copyright or Comments field. 6. Highlight the text and press delete on the keyboard. The field is empty. 7. Click Apply. Add a time stamp to your channel Adding a date and time to your video is an easy way to confirm that the information that you are streaming is current. To add a time label or timestamp your video: 1. Connect to the admin interface using your preferred connection mechanism. See Connect to the Admin Interface.
Lecture Recorder x2 User Guide 3-3 Customize your channel Field Value Example minute %M 40 second %S 45 millisecond %#m 378 8. Click Apply. Select the background color for your channel When you choose picture in picture layout with the video channel outside the DVI/VGA channel, you can select the background color to fill the unused space. For example you can add your corporate color scheme. To add a background color: 1. Connect to the admin interface using your preferred connection mechanism.
Lecture Recorder x2 User Guide PART 4: Stream PART 4: Stream Streaming provides powerful and flexible approaches to delivering to your users. Offering an easy to use interface, users can stream video using multiple formats to multiple users and devices such as web browsers, media players, set-top-boxes, Smart TVs and Content Distribution Networks. The tool's flexibility is further enhanced by its ability to support standard codecs used by most sharing destinations and media players.
Lecture Recorder x2 User Guide 4-1 Stream your video 4-1 Stream your video After you have configured your media and channels, decided on the content and layout of your broadcast, it’s time to share your broadcast. The following sections provide a description of the available streaming options, insight into why you would choose each option, and procedures to stream your content using each option.
Lecture Recorder x2 User Guide 4-1 Stream your video Choose a streaming option Each method of streaming media has strengths and weaknesses depending on your audience location, hardware resources and bandwidth. To help you to decide how to publish your content, you must first identify the number of viewers and how viewers will access your content. Are you streaming live video, or recorded video.
Lecture Recorder x2 User Guide 4-1 Stream your video Publishing Options Use this option to... HTTP Quickly stream content to viewers simultaneously. No set up is required. The Lecture Recorder x2 is ready to stream content as soon as it is has power and an input signal. No other settings are required. Your audience need only access the URL of the broadcast and they are instantly connected.
Lecture Recorder x2 User Guide 4-1 Stream your video Publishing Options Use this option to... Content Distribution Network Stream web content to many viewers simultaneously to any geographical location. A viewer accesses the broadcast from a website using a user name and password, if required. Using a CDN to host your broadcast is highly scalable and makes financial sense to website owners since you do not pay for additional server hardware or routing should your network traffic increase or decrease.
Lecture Recorder x2 User Guide 4-1 Stream your video Publishing Options Use this option to... Multicast Streaming Stream content to a multicast IP address where it can be shared with multiple viewers within the same LAN. All viewers receive the same stream at the same time. Similar to turning on a radio station, all listeners hear the same music at the same time.
Lecture Recorder x2 User Guide 4-1 Stream your video Serial URLs must be on the viewer's LAN for the viewer to use this option. Table 18 URL options Access Method serial discovery URL Format http:// (or rtsp://).local:**** s/n is the serial number of the device IP address http:// (or rtsp://)***.***.***.***:**** Configure streaming ports For HTTP or RTSP streaming the only information required to view the broadcast is the URL and the port number used to stream the broadcast.
Lecture Recorder x2 User Guide 4-1 Stream your video The port number must be higher than 500 for HTTP. In the case of RTSP streaming this value is ignored. 4. Set the RTSP Streaming port when you are streaming live video. This value along with the URL is used by viewers to access the broadcast. The default is 554. 5. Click Apply. Stream content using HTTP or RTSP 1. Connect to the admin interface using your preferred connection mechanism. See Connect to the Admin Interface. 2. Login as admin. 5.
Lecture Recorder x2 User Guide 4-1 Stream your video You can test how your content is streamed by sending your content to Epiphan’s CDN or choose one of Epiphan’s preferred CDN providers http://epiphan.tv/cdn-partners.php. Test content distribution using Epiphan CDN Epiphan.tv is a service provided by Epiphan to help our customers to experiment with content distribution networks, bandwidth, performance limits and viewer limits are applied.
Lecture Recorder x2 User Guide 4-1 Stream your video 6. Click Apply; connection through the media tunnel is established. The system streams to the Epiphan’s portal – epiphan.net. You must set audio format to MP3 when streaming through epiphan.net, see Select an audio codec. View content from Epiphan TV To view content from Epiphan TV ensure you have: l a current browser; l a current flash player; l set H.
Lecture Recorder x2 User Guide 4-1 Stream your video 5. A new page opens displaying the broadcast. Specify a multimedia player to view your Epiphan TV broadcast 1. From the Epiphan TV portal, click Switch To on the bottom of the screen; the following options appear. 2. Choose a plug-in from the list, the stream is displayed using the selected multimedia player. Add a link to your website to stream your Epiphan TV broadcast Follow the steps below to embed code for the broadcast in a web page. 1.
Lecture Recorder x2 User Guide 4-1 Stream your video 3. Highlight and right-click on the code in the dialog box. A drop-down menu appears. 4. Choose Copy. 5. Paste the content into the HTML code for your website. A link to your broadcast on Epiphan TV is added to your web page. Retrieve a list of addresses based on video stream encapsulation 1. Go to the Epiphan TV portal. 2. Click Direct URLs on the bottom of the screen; a dialog box opens displaying a list of URLs for different types of streams. 3.
Lecture Recorder x2 User Guide 4-1 Stream your video 5. Choose using RTSP announce from the drop-down menu. 6. Enter the host name or IP address of the CDN or media server. 7. Enter the port number which is used for streaming to the server. Usually for RTSP streaming the value is 554. 8. Enter a value in the Mount Point field. This is the full path to the location of the live steam or the media server. The path starts with the application name. The path is provided by the CDN provider. 9.
Lecture Recorder x2 User Guide 4-1 Stream your video 5. Choose using RTMP push from the drop-down menu. 3. Enter the host name or IP address of the media server or CDN. 4. Enter the port number which is used for streaming to the media server or CDN. Usually for RTMP streaming the value is 1935. 5. Enter a value in the Mount Point field. This is the full path to the location of the live steam or the media server. The path starts with the application name. The path is provided by the CDN provider.
Lecture Recorder x2 User Guide 4-1 Stream your video Stream content using multicast streaming A multicast stream consists of one stream distributed to many viewers via a multicast-capable network. Lecture Recorder x2 supports the following multicast streaming options: • Using RTP/UDP push • Using MPEG-TS UDP push • Using MPEG-TS RTP/UDP push Lecture Recorder x2 supports multicast streaming content to an IP TV or a set-top box playlist when the file format is MPEG-TS.
Lecture Recorder x2 User Guide 4-1 Stream your video Both audio and video use adjacent ports (port and port+1). The minimum distance between audio and video ports should 2. 9. Click Apply; an SDP file is generated and available from the Info menu option of the web interface. 10. Select a name and location for the SDP file and save it. 11. Share the link to the file with viewers.
Lecture Recorder x2 User Guide 4-1 Stream your video A IPv4 multicast address range is an address between 224.0.0.0 to 239.255.255.255. Contact your System Administrator for the specific address to use. 7. Enter the destination port number through which the media will stream. 8. Perform one of the following: a. If you do not want to advertise your stream to a media player over a local network, go to the last step of this procedure; or b.
Lecture Recorder x2 User Guide 4-1 Stream your video 1. Connect to the admin interface using your preferred connection mechanism. See Connect to the Admin Interface. 2. Login as admin. 3. From the web interface, scroll to the Publish Stream menu option. The Publish Stream page opens. 4. Click the Publish drop-down menu. 5. Choose using MPEG-TS RTP/UDP push. 6. Enter the destination multicast IP address where the broadcast can be viewed. A IPv4 multicast address range is an address between 224.0.0.
Lecture Recorder x2 User Guide 4-1 Stream your video rtp://@226.10.24.32:7000 To view the stream when SAP announce has been set and the stream is advertised on a media player, set-topbox or Smart TV, refer to Viewing with SAP Announce. Stream content using UPnP Using the Universal Plug and Play (UPnP) networking protocol, your Lecture Recorder x2 can be discovered and can stream to software and hardware media players, set-top-boxes and Smart TVs with ease.
Lecture Recorder x2 User Guide 4-1 Stream your video 1. Connect to the admin interface using your preferred connection mechanism. See Connect to the Admin Interface. 2. Login as admin. 3. Click the UPnP link in the Configuration section; the UPnP configuration page opens. 4. Enter a name in the Server name field. If no name is provided the server name will be the device's serial number. 5. Select whether you want to share live video and recorded files. 6. Click Apply. 7.
Lecture Recorder x2 User Guide 4-1 Stream your video Disable UPnP By default, UPnP sharing is disabled. If you enabled it for a particular broadcast, you may want to disable UPnP sharing after the broadcast is complete. You can choose to disable access to live streams, recorded files, or both. To disable UPnP: 1. Connect to the admin interface using your preferred connection mechanism. See Connect to the Admin Interface. 2. Login as admin. 3.
Lecture Recorder x2 User Guide 4-1 Stream your video 1. Connect to the admin interface using your preferred connection mechanism. See Connect to the Admin Interface. 2. Login as admin. 3. Click the UPnP link in the Configuration section; the UPnP configuration page opens. 4. Scroll to the Play on service start section. 5. Select a stream to use from the Live stream drop-down list. 6. Select a digital media player from the Player drop-down list. 7. Click Apply.
Lecture Recorder x2 User Guide 4-2 Samples of stream settings 4-2 Samples of stream settings When choosing your stream settings it is important to consider the stream content. When streaming fast moving video it's best to choose a higher bitrate and frame rate versus streaming a slide presentation where you can save on bandwidth and system processing by lower the bitrate and frame rate. Stream setup is a matter of balancing quality and system resource usage.
Lecture Recorder x2 User Guide 4-2 Samples of stream settings Streaming slide content The table below provides suggested settings to maximize your stream quality while minimizing system resource usage when streaming slide content from a PC, Mac or tablet. Setting PC and Mac Tablet Codec H.264 Motion JPEG Video encoding preset High Quality High Quality Video encoding profile High Enhanced compatibility mode (h.
Lecture Recorder x2 User Guide PART 5: Record PART 5: Record Your Lecture Recorder x2 encodes the video and audio it captures. If you choose to record the resulting streams, it stores the recorded files on the device and provides a variety of automatic or manual mechanisms to download the files.
Lecture Recorder x2 User Guide 5-1 Create Recordings 5-1 Create Recordings Your Lecture Recorder x2 can record the encoded stream to a multi-track file. This section describes the following topics for creating and configuring recordings via the web interface.
Lecture Recorder x2 User Guide 5-1 Create Recordings b. The device continues to record until it is stopped or the device runs out of storage space. The recording is broken into multiple files as needed. 4. To Stop Recording: a. Click the Stop button in the Recorder status section. Configure the type and length of recording files By default recordings are saved as AVI files.
Lecture Recorder x2 User Guide 5-1 Create Recordings Tip: If you don’t know what size to select, do some test recordings to get an idea of the file sizes you can expect. If you want to guarantee the recording lasts to a given time limit, select a file size that is far larger than you saw in your tests. 7. Select a file type from the File type drop down. 8. If desired, enter a prefix for the recordings. All new recording files for this channel or recorder will be prefixed with the text you enter.
Lecture Recorder x2 User Guide 5-1 Create Recordings Close the current recording file while recording Recording files are automatically saved and new ones opened for writing when they reach the configured time or size limit or when changes are made to the stream. You cannot download files from the device while they are being recorded, so from time to time you may need to close the current recording to facilitate file downloads.
Lecture Recorder x2 User Guide 5-1 Create Recordings To control recordings with the red button: 1. Power on the device. 2. Attach sources and configure the device. 3. Connect the red button to a USB port on the device. 4. Press the button once to start recording; recording starts and the button lights red, after a few moments it flashes to confirm recording. 5. Press the button again to stop recording; recording stops and the red button light turns off.
Lecture Recorder x2 User Guide 5-1 Create Recordings To disable the button and prevent accidental control of the recording: 1. Connect to the admin interface using your preferred connection mechanism. See Connect to the Admin Interface. 2. Login as admin. 3. Select Button Actionsin the Configuration section; the button action configuration page is displayed. 4. Pick No Action from the drop-down lists for Down, Up, and Long Press for Right Button. 5.
Lecture Recorder x2 User Guide 5-1 Create Recordings The device supports keyboards with media buttons such as Play/Pause and Volume Up/Down or a mouse with up to three buttons. When configuring the mouse or keyboard for recording, set the Down actions. Down action is chosen so the recording starts or stops as soon as the button or key is pressed, avoiding any delay that may happen before the finger is released. To configure a start recording and stop recording button: 1.
Lecture Recorder x2 User Guide 5-2 File Maintenance 5-2 File Maintenance The Lecture Recorder x2 has a finite amount of storage. By default, the device has 16 GB of storage. Though this storage space holds a lot of recordings, it will eventually run out of space if recordings are added but never removed. When this happens, the device deletes the oldest recorded files to make room for new recordings. You can use a variety of methods to automatically transfer files from the device to local network storage.
Lecture Recorder x2 User Guide 5-2 File Maintenance Rename Stored Files Recording files are named based on the filename prefix specified during configuration. See Configure the type and length of recording files for more details about setting prefixes. To rename recordings: 1. Connect to the admin interface using your preferred connection mechanism. See Connect to the Admin Interface. 2. Login as admin. 3. Go to the list of recorded files. See View the List of Stored Files. 4.
Lecture Recorder x2 User Guide 5-2 File Maintenance Download Files Manually Recordings can be manually downloaded from the web interface. You should consider deleting them from internal storage after you complete the download. See Delete Files Manually. This procedure explains how to download files to your admin computer. See File and Recording Transfer for information on transferring files to a USB drive connected to the device. To download recordings to your admin computer: 1.
Lecture Recorder x2 User Guide 5-2 File Maintenance 1. Connect to the admin interface using your preferred connection mechanism. See Connect to the Admin Interface. 2. Login as admin or operator. 3. Find the recordings by channel or by recorder. See View the List of Stored Files. 4. To delete an individual file: a. Click the X icon to the right of a file entry to request deletion; a confirmation dialog appears. b. Click OK on the confirmation dialog. 5. To delete multiple files: a.
Lecture Recorder x2 User Guide 5-3 File and Recording Transfer 5-3 File and Recording Transfer Your Lecture Recorder x2 can be configured to automatically upload recordings from local storage to a network storage location or an attached USB drive.
Lecture Recorder x2 User Guide 5-3 File and Recording Transfer 4. Select the Enable Automatic File Upload checkbox. 5. Specify how often automatic updates should happen. The first transfer occurs after the specified amount of time expires, or after the current file completes recording. I.e. if the value is set to every hour and five videos are saved the first hour, those five videos are uploaded after the first hour, and one hour later the videos saved in the second hour are uploaded.
Lecture Recorder x2 User Guide 5-3 File and Recording Transfer 7. If desired, check Remove after upload to have the files deleted from local storage when upload completes. 8. If desired, check Mark file as downloaded to have the color of the file link in the file archive list change to show the files are downloaded. This only applies if the files are not deleted after upload is complete. 9. Select the protocol or destination for upload. The following table describes the options.
Lecture Recorder x2 User Guide 5-3 File and Recording Transfer instead of the IP address. 3. Specify the Server Port used for the target FTP server. The standard port is 21. 4. Enter the FTP account username in the Login field. 5. Enter the FTP account password in the Password field; the characters are masked with dots. 6. Select Use temp file to name files with a temporary filename extension (.part) on the server until upload is complete. 7.
Lecture Recorder x2 User Guide 5-3 File and Recording Transfer 2. Specify the target Server address. If your device is configured with DHCP or has a valid DNS configuration (see Configure Network Settings), you can use the server’s fully qualified domain name instead of the IP address. 3. Specify the Server module. This is the name of the shared folder on the server. If needed, request this value from your network administrator. 4. Specify a username for the RSync Server in the Login field.
Lecture Recorder x2 User Guide 5-3 File and Recording Transfer Configure Automatic File Upload using CIFS (Part 2 of 2) This procedure assumes you have completed the steps in Configure Automatic File Upload (Part 1 of 2) and wish to continue with configuration of upload using CIFS (also known as SMB or samba). To configure upload using CIFS: 1. Select CIFS Client from the protocol drop down list in the Automatic File Upload configuration page; the lower half of the page reflects the selection. 2.
Lecture Recorder x2 User Guide 5-3 File and Recording Transfer Table 24 CIFS Automatic File Upload Configuration Options Name Description / Options Server Port The CIFS server port. Leave blank to use the default port, or enter the port used for your CIFS server. Server address The IP address (or fully qualified domain name) of the CIFS server. Server share The name of the shared folder on the CIFS server. Domain The CIFS server's Windows domain or Work Group name .
Lecture Recorder x2 User Guide 5-3 File and Recording Transfer One-Time Copy/Move of All Recorded Files to USB Drive When configured to make a one-time copy of files, the device will automatically begin to copy files to an inserted USB drive, starting with the newest recording. Files will continue to copy until all are copied, the specified maximum number of files is copied, or the target drive runs out of storage space.
Lecture Recorder x2 User Guide 5-3 File and Recording Transfer Table 25 One-Time Transfer/Copy to External USB Drive Options Name Description create subfolder with serial number () If checked, the transfer process creates a sub-folder with the device’s serial number on the USB drive. This is useful if you are using the same drive to collect recordings from multiple devices and want to know which device they came from.
Lecture Recorder x2 User Guide 5-3 File and Recording Transfer 1. Connect to the admin interface using your preferred connection mechanism. See Connect to the Admin Interface. 2. Login as admin. 3. Select the External USB Drive link in the Configuration section; the External USB Drive configuration page is displayed. 4. Select used to manually move/copy selected files via web interface from the drop down list. 5. Click Apply; the changes are saved.
Lecture Recorder x2 User Guide 5-3 File and Recording Transfer 10. Repeat the steps to select a channel or recorder and copy or move files to the external drive until you have copied all the files you wish. The green LED blinks to indicate copy/move operations. 11. Follow the steps to Safely Eject the USB Drive. View Available USB Storage Space When you insert a USB drive in an available port of the Lecture Recorder x2, the total and free space are calculated and displayed in the Web Interface.
Lecture Recorder x2 User Guide 5-3 File and Recording Transfer 2. Login as admin. 3. Scroll to the bottom of the Web Interface page; click the eject link below external storage space. 4. When prompted, click OK to confirm that you want to eject the USB drive. 5. Disconnect the USB drive from the device.
Lecture Recorder x2 User Guide 5-4 Use the Local FTP Server 5-4 Use the Local FTP Server Your Lecture Recorder x2 can act as an FTP server, allowing you to manually or automatically connect to the system and download recordings. Depending on configuration of the FTP server, you may also be able to remotely delete files after download, maximizing available device storage. This section discusses the following FTP Server topics.
Lecture Recorder x2 User Guide 5-4 Use the Local FTP Server c. Click Apply. 5. To allow the FTP user to delete files: a. Select the Enable FTP DELETE command check box. b. Click Apply. Any currently logged in ftp users must log out and back in again to have access to the command. 6. To disable the FTP server: a. De-select the Enable FTP access check box. b. Click Apply. 7. To disable file deletion by FTP: a. De-select the Enable FTP DELETE command check box. b. Click Apply.
Lecture Recorder x2 User Guide 5-4 Use the Local FTP Server l The IP address of your device (found in the Network configuration menu) l An FTP tool l The username and password for your FTP user (See Configure the Local FTP Server) In the example below, the IP address of the Lecture Recorder x2 is 192.168.1.210, the username is admin, there is no password, and the Windows command line ftp utility is used. To connect to the FTP server: 1.
Lecture Recorder x2 User Guide 5-4 Use the Local FTP Server If the delete command is not enabled, attempting to delete a file will result in an Unknown Command error.
Lecture Recorder x2 User Guide PART 6: View PART 6: View Now that you have perfected your stream, identified the medium to publish your stream, it's time to view the video stream from a media player or a web browser.
Lecture Recorder x2 User Guide 6-1 View your video 6-1 View your video This chapter describes factors to consider when choosing a streaming URL and steps to view the video stream from a media player or a web browser.
Lecture Recorder x2 User Guide 6-1 View your video 4. Copy the URL and provide to viewers. Based on their media player, viewers can access the broadcast using a URL specific to their media player. View your broadcast using the Live View button on the Info menu 1. Connect to the admin interface using your preferred connection mechanism. See Connect to the Admin Interface. 2. Login as admin or operator. 3. From the web interface, click Info; the info page opens displaying the live broadcast and stream URL.
Lecture Recorder x2 User Guide 6-1 View your video 4. Copy the URL and provide to viewers. Based on their media player, viewers can access the broadcast using a URL specific to their media player. Sending stream URLs to viewers For participants to log in and view a stream, you must provide a stream URL. The URL that you send depends on the device the participant uses to view the stream.
Lecture Recorder x2 User Guide 6-1 View your video 1. Open a web browser. 2. Enter the IP address of the broadcast stream, refer to the example below. To locate the IP address for the broadcast, refer to View your video If the IP address of the broadcast is 172.20.1.33, then browse to: http:// 172.20.1.33 3. Enter the user name and password at the prompt: User Name: viewer Password: (enter the viewer password) 4. Press Enter. The stream is played in the browser window.
Lecture Recorder x2 User Guide 6-1 View your video rtsp://96377.local:554/stream.sdp 5. Press Play. The stream is played in the media player window. Viewing with UPnP Using a software or hardware media player, you can browse for files or streams with Universal Plug and Play (UPnP). UPnP uses MPEG-TS over HTTP with the H.264 codec and MP3 or AAC audio encoding (or no audio). You can only access live streams or recordings that meet these requirements.
Lecture Recorder x2 User Guide 6-1 View your video Live Streams When you open the device from Windows Media Player, you'll see a list of the available channels you can stream under the Videos tab. The channel name is VGADVI. From other digital media players, the channel list can be under a Live Streams folder. With Windows Media Player, double click to open any channel and press Play to start the stream. Using your digital media player, select a live stream and press play.
Lecture Recorder x2 User Guide 6-1 View your video the video is streamed to their desktop, mobile or tablet. To configure SAP announce, go to Stream content using multicast streaming. Your Lecture Recorder x2 is advertised by the metadata title, if one was configured under Stream Branding, otherwise it is identified by it's product serial number. For a description of how to set the metadata, refer to Add your logo and company information to your channel.
Lecture Recorder x2 User Guide 6-1 View your video 8. Click on a live stream; the stream plays in the media player window.
Lecture Recorder x2 User Guide PART 7: Maintenance PART 7: Maintenance This section covers topics that will keep your Lecture Recorder x2 running smoothly. It also covers a new tablet operator interface and ways to configure and operate your device using third party tools via HTTP or RS-232.
Lecture Recorder x2 User Guide 7-0 Mobile / Tablet Operator Interface 7-0 Mobile / Tablet Operator Interface Epiphan's tablet interface is designed for touch-screen devices. Use your tablet or mobile device to perform confidence checks and basic operator tasks such as verifying disk space or starting and stopping recording.
Lecture Recorder x2 User Guide 7-0 Mobile / Tablet Operator Interface For example: http://192.168. 1.163/admin/m or http://95dd40d5.local/admin/m In the future you can go directly to the IP address above and login from the mobile interface without ever seeing the usual admin interface. Use tethering on your device You can use tethering on your mobile device or tablet to connect to the tablet interface. This option requires some configuration through the full admin interface.
Lecture Recorder x2 User Guide 7-0 Mobile / Tablet Operator Interface 1. Once Epiphan Connect is installed, connect to the wifi network where you can access your Lecture Recorder x2. 2. Launch Epiphan Connect; the application searches your network and shows you a list of available Epiphan devices. 3. Find your device in the list. If you have several Epiphan devices, look for the serial number of the one to which you'd like to connect. 4.
Lecture Recorder x2 User Guide 7-0 Mobile / Tablet Operator Interface 4. If there is no audio signal, nothing appears in the audio input bar. 5. If there is an audio signal, the level is shown next to the source name in the audio input bar. 6. If the source has no signal, the name appears red and a note next to the name says NO SIGNAL. 7. If the source has a signal, it is displayed under the source name.
Lecture Recorder x2 User Guide 7-0 Mobile / Tablet Operator Interface 4. If disk space is low, the green bar will be nearly full. Control recording via the tablet interface The tablet interface provides a simple way to control recording for your Lecture Recorder x2. To control recording from the tablet interface: 1. Connect to the tablet interface. See Connect to the tablet interface. 2. Login as admin or operator. 3. Scroll to the CHANNELS section. 4. Click the down arrow in the row for the recorder.
Lecture Recorder x2 User Guide 7-0 Mobile / Tablet Operator Interface 150
Lecture Recorder x2 User Guide 7-1 Power Down and System Restart 7-1 Power Down and System Restart This section covers the following topics: l Restarting the Device via the Web Interface l Power Down and System Restart Restarting the Device via the Web Interface The Lecture Recorder x2 web interface allows you to reboot the device. To restart the device: 1. Connect to the admin interface using your preferred connection mechanism. See Connect to the Admin Interface. 2. Login as admin. 3.
Lecture Recorder x2 User Guide 7-2 Save and Restore Device Configuration 7-2 Save and Restore Device Configuration After completing configuration of your Lecture Recorder x2, it is good practice to save the device configuration so you may restore it at a later date (i.e. after a change that wasn’t wanted, or after a factory reset) or so you may load it onto another device to provision it with the same configuration.
Lecture Recorder x2 User Guide 7-2 Save and Restore Device Configuration 5. Save the file in a secure location. 6. Rename your saved configuration file to indicate the specifics of the configuration, if desired. Load a saved device configuration After making changes to the device configuration, you may find that the results are not what you expected or that they serve a different need and you wish to return to a previous configuration.
Lecture Recorder x2 User Guide 7-2 Save and Restore Device Configuration 7. Reboot the device by clicking the link in the message on the web page, or by using the power button on the device; when the system comes back up the restoration is complete. 8. Login as admin (with no password). 9. Reset your user passwords. See Setting and Changing User Passwords.
Lecture Recorder x2 User Guide 7-3 Restoring Factory Configuration 7-3 Restoring Factory Configuration If you’ve been testing with your Lecture Recorder x2 and are ready to restore back to the factory configuration to start again with a clean slate, you can do this manually or through the web interface.
Lecture Recorder x2 User Guide 7-3 Restoring Factory Configuration 5. Click OK on the warning dialog; the device applies the factory configuration and reboots. 6. Wait for the system to reboot and begin re-configuration. Restore Factory Configuration Manually If you don’t remember the admin password for your Lecture Recorder x2, or you want a manual method to restore factory configuration to the device, you can follow the steps described below.
Lecture Recorder x2 User Guide 7-3 Restoring Factory Configuration 3. Press and hold the Factory Reset button on the front of the device while you restore power to the device; the blue LED illuminates. 4. Continue to hold the reset button until the blue light is extinguished and the green LED illuminates. 5. Release the reset button. 6. Wait for the system to reboot and begin re-configuration.
Lecture Recorder x2 User Guide 7-4 Firmware Upgrade 7-4 Firmware Upgrade Epiphan will from time to time issue an updated firmware revision to bring new features to your Lecture Recorder x2. To take advantage of these new features, you will need to install the new firmware on the device. This section covers: l Check for Firmware Updates l Install firmware Check for Firmware Updates When you register your product with Epiphan you are given a choice to be notified of firmware updates for your device.
Lecture Recorder x2 User Guide 7-4 Firmware Upgrade Installing new firmware takes a few minutes. Broadcasting and recording is not available until the upgrade is complete. There are two ways to install new firmware: from a the download link via the web interface, or from a file provided by Epiphan.
Lecture Recorder x2 User Guide 7-4 Firmware Upgrade 8. Wait for the system to restart. Depending on the upgrade, a disk rebuild may be required, causing the restart process to take much longer than usual. 9. Connect to the admin interface using your preferred connection mechanism. See Connect to the Admin Interface. 10. Login as admin. 11. Select the Firmware Upgrade link in the Configuration menu; the firmware upgrade page opens. 12. Verify that the firmware version is the expected new version.
Lecture Recorder x2 User Guide 7-4 Firmware Upgrade 9. Wait for the system to restart. 10. Connect to the admin interface using your preferred connection mechanism. See Connect to the Admin Interface. 11. Login as admin. 12. Select the Firmware Upgrade link in the Configuration menu; the firmware upgrade page opens. 13. Verify that the firmware version is the expected new version. If the firmware upgrade failed, restore to the default factory settings before trying again.
Lecture Recorder x2 User Guide 7-5 Remote Support 7-5 Remote Support The Lecture Recorder x2 supports remote troubleshooting by Epiphan’s support team. Remote support allows Epiphan to assist in troubleshooting issues you experience with the device and can also assist with resetting lost admin passwords. No private information is sent to the Epiphan maintenance server. Remote support is on by default.
Lecture Recorder x2 User Guide 7-5 Remote Support 4. Click Enable remote support if the check box is not selected. This setting controls incoming links from Epiphan. 5. Click Enable connection to maintenance server if the check box is not selected. This setting configures outgoing links to Epiphan. 6. Ensure the server address is epiphany.epiphan.com, unless Epiphan support directs you to change it. 7. Ensure the port is 30, unless Epiphan support directs you to change it. 8. Click Apply. 9.
Lecture Recorder x2 User Guide 7-5 Remote Support Disable Remote Support By default, remote support is on. If you want to turn it off, you may use the following procedure. Disabling remote support for the Lecture Recorder x2 removes the ability for Epiphan to reset a lost admin password. To disable remote support: 1. Connect to the admin interface using your preferred connection mechanism. See Connect to the Admin Interface. 2. Login as admin. 3.
Lecture Recorder x2 User Guide 7-6 Storage Disk Maintenance 7-6 Storage Disk Maintenance Your Lecture Recorder x2 is equipped with a solid-state storage drive for storage of recordings. Occasionally, maintenance is required for these disks. This section describes procedures for the following topics: l Check disk storage space l Schedule disk check l Perform disk check Check disk storage space The Lecture Recorder x2 has a finite amount of storage: 16 GB.
Lecture Recorder x2 User Guide 7-6 Storage Disk Maintenance Schedule disk check A disk maintenance schedule is used to check the device storage drives for errors. Two values are supplied, one to specify the number of system restarts that should occur before disk check, and the second to specify the number of months before performing a disk check. The disk check happens based on whichever event occurs first. For example, the restart setting is set to 50 and the months setting is set to 6.
Lecture Recorder x2 User Guide 7-6 Storage Disk Maintenance 2. Login as admin. 3. Select the Disk Check link in the Configuration menu; the disk maintenance page opens. 4. Click the Check Now button; a new page opens showing you the progress of the disk check. Do not interrupt power to the device during the disk check. 5. When the disk check is complete, the main page returns and a summary is shown. 6. If any unrecoverable errors are detected, contact Epiphan support. b.
Lecture Recorder x2 User Guide 7-6 Storage Disk Maintenance 4. If using RAID 1 and one of the disks is down, the following warning is displayed.
Lecture Recorder x2 User Guide 7-7 Control with RS-232 / Serial Port 7-7 Control with RS-232 / Serial Port The Lecture Recorder x2 presents an RS-232 / serial port control interface for integration with existing control room and board room equipment.
Lecture Recorder x2 User Guide 7-7 Control with RS-232 / Serial Port Label Description / Options Software A software handshake that uses XON/XOFF characters to control the flow of data. Select this when your control terminal requires it (see control terminal manual). None No flow control is used. Only select this if your control terminal requires it (see control terminal manual). 5. Click Apply.
Lecture Recorder x2 User Guide 7-7 Control with RS-232 / Serial Port Command Name Description STATUS Reports the recording status of each channel. Status is one of: l RUNNING l STOPPED l UNINITIALIZED FREESPACE Reports the free storage space, in bytes. RECTIME Reports the elapsed recording time for the current file on each channel.
Lecture Recorder x2 User Guide 7-7 Control with RS-232 / Serial Port 3. To get the value of the frame size (resolution): GET.framesize 4. To set the frame size (resolution), enclose the parameter in quotes to preserve the spaces: SET.framesize="640 x 480" SAVECFG 5. To enable broadcasting audio: SET.audio=on SAVECFG 6. To disable broadcasting audio: SET.
Lecture Recorder x2 User Guide 7-8 Control with HTTP Commands 7-8 Control with HTTP Commands The Lecture Recorder x2 has an HTTP API interface for configuration and control by a third party application or with a script that sends commands to the device as a series of URLs.
Lecture Recorder x2 User Guide 7-8 Control with HTTP Commands Third Party Applications Like wget If you’re using a third party application like wget to send commands to the device, always include the admin username and password when viewing or setting configuration items. The syntax for wget commands is shown below. Specify your device’s IP address, password and the key(s) or value(s) you wish to query.
Lecture Recorder x2 User Guide 7-8 Control with HTTP Commands wget --http-user=admin --http-passwd=pass123 http://192.30.23.45/admin/set_params.cgi?rec_ enabled=on 4. To stop recording: wget --http-user=admin --http-passwd=pass123 http://192.30.23.45/admin/set_params.
Lecture Recorder x2 User Guide 7-9 Configuration Keys for Third Party APIs 7-9 Configuration Keys for Third Party APIs Using HTTP or RS-232, you can send commands to the device to query or configure the device. For the RS-232 and HTTP syntax see Control with RS-232 / Serial Port and Control with HTTP Commands. When setting keys to values with spaces use the following syntax. For RS-232: Enclose in quotes: SET.2.framesize="640 x 480" For HTTP: Encode each space as %20: set_params.
Lecture Recorder x2 User Guide 7-9 Configuration Keys for Third Party APIs The list of supported keys is also available for viewing from your device. Browse to the following URL (where
is the IP address of the device): http:///admin/http_api.cgi System-level Settings Keys(Read-only) The following read-only system-level setting keys are supported. The channel number can be omitted from the command when requesting the value for these keys.Lecture Recorder x2 User Guide 7-9 Configuration Keys for Third Party APIs Recording Configuration Keys The following recording settings are supported. Table 32 Supported Recording Configuration Keys Key Values Description rec_enabled on empty string ("") Enables or disables recording. To enable recording, set to on. To disable recording, set to an empty string (""). rec_format avi mov ts Specifies the format of the saved file. rec_prefix string Specifies a prefix for the recording files.
Lecture Recorder x2 User Guide 7-9 Configuration Keys for Third Party APIs IP-Based Access Control Configuration Keys The following settings are supported for configuring allowed and denied IP addresses for the device. See Configure Network Settings for more information on Allow and Deny lists. Table 34 Supported IP-Based Access Configuration Keys Key Values Description allowips string: commaseparated list of IP addresses and/or ranges. empty string("") Specifies the IP addresses to permit access.
Lecture Recorder x2 User Guide 7-9 Configuration Keys for Third Party APIs Table 36 Supported Frame Grabber Configuration Keys Key Values Description gain 0...255 Specifies ADC gain adjustments. 0 is brightest, 255 is darkest. hshift -999...999 Specifies horizontal shift. For shifts to the left, use positive values. For shifts to the right, use negative values. offset 0...63 Specifies ADC offset. 0 is brightest, 63 is darkest. phase 0...31 Specifies phase adjustments for VGA signals.
Lecture Recorder x2 User Guide 7-9 Configuration Keys for Third Party APIs Channel Encoder Configuration Keys The following channel encoder configuration settings are supported. For more information on individual items listed, see Configure channels. Table 38 Supported Channel Encoder Configuration Keys Key Values Description autoframesize on empty string ("") Enables or disables use of the current signal’s resolution as the frame size. Is switched to off if a frame size is manually specified.
Lecture Recorder x2 User Guide 7-9 Configuration Keys for Third Party APIs Key Values Description timelabel none (no date) date (date alone) hms (time alone) date_hms (date and time) hms_ms (time to ms) date_hms_ms (date and time to ms) Specifies the time label on the stream. To have no time label, set to ‘none’. slicemode on empty string ("") Enables or disables h.264 slicing for RTP. To enable slicing, set to on. To disable slicing, set to empty string (""). vbitrate Integer integerK (i.e.
Lecture Recorder x2 User Guide 7-9 Configuration Keys for Third Party APIs Table 39 Supported Channel Logo Configuration Keys Key Values Description logo_margin_x 0…frame width Specifies the horizontal offset in pixels from the position in logo_position. To offset 10 pixels from the left (when using a top-left logo position), set to 10. logo_margin_y 0…frame height Specifies the vertical offset in pixels from the position in logo_ position.
Lecture Recorder x2 User Guide 7-9 Configuration Keys for Third Party APIs Audio Configuration Keys The following audio configuration keys are supported. For more information on individual items listed, see Configure channels. Table 41 Supported Audio Configuration Keys Key Values Description audio on empty string ("") Enables or disables audio for the stream. To enable audio, set to on. To disable audio, set to an empty string ("").
Lecture Recorder x2 User Guide 7-9 Configuration Keys for Third Party APIs Table 42 Supported Stream Publishing Configuration Keys Key Values Description publish_type 0 (do not publish) 1 (via Epiphan.tv) 2 (RTSP Announce) 3 (multicast RTP/UDP) 4 (multicast MPEG-TS over UDP) 5 (multicast MPEG-TS over RTP/UDP) 6 (RTMP push) Specifies the type of stream publishing, if any.
Lecture Recorder x2 User Guide 7-9 Configuration Keys for Third Party APIs RTP/UDP Configuration Keys (Publish Type 3) The following settings are supported when the publish type is set to RTP/UDP. For more information on RTP/UDP and these settings, see Stream your video. Table 44 Supported RTP/UDP Configuration Keys Key Values Description unicast_address string (IP address) Specifies the unicast/multicast address. unicast_aport 1000...
Lecture Recorder x2 User Guide 7-9 Configuration Keys for Third Party APIs Key Values Description announce_name string Specifies the RTMP resource name. announce_ password string Specifies the password for the RTMP server's user. announce_port 1000...65535, but not 5557 Specifies the RTMP server port to connect to for streaming. Note port 5557 is used for network discovery and cannot be used for streaming. announce_ username string Specifies the username for the RTMP server.
Lecture Recorder x2 User Guide 7-10 Troubleshooting 7-10 Troubleshooting Use the follow table for help if you are experiencing problems or unexpected behavior from your Lecture Recorder x2. Problem Action(s) to Resolve Not sure if the connected video inputs are Look at the device's LED lights. If the red light is blinking, signal being captured. is being received. OR Check each source's input from the source preview in the Web Interface. See Configure a video source.
Lecture Recorder x2 User Guide 7-10 Troubleshooting Problem Action(s) to Resolve Stream won't play in my media player or browser. Check the LEDs on the System to ensure data is being recevied. The green LED should be illuminated and the red LED blinking. If the broadcast is being recorded, the blue LED blinks too. Verify that the Stream Type matches with the media player used and that you have the correct url or SDP file for the player. See Viewing with a web browser and Viewing with a media player.
PART 8: Releases and Features This section outlines the features introduced with each product release. Release 3.11 Features Improved USB Drive Support Choose what happens when you insert a USB drive You can now select what happens when you insert a USB drive: nothing; a one-time copy or transfer to the drive; a manual copy or transfer to the drive; or automatic continuous copy or transfer of recorded files to the drive.
Auto Settings Automatic selection frame size using signal resolution To assist with stream setup, stream frame size is now configured by default with the input signal's resolution and will follow the signal's changes of resolution. If the input signal changes, streaming and recording is stopped and restarted. Deslect Use current signal resolution as frame size if your input resolution will change often and you don't want streaming or recording to stop and restart with each change.
Discovery of Epiphan devices Use the new Epiphan Connect application on Android and iOS as an alternative to the desktop based discovery utility. The application has built-in support for opening the tablet operator interface and can be configured to automatically open the tablet interface if connected to the Lecture Recorder x2 by USB. Mobile tethering Release 3.11.0 introduces the option to use mobile tethering for recording control, confidence monitoring and mobile network file transfers.
Software and Documentation License ATTENTION: THE SOFTWARE AND DOCUMENTATION PROVIDED UNDER THIS AGREEMENT ARE BEING LICENSED TO YOU BY EPIPHAN SYSTEMS INC. (“LICENSOR”) AND ARE NOT BEING SOLD. THIS AGREEMENT CONTAINS LIMITATIONS ON REPRESENTATIONS, WARRANTIES, CONDITIONS, REMEDIES, AND LIABILITIES THAT ARE APPLICABLE TO THE SOFTWARE AND DOCUMENTATION. Epiphan Systems Inc.
agreement for an item of open source software is: delivered to You with the Software; included in the download package for the Software; referenced in any material (including the Documentation) that is included in the download or distribution package for the Software; or listed at www.epiphan.com/opensource, then such open source software shall be Open Source Software and such separate license agreement shall govern Your use of that item or version of such open source software.
PERSON OR ENTITY FOR ANY DAMAGES ARISING FROM THIS AGREEMENT, RELATING TO THE SOFTWARE OR DOCUMENTATION, OR RELATING TO ANY SERVICES PROVIDED TO YOU BY LICENSOR (INCLUDING ITS LICENSORS, SUPPLIERS, SUBCONTRACTORS AND/OR DISTRIBUTORS) IN RELATION TO THE SOFTWARE AND/OR DOCUMENTATION FOR ANY INDIRECT, RELIANCE, INCIDENTAL, SPECIAL, PUNITIVE, EXEMPLARY OR CONSEQUENTIAL DAMAGES, INCLUDING, BUT NOT LIMITED TO, LOSS OF REVENUE OR PROFIT, LOSS OF OR DAMAGE TO DATA, BUSINESS INTERUPTION, LOSS OF DATA, REPLACEMENT O
discontinue the release of any Software and to alter prices, features, specifications, capabilities, functions, licensing terms, release dates, general availability or other characteristics of the Software. 9. Title: All right, title, and interest (including all intellectual property rights) in, to, and under the Software (including all copies thereof) shall remain with Licensor and its licensors. 10.
Software. You may not assign this Agreement whether voluntarily, by operation of law, or otherwise without Licensor’s prior written consent. Licensor may assign this Agreement at any timewithout notice. The failure of a party to claim a breach of any term of this Agreement shall not constitute a waiver of such breach or the right of such party to enforce any subsequent breach of such term.
Other Jurisdictional Issues Epiphan makes no representation that its products or information in this document or its web site is appropriate or available for use in your jurisdiction.
Enforcement of Terms and Conditions These Terms and Conditions for use of this document and the associated Epiphan Product are governed and interpreted pursuant to the laws of the province of Ontario, Canada, notwithstanding any principles of conflicts of law. All disputes arising out of or relating to these Terms and Conditions shall be finally resolved by arbitration conducted in the English language in Ottawa, Ontario, Canada under the commercial arbitration rules of the Canada.