SmartSwitch 2000 User’s Guide
Notice Enterasys Networks reserves the right to make changes in specifications and other information contained in this document without prior notice. The reader should in all cases consult Enterasys Networks to determine whether any such changes have been made. The hardware, firmware, or software described in this manual is subject to change without notice.
Restricted Rights Notice (Applicable to licenses to the United States Government only.) 1. Use, duplication, or disclosure by the Government is subject to restrictions as set forth in subparagraph (c) (1) (ii) of the Rights in Technical Data and Computer Software clause at DFARS 252.227-7013. Enterasys Networks, 35 Industrial Way, Rochester, New Hampshire 03867. 2. (a) This computer software is submitted with restricted rights.
Contents Chapter 1 Introduction Using the SmartSwitch 2000 User’s Guide ............................................................... 1-5 Related Manuals............................................................................................................ 1-6 Software Conventions .................................................................................................. 1-6 Using the Mouse ....................................................................................................
Contents Configuring Ethernet Ports on Second Generation Devices .................. 2-35 Operational Mode Fields ...................................................................... 2-37 Setting the Desired Operational Mode ............................................... 2-38 Auto Negotiation Technologies ........................................................... 2-39 Setting Advertised Abilities for Auto Negotiation........................... 2-40 Configuring the COM Port...............................
Contents Disabling a Basic Alarm........................................................................................ 3-8 Viewing the Basic Alarm Log............................................................................... 3-9 Advanced Alarm Configuration............................................................................... 3-10 Accessing the RMON Advanced Alarm/Event List ...................................... 3-10 Creating and Editing an Advanced Alarm ..................................
Contents Chapter 6 FDDI Applications Concentrator Configuration ........................................................................................ 6-2 Connection Policy Window ......................................................................................... 6-6 Station List................................................................................................................... ... 6-8 Stations Panel....................................................................................
Chapter 1 Introduction How to use this guide; related guides; software conventions; getting help Welcome to the SmartSwitch 2000 User’s Guide. We have designed this guide to serve as a reference for using the SmartSwitch 2000 family of devices. The SmartSwitch 2000 product family consists of several models of standalone high-speed network devices. By default, these devices perform traditional switching (or bridging); each can also be configured to perform prestandard IEEE 802.1Q VLAN switching (a.k.
Introduction high speed connection to a local server, and one additional slot for a High Speed Interface Module (HSIM) which can provide FDDI, ATM, Gigabit Ethernet, or WAN connectivity depending on the type of HSIM installed. The only difference between the two devices is that the 2E43-51 supports a single power supply, and the 2E43-51R supports dual, redundant power supplies.
Introduction • The 2H28-08R SmartSwitch, which has a total of eight ports consisting of six built-in front panel 100BaseFX multimode fiber SC ports and two front panel slots for optional Fast Ethernet Port Interface Modules (FEPIMs) to support an uplink to 100 Mbps Ethernet backbones or a high speed connection to a local server. The 2H28-08R supports dual, redundant power supplies.
Introduction standard, which defines how end users that rely on existing data communications technology and protocols can operate over an ATM network without penalty. • NOTE The HSIM-W6 and HSIM-W84 are Wide Area Networking (WAN) HSIMs, which can provide uplinks to WAN backbones and allow you to perform seamless LAN to WAN switching. The HSIM-W6 supports IP and IPX bridging or routing services, including IP RIP.
Introduction The latest SmartSwitches feature VHSIM slots, which can accept any of the previously detailed HSIMs or the VHSIM-G6 Gigabit Ethernet High Speed Interface Module: • The VHSIM-G6 is a Gigabit Ethernet module which provides two slots for GPIMs of various media to offer integrated Gigabit Ethernet uplink capability.
Introduction Chapter 7, ATM Configuration, describes how to configure Permanent Virtual Circuits (PVCs) for the ATM interface(s) in the ATM Connections window, which will be available if you have an HSIM-A6DP module installed in your device. Chapter 8, HSIM-W87 Configuration, describes the T3, T1, and IP Priority configuration windows which will be available when an HSIM-W87 is installed.
Introduction Left Mouse Button Right Mouse Button Figure 1-1. Mouse Buttons For many mouse operations, this document assumes that the left (primary) mouse button is to be used, and references to activating a menu or button will not include instructions about which mouse button to use. However, in instances in which right (secondary) mouse button functionality is available, instructions will explicitly refer to right mouse button usage.
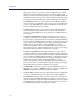
Introduction Common SmartSwitch 2000 Window Fields Similar descriptive information is displayed in boxes at the top of most device-specific windows in NetSight Element Manager, as illustrated in Figure 1-2, below. Device Name IP Address Location MAC Address Figure 1-2. Sample Window Showing Group Boxes Device Name Displays the user-defined name of the device. The device name can be changed via the System Group window; see the Generic SNMP User’s Guide for details.
Introduction Informational fields describing the boards and/or ports being modeled are also displayed in most windows: Board Number Displays the number of the board. The SmartSwitch 2000 will always be Board 1. Port Number Displays the number of the monitored port. Uptime Displays the amount of time, in a X days hh:mm:ss format, that the SmartSwitch 2000 has been running since the last start-up.
Introduction the use of the windows and their associated command and menu options. Note that if a Help button is grayed out, on-line help has not yet been implemented for the associated window. From the Help menu accessed from the Chassis View window menu bar, you can access on-line help specific to the Chassis View window, as well as bring up the Chassis Manager window for reference. Refer to Chapter 2 for information on the Chassis View and Chassis Manager windows.
Introduction FTP: Login Password By BBS: Modem Setting ftp.ctron.com (134.141.197.25) anonymous your e-mail address (603) 335-3358 8N1: 8 data bits, 1 stop bit, No parity Send your questions, comments, and suggestions regarding NetSight documentation to NetSight Technical Communications via the following address: Netsight_docs@enterasys.com To locate product specific information, refer to the Enterasys Web site: http://www.enterasys.
Introduction 1-12 Getting Help
Chapter 2 The SmartSwitch 2000 Chassis View Information displayed in the Chassis View window; the Chassis Manager window; Hub management functions The SmartSwitch 2000 Chassis View window displays a color-coded graphic representation of your SmartSwitch 2000. It serves as a single point of access to all other SmartSwitch 2000 windows and screens, which are discussed at length in the following chapters. To access the SmartSwitch 2000 Chassis View window, use one of the following options: 1.
The SmartSwitch 2000 Chassis View Viewing Chassis Information The SmartSwitch 2000 Chassis View window (Figure 2-1) provides graphic representations of the SmartSwitch 2000, including a color-coded port display which immediately informs you of the current configuration and status of the switch and its ports. Figure 2-1.
The SmartSwitch 2000 Chassis View • Magenta indicates that the SmartSwitch 2000 is in a temporary stand-by mode while it responds to a physical change in the hub; note that board and port menus are inactive during this stand-by state. • Blue indicates an unknown contact status – polling has not yet been established with the SmartSwitch 2000.
The SmartSwitch 2000 Chassis View Menu Structure By clicking on various areas of the SmartSwitch 2000 Chassis View display, you can access menus with device-, module-, and port-level options, as well as utility applications which apply to the device. The following illustration displays the menu structure and indicates how to use the mouse to access the various menus. For the Device menu: • The FDDI Statistics option displays if you have an HSIM-F6 module installed.
The SmartSwitch 2000 Chassis View The Device Menu From the Device Menu at the Chassis View window menu bar, you can access the following selections: NOTE • Device Type displays a description of the device being modeled. See Viewing Hardware Types, on page 2-16. • Device Find Source Address enables you to determine through which interface a specified MAC address is communicating by searching the 802.1d bridge Filtering database.
The SmartSwitch 2000 Chassis View NOTE NOTE • Broadcast Suppression allows you to set a threshold on the number of broadcast packets issued from each port on the SmartSwitch 2000 when it is operating in traditional switch (bridge) mode. See Broadcast Suppression, on page 2-67. • FDDI Statistics menu option displays if you have an HSIM-F6 installed in your device. This launches a window which displays traffic-related statistics for each Station Management (SMT) entity present on an installed HSIM-F6.
The SmartSwitch 2000 Chassis View • I/F Speed will display the port’s bandwidth: 10M (megabits) for Ethernet; 100M for Fast Ethernet; 155.5M for ATM; and 1G for Gigabit Ethernet. • I/F Type will display the port type of each port on your SmartSwitch 2000, e.g., Eth (ethernet-csmacd), ATM, or FDDI. • VLAN Mapping displays if your device has been configured to operate in 802.1Q mode. It displays the VLAN ID number associated with each port on your SmartSwitch 2000.
The SmartSwitch 2000 Chassis View The Utilities Menu The Utilities menu provides access to the MIB Tools utility, which provides direct access to the SmartSwitch 2000’s MIB information, and to the RMON utility, a remote monitoring feature that is supported by many intelligent devices. These selections are also available from the Utilities menu at the top of NetSight Element Manager’s primary window. Refer to the Tools Guide for a thorough explanation of the MIB Tools and RMON utilities.
The SmartSwitch 2000 Chassis View • Spanning Tree allows you to set bridge parameters when it is operating using the Spanning Tree Algorithm (STA) – the method that bridges use to decide the controlling (root) bridge when two or more bridges are in parallel; see the Bridging chapter in the Tools Guide for more information.
The SmartSwitch 2000 Chassis View • Alarm Configuration brings up windows that allow you to configure alarms and events for each available interface; see Chapter 3, Alarm Configuration for details. • Statistics launches the highest level of statistics currently available for the selected port. For standard Ethernet and Fast Ethernet ports, RMON statistics will be displayed if the RMON Default MIB component is active; if it has been disabled, MIB-II interface statistics will display.
The SmartSwitch 2000 Chassis View If you have selected the Bridge status mode, a port is considered: • FWD (Forwarding) if the port is on-line and forwarding packets across the SmartSwitch 2000 from one network segment to another. • DIS (Disabled) if bridging at the port has been disabled by management; no traffic can be received or forwarded on this port, including configuration information for the bridged topology.
The SmartSwitch 2000 Chassis View Errors If you choose the Errors mode, the interface boxes will display the percentage of the total number of valid packets processed by each port during the last polling interval that were error packets. This percentage reflects the number of errors generated during the last polling interval by devices connected to that port compared to the total number of valid packets processed by the port.
The SmartSwitch 2000 Chassis View If you have selected the Admin/Link status mode, a port is considered: • ON if the port is enabled and has a valid link. • OFF if it has not been enabled or if it has been disabled through management action. • SEG (segmented) if the port has been enabled by management and has a valid connection, but has been segmented by the repeater because 33 consecutive collisions have occurred on the attached segment, or the collision detector was on for more than 2.4 µs.
The SmartSwitch 2000 Chassis View NOTE Because BNC thin coax and AUI ports do not support the link feature, the displayed Admin/Link, Admin, and Link status conditions will not always follow the pattern described above: Under Admin/Link status mode, BNC ports will display as ON if there is a valid connection and the port has been enabled; OFF if the port has been disabled; and SEG if the port has experienced 33 consecutive collisions or if there is no cable attached.
The SmartSwitch 2000 Chassis View Port Status Color Codes The Port Status display options —Bridge, Admin, and Operator— incorporate color coding schemes. For the Admin and Operator Status display options, green = ON, red = OFF, and blue = N/A (not available). For the Bridge Status display option, green = forwarding, blue = disabled, magenta = learning and listening, orange = blocking, red = broken, and gray = unknown.
The SmartSwitch 2000 Chassis View The MIBs which provide the SmartSwitch 2000’s functionality — both proprietary MIBs and IETF RFCs — are listed here. MIB Components are listed here; remember, there’s no one-to-one correspondence between MIBs and MIB Components. Figure 2-3.
The SmartSwitch 2000 Chassis View Module Type From the Module menu on the SmartSwitch 2000 Chassis View window, you can view a description of the SmartSwitch 2000. 1. Click on the SmartSwitch 2000 module index. The Module Menu opens. 2. Select Module Type. A Module Type text box opens, describing the SmartSwitch 2000. Figure 2-5. Sample Module Type Windows Connection Type If your SmartSwitch 2000 supports the ctIfConnectionType OID, its Port menus will contain the Connection Type option.
The SmartSwitch 2000 Chassis View Interface Description Choosing the Description option from the Port menu brings up a window that describes the selected interface. Figure 2-7. Sample Interface Description Windows Viewing I/F Summary Information The I/F Summary menu option available from the Device menu lets you view statistics for the traffic processed by each network interface on your device.
The SmartSwitch 2000 Chassis View The I/F Summary window provides a variety of descriptive information about each interface on your device, as well as statistics which display each interface’s performance. The following descriptive information is provided for each interface: UpTime The UpTime field lists the amount of time, in a days, hh:mm:ss format, that the device has been running since the last start-up. Index The index value assigned to each interface on the device.
The SmartSwitch 2000 Chassis View After you select a new display mode, the statistics (and graphs, where applicable) will refresh to reflect the current choice, as described below. Raw Counts The total count of network traffic received or transmitted on the indicated interface since device counters were last reset. Raw counts are provided for the following parameters: In Octets Octets received on the interface, including framing characters.
The SmartSwitch 2000 Chassis View Out Octets The number of bytes transmitted by this interface, expressed as a percentage of the theoretical maximum load. When you select this option, a Bar Graph field will be added to the interface display area; this field is only available when Load is the selected base unit. Rate The count for the selected statistic during the last poll interval. The available parameters are the same as those provided for Raw Counts.
The SmartSwitch 2000 Chassis View TIP You can also access this information via the I/F Statistics option available on the individual port menus; see Chapter 4, Statistics, for more information. Three informational fields appear in the upper portion of the window: Description Displays the interface description for the currently selected interface. Address Displays the MAC (physical) address of the selected interface. Type Displays the interface type of the selected port.
The SmartSwitch 2000 Chassis View Unknown Protocol (Received only) Displays the number of packets received which were discarded because they were created under an unknown or unsupported protocol. Packets Received (Received only) Displays the number of packets received by the selected interface. Transmit Queue Size (Transmit only) Displays the number of packets currently queued for transmission from this interface.
The SmartSwitch 2000 Chassis View Using Device Find Source Address When you select the Device Find Source Address option, the device’s 802.1d Filtering database is searched for the specified MAC address. If it is found, the Component field will display the value “Bridge” indicating that the address was found on a bridging interface, and the Port Instance field will display the index number assigned to the bridge port on which the address was located.
The SmartSwitch 2000 Chassis View Port Instance Displays the bridge port index number on which the specified MAC address was found. To use the Device Find Source Address window: 1. In the Address Mode field, select the format of the Source Address you wish to find, either MAC or Canonical. 2. In the Enter Address text box, enter the Source Address you wish to find in the appropriate XX-XX-XX-XX-XX-XX format.
The SmartSwitch 2000 Chassis View NOTE You may receive an error message stating “Can’t Display Source Address” if a Port Instance of “0” or “0.0” is reported while using the Device Find Source Address feature. This value indicates that the MAC address is communicating through the backplane instead of through a front panel interface. To open the Device Find Source Address window: 1. Click on Device in the Chassis View menu bar. 2. Click to select Device Find Source Address.
The SmartSwitch 2000 Chassis View MAC address was found. The board and port index numbers are separated by a period; for example, a Port Instance of 1.2 refers to board (port group) 1 and port number 2. To use the Device Find Source Address window: 1. In the Address Mode field, select the format of the Source Address you wish to find, either MAC or Canonical. 2. In the Enter Address text box, enter the Source Address you wish to find in the appropriate XX-XX-XX-XX-XX-XX format.
The SmartSwitch 2000 Chassis View control parameters; and for COM ports, you can select the operation you wish the port to perform, and set any associated speed parameters. FDDI, Ethernet, Fast Ethernet, and Gigabit Ethernet Port Configuration windows are available from the Chassis View Port menus (except on Ethernet MicroLAN Switches where they are available from the Bridge Port menu); the COM Port option is available from the Device menu.
The SmartSwitch 2000 Chassis View WARNING For standard Ethernet interfaces, Full Duplex should only be enabled on an interface that has a connection to a single destination address at the other end of the connection (i.e., it is not a segment with an attached repeater cascading the connection to multiple destination addresses). Full Duplex mode disables the collision detection circuitry at the interface, so that both Transmit and Receive wires can be used simultaneously.
The SmartSwitch 2000 Chassis View those ports allows you to both view and set that port’s available modes.
The SmartSwitch 2000 Chassis View NOTE TIP Auto-Negotiation is not supported by the FE-100FX Fast Ethernet port interface module. If you launch the window for a port module slot which has no FE module installed, the Port Type will display as Unknown, the Link State will display No Link, and the rest of the fields will be blank and/or grayed out.
The SmartSwitch 2000 Chassis View ! CAUTION If you choose to select a specific mode of operation (rather than auto-negotiation), you should be sure that the link partner supports the same mode. Otherwise, no link will be achieved. If you select a Full Duplex mode and the link partner supports the same wire speed but not Full Duplex, a link will be achieved, but it will be unstable and will behave erratically.
The SmartSwitch 2000 Chassis View • Link Partner does not support auto negotiation — auto negotiation is either not supported by or is not currently selected on the remote port. • Unknown — the link partner’s capabilities could not be determined. When the local node is not set to Auto-Negotiation, this field will be grayed out, even if the link partner is set to Auto-Negotiation and is advertising abilities.
The SmartSwitch 2000 Chassis View 2. If you have selected Auto Negotiation (for 100Base-TX ports only), use the Advertised Abilities field to select the operational capabilities you wish to advertise to the port’s link partner. If both link partners will be auto-negotiating, be sure there is at least one mutually-advertised operational mode, or no link will be achieved.
The SmartSwitch 2000 Chassis View Figure 2-14. The Ethernet Configuration Window TIP If you select the Configuration option available for a standard Ethernet or FDDI interface or for a Fast Ethernet port on a first generation device, an entirely different window opens; see Configuring Standard Ethernet and FDDI Ports, page 2-28, or Configuring Fast Ethernet Ports on First Generation Devices, page 2-29, for information on configuring these ports.
The SmartSwitch 2000 Chassis View (for the FE-100FX Fast Ethernet port module), 1000Base-SX/LX/CX (for the VHSIM-G6 Gigabit Ethernet port module), or Unknown (for a port slot with no module installed). Link State Displays the current connection status of the selected port: Link or No Link. Remote Auto Signal Indicates whether the operating mode at the remote end of the link is set to Auto Negotiate. Auto Negotiate Config Indicates whether Auto Negotiate signalling is in progress or has completed.
The SmartSwitch 2000 Chassis View The following operational modes can be specified: Speed This field specifies a port speed of 10MB, 100MB, or 1000MB. Duplex This field specifies Half Duplex or Full Duplex mode for the port. Flow Control Flow control allows Ethernet devices to notify attached devices that congestion is occurring and that the sending device should stop transmitting until the congestion can be cleared.
The SmartSwitch 2000 Chassis View 100Base-FX ports do not support auto negotiation for bandwidth or flow control capability, so you must choose between 100Base-FX Half Duplex and 100Base-FX Full Duplex mode, and set the flow control option. However, you must still be sure that both link partners are set to the same operational mode, or the link will be unstable. For 1000Base-SX/LX/CX ports the speed and duplex modes are always configured at 1000MB Full Duplex.
The SmartSwitch 2000 Chassis View The Auto Negotiation Technologies list box has the following column headings: Advertised This column specifies whether the operational mode listed in the far right column of the list box will be advertised to the link partner. Only those operational modes supported by the local port (those with a “yes” listed in the Local column) can be advertised.
The SmartSwitch 2000 Chassis View 2. Click on Com Port Configuration, and then select Port 1, and release. The Com Port Configuration window, Figure 2-15, opens. Figure 2-15. The Com Port Configuration Window You can use the Com Port Configuration window to set the following operating parameters: Com Port Admin Use this field to administratively enable or disable the COM port.
The SmartSwitch 2000 Chassis View workstation. Note that when you configure the port as a PPP connection, you must select the desired baud rate in the Speed Selection field described below. Speed Selection If you have configured the selected port as a SLIP or PPP connection, you must select the appropriate baud rate: 2400, 4800, 9600, or 19,200. Note that this field will default to Auto-Baud and become unselectable when the Com Port Function is set to LM or UPS.
The SmartSwitch 2000 Chassis View You can also view information concerning the UPS connected to your SmartSwitch 2000 including: • The amount of time that your UPS has been running since the last start-up • The line voltage and battery output • The actual battery capacity of the UPS (dynamic bar graph) You can also use a button at the bottom of the window to disconnect your UPS, or you can use the Test option to initiate a self test of the unit. To access the UPS window: 1.
The SmartSwitch 2000 Chassis View • • • • • • • • Model 1250 Model 2000 Matrix 3000 Matrix 5000 SU 700 SU 1400 SU 2000XL Other UPS Uptime Displays the number of hours that the UPS has been operating since the last time it was started up. Line Voltage Displays the voltage coming through the line attached to the SmartSwitch 2000. Battery Output Displays the amount of battery output voltage. Battery Capacity Displays the percentage of remaining battery capacity (100% indicates a fully charged battery).
The SmartSwitch 2000 Chassis View To set the UPS ID: 1. Click on next to the SET UPS ID text box. A Model number menu displays. Scroll to highlight the appropriate UPS ID. (Consult the manual that was included when you purchased your UPS for the correct Model ID number.) 2. Click OK. The UPS ID you have chosen displays in the text box, and the UPS window will be active.
The SmartSwitch 2000 Chassis View To access the Port Redirect window: 1. Click on Device in the Chassis View menu bar to display the Device menu. 2. Click Port Redirector. The Port Redirect window, Figure 2-17, opens. Figure 2-17. The Port Redirect Window The current port mappings will be listed in this window. You may add or delete entries from this window. To add an entry: 1. Next to the Source Port display box click on port (Port X) from the drop down list. and select the desired source 2.
The SmartSwitch 2000 Chassis View To delete an entry: 1. Highlight the entry line in the current active entries list that you wish to delete. 2. Click Delete to remove the redirect pair you have highlighted from the current active entries list. The entry will be deleted from the current active entries list and the traffic from the source port will not be redirected to the destination port any longer. Priority Configuration The SmartSwitch 2000 devices support priority packet forwarding.
The SmartSwitch 2000 Chassis View You can use NetSight Element Manager to configure the criteria that determine the priority in which frames will be queued for transmission by your SmartSwitch 2000. Several different criteria can be used to determine a frame’s transmission queue order: • The device and port at which the frame was received. • The destination and/or source MAC address associated with the frame. • A combination of destination and/or source MAC address and the frame’s protocol type.
The SmartSwitch 2000 Chassis View Highlight a port, then use the drop-down list box to select a priority (Normal–7). Click Apply to set the priority at the device. Any priority of 1 or higher will allow packets received at the chosen port to be forwarded from the higher priority transmission queue. Figure 2-18.
The SmartSwitch 2000 Chassis View 2. Click on the Transmit Priority drop-down list box, and scroll to select the desired priority level (Normal–7) for forwarding packets received on the selected port. NOTE Since the SmartSwitch 2000 device has two transmit queues, a priority of Normal will cause packets received on that port to be forwarded through the lower priority queue, and any priority of 1 through 7 will cause the packets to be forwarded through the higher priority queue.
The SmartSwitch 2000 Chassis View To access the MAC Based Priority Configuration window: 1. Click on Device to access the Device menu. 2. Click on Priority Configuration, and then select MAC Based from the menu. The MAC Based Priority Configuration window opens. The MAC Based Priority Configuration window contains the following information: Current Priority Entries The Current Priority Entries list box displays any MAC-based priority entries that have been configured for the SmartSwitch 2000 device.
The SmartSwitch 2000 Chassis View To assign a transmit priority based on MAC-layer information: 1. Click on the Add button. The entry fields will be activated. 2. Click in the MAC Address text box, and type in the physical address in XX-XX-XX-XX-XX-XX format, where X is a valid hexadecimal value (A-F or 0-9), for which you want to configure a transmit priority. 3.
The SmartSwitch 2000 Chassis View 2. Click on the Priority drop-down list box, and scroll to select the new priority level (Normal–7) for forwarding packets received with the specified MAC-layer information. 3. Click the Apply button. The Current Priority Entries list box will be updated with the newly edited entry. To clear a priority entry from the ctPriorityExtMACTable: 1. Highlight the desired entry in the Current Priority Entries list box, and click on the Delete button.
The SmartSwitch 2000 Chassis View NOTE Since the SmartSwitch 2000 has two transmit queues, a priority of Normal will cause packets to be forwarded through the lower priority queue, and any priority of 1 through 7 will cause the packets to be forwarded through the higher priority queue. 4. Click Apply. The Frame Type Entries list box will be updated with the newly created entry. You can edit an existing frame Type entry by changing its previously assigned priority. 1.
The SmartSwitch 2000 Chassis View Figure 2-21. The System Resources Window CPU Type Displays the type and speed (in mega-hertz) of the CPU (processor) used by the system. Flash Memory Installed: Displays the total amount of installed flash memory (in Mbytes). Flash Memory Available: Displays (in Kbytes) the current amount of flash memory that is currently free and not currently being used for code and data. DRAM Installed: Displays the total installed local memory or (DRAM) in Mbytes.
The SmartSwitch 2000 Chassis View NVRAM Available: Displays (in Bytes) the current amount of non-volatile memory (NVRAM) that is free and not currently being used for data. Current Switch Utilization: Displays the current load on the switch, which is based on a percentage of maximum switching capacity of 100%.
The SmartSwitch 2000 Chassis View • none — the SmartSwitch 2000 will reserve all bandwidth for switching; therefore, if all the bandwidth is needed for switching, management frames may be dropped. • limited — the management of the SmartSwitch 2000 may appear slow while the SmartSwitch 2000 is at maximum switching load.
The SmartSwitch 2000 Chassis View What is an 802.1Q Port-Based VLAN? Switches that support the pre-standard IEEE 802.1Q draft specification for port-based VLANs act by classifying frames into VLAN membership. Usually, VLAN classification is based on tag headers (VLAN tags) in the headers of data frames. The tag header is inserted into the frame directly after the Source MAC address field. A four-byte field in the tag header is used as the VLAN identifier.
The SmartSwitch 2000 Chassis View Ingress List Operation A port’s ingress list specifies the VLAN with which received frames will be associated. The switch’s Filtering Database tracks the associations between VLAN eligibilities, MAC addresses, and port numbers. Untagged frames received by an 802.1Q switch port are classified according to the VLAN membership of the port that receives the frame. Tagged frames received by an 802.
The SmartSwitch 2000 Chassis View Hybrid Hybrid mode (enabled by default) allows a port to receive and transmit both tagged and untagged frames. In this mode, the port will be a member of its statically assigned VLAN, as well as any dynamically learned VLANs (remember, dynamically learned VLANs are subject to the same aging rules as source addresses). Configuring Your 802.1Q VLANS Before you can define and configure 802.1Q port-based VLANs on your device, you must activate the device’s 802.
The SmartSwitch 2000 Chassis View Figure 2-22. The VLAN Config Window The Configured VLANS list box and fields allow you to view, create, modify, delete, enable, and disable 802.1Q port-based VLANs. The list box displays the following information about your defined VLANs: VLAN ID The VLAN ID is used to identify data frames that originate from, and are intended for, the ports assigned to the VLAN. Up to 64 VLANs may be created, with VLAN IDs ranging from 2-4094.
The SmartSwitch 2000 Chassis View Creating and Modifying VLANs The fields immediately below the Configured VLANS list box are used to create and modify your port-based VLANs. To create a new VLAN: 1. In the VLAN ID field, enter a unique value between 2-4094. VLAN ID 1 is reserved for the Default VLAN, and cannot be used. 2. If desired, enter a name for the VLAN in the VLAN Name field. VLAN names must be 32 characters or less.
The SmartSwitch 2000 Chassis View Enabling and Disabling VLANs NOTE Unless Enable is selected when a VLAN is initially defined, it is disabled by default. A new VLAN that is left in a Disabled state will remain disabled until a port is assigned to it, at which time it will be automatically enabled. If you are changing a VLAN’s port assignment, the VLAN should be disabled before changing the port configuration.
The SmartSwitch 2000 Chassis View Figure 2-23. The VLAN Port Config Window The 802.1Q VLAN Port Assignment list box in this window displays the following information about ports on your 802.1Q switch: Slot/Port These fields display the slot and port index for each port on your 802.1Q switch. For the SmartSwitch 2000, the slot index will always be 1. VLAN ID This field displays the VLAN ID of the VLAN to which the port is currently assigned. Mode This field displays the port’s current mode of operation.
The SmartSwitch 2000 Chassis View • Hybrid mode, which allows a port to receive and transmit both tagged and untagged frames. In this mode, the port will be a member of its statically assigned VLAN, as well as any dynamically learned VLANs. Hybrid mode is enabled by default. For more information on 802.1Q port operational modes, see 802.1Q Port Types, on page 2-58. Discard This field displays the port’s current frame discard format (discardTagged, discardUntagged, or noDiscard).
The SmartSwitch 2000 Chassis View Setting Port Operational Modes To assign a port operational mode (dot1dTrunk, dot1QTrunk, or hybrid) to a port on your 802.1Q switch: 1. In the VLAN Port Config window’s list box, click to select a port to which you wish to assign a port operational mode. 2. In the Port Operational Mode field, click to select the desired operational mode. 3. Click the Apply button. The selected mode will be reflected in the list box for the selected port.
The SmartSwitch 2000 Chassis View Figure 2-24. The VLAN Egress Port Config Window The list box at the top of this window is used to select a configured VLAN for association with your switch’s ports. Clicking on a VLAN will display its currently associated ports in the lower portion of this window. The list box displays the following information: Slot Number This field displays the slot index for the device being configured. VID This field lists the VLAN IDs of the currently configured VLANs on your switch.
The SmartSwitch 2000 Chassis View Under the list box there are two groups of check boxes that display the ports on the switch. A checkmark in the port’s check box indicates that the VLAN selected in the list box is in the port’s egress list. The two groups are: Egress Ports Use these check boxes to add or remove the selected VLAN from the egress list of one or more ports. Egress Untagged List Use these check boxes to allow the ports to transmit untagged frames from the selected VLAN.
The SmartSwitch 2000 Chassis View 2. Select Broadcast Suppression. The Broadcast Statistics and Suppression window, Figure 2-25, opens. Figure 2-25. The Broadcast Statistics and Suppression Window Port # This read-only field indicates the number assigned to each interface on the device. Total RX Displays the total number of broadcast frames received on the interface since the device was last initialized.
The SmartSwitch 2000 Chassis View TIP In order to calculate the time since peak, subtract the value in the Time Since Peak column from the current sysUpTime displayed as Up Time in the front panel. Please note that the peak time you calculate will be within 5 minutes of the actual time since peak, as sysUpTime is polled by default at 3 minute intervals and the broadcast suppression values are polled by default at 2 minute intervals. To reset the Peak Rate and Time Since Peak values: 1.
The SmartSwitch 2000 Chassis View Setting the Device Date and Time You can select the Edit Device Time and Edit Device Date options from the menu to change the date and time stored in the device’s internal clock. To edit the device time: 1. Click on Device on the Chassis View window menu bar to access the Device menu. Click Edit Device Time. 2. The following change window, Figure 2-26, opens. Figure 2-26. The Edit Time Window 3.
The SmartSwitch 2000 Chassis View 3. Enter the new date in a mm/dd/yyyy format, either by highlighting the field you wish to change and using the up and down arrow buttons, or by simply entering the new value in the appropriate field. 4. Click OK to save your changes, or on the Cancel button to cancel. Enabling and Disabling Ports When you disable bridging at a port, you disconnect that port’s network from the bridge entirely.
The SmartSwitch 2000 Chassis View 2-72 Managing the Hub
Chapter 3 Alarm Configuration Accessing the Basic and Advanced Alarms windows; creating a basic alarm; creating an advanced alarm; creating events; assigning actions to events; viewing the event log You can configure alarms and events (and, where appropriate, actions) for each available interface through the RMON Alarm and Event functionality supported by your SmartSwitch 2000. TIP The Alarm, Event, and Actions windows described in this chapter are identical to those provided via the RMON utility.
Alarm Configuration Using the Advanced Alarms feature, you can define custom alarms for almost any MIB-II or RMON object, as long as it is present in the device firmware and its value is defined as an integer (including counters, timeticks, and gauges).
Alarm Configuration Accessing the Basic Alarm Configuration Window To access the RMON Basic Alarm Configuration window: 1. From the Chassis View, click on the appropriate port interface to display the Port menu. 2. Select Alarm Configuration. The RMON Basic Alarm Configuration window, Figure 3-1, opens. Figure 3-1.
Alarm Configuration Viewing Alarm Status The Basic Alarm Configuration window contains all the fields you need to configure one or more of the three basic alarms available for each interface installed in your RMON device: Kilobits — Total Errors — Broadcasts/Multicasts Use these fields at the top of the window to change the alarm type whose status is displayed in the list box.
Alarm Configuration Log/Trap Indicates whether or not each alarm has been configured to create a silent log of event occurrences and the alarms that triggered them, and whether or not each alarm has been configured to issue a trap in response to a rising or falling alarm condition. Possible values are log, trap, log&trap, or none. Polling Interval Displays the amount of time, in days, hours, minutes, and seconds, over which the selected alarm variable will be sampled.
Alarm Configuration The remainder of the window fields provide the means for configuring alarms for each available interface. The information provided in this screen is static once it is displayed; for updated information, click on the Refresh button. Adding or modifying an alarm automatically updates the list. Creating and Editing a Basic Alarm The editable fields at the bottom of the Basic Alarm Configuration window allow you to configure alarm parameters for each available interface.
Alarm Configuration NOTES In order for the trap selection to work properly, your SmartSwitch 2000 must be configured to send traps to your network management station. This is accomplished via Local Management and the Trap Table; consult your device hardware manual for more information. If you are monitoring a variable you consider to be critical, we do not recommend that you select Trap as the only event response; if a trap is lost due to a collision or other transmission problem, it will not be re-sent.
Alarm Configuration When configuring a Kilobits alarm, NetSight Element Manager converts octets into kilobits (units of 125 bytes, or octets) for you; for example, to set a falling threshold of 625 octets, enter a threshold value of 5. 9. In the Falling Action field, click to select the action you want your device to take in response to a falling alarm: Enable Port, Disable Port, or None. Note that this action enables and disables only bridging at the specified port, and not the interface itself.
Alarm Configuration Viewing the Basic Alarm Log If you have selected the “log” response for an alarm, and that alarm’s rising and/or falling threshold has been crossed, the Basic Alarms application will create a log of alarm occurrences. If a threshold has been crossed, it will be preceded in the interface list box display by a double greater-than sign (>>).
Alarm Configuration Description Provides a detailed description of the condition which triggered the alarm, including whether it was a Rising or Falling alarm, the Value which triggered the alarm, and the configured Threshold that was crossed. Each log will hold only a finite number of entries, which is determined by the resources available on the device; when the log is full, the oldest entries will be replaced by new ones.
Alarm Configuration Figure 3-3. The RMON Advanced Alarm/Event List Window NOTES Neither the Alarms or Events list is interface-specific; both will be displayed the same for every interface. Alarms and events which have been configured via the Basic Alarms window are not displayed in and cannot be accessed or edited from the Advanced Alarm/Event List window.
Alarm Configuration The fields in the Alarms Watch display include: 3-12 Index The index is a number that uniquely identifies each alarm. Index numbers are user-defined; you can use any indexing scheme that works for you. These numbers are permanently assigned to their associated alarms; however, index numbers made available by the deletion of existing alarms can be assigned to new alarms, as needed. Indices 2000 to 3999 are reserved and unavailable.
Alarm Configuration The information provided in this screen is static once it is displayed; for updated information, click Refresh. Adding or modifying an alarm automatically updates the list. The fields in the Events Watch display include: Index This is a number that uniquely identifies an entry in the event table; an index number is assigned when an event is created. These numbers are extremely important, as they are the means by which an event is associated with an alarm or a packet capture filter.
Alarm Configuration The main Alarm/Event window remains active while the Create/Edit Alarm window is open; to edit a different alarm (or use its settings as the basis of a new alarm), simply double-click on the alarm you want to use in the main Alarms Watch list, and the Create/Edit Alarm window will update accordingly. To configure an alarm: 1.
Alarm Configuration the creator of the alarm. Since any workstation can access and change the alarms you are setting in your SmartSwitch 2000, some owner identification can prevent alarms from being altered or deleted accidentally. The default value provided is — <(hostname)>
Alarm Configuration TIP If you don’t know the exact spelling of the OID you wish to use for your alarm variable, and you can’t find it by searching through the tree, use the MIB Tool Find feature to locate the OID and determine its exact spelling (and tree location). For more information on the MIB Tool utility and its Find capabilities, see the MIB Tools chapter in the Tools Guide. The Find feature is not case-sensitive.
Alarm Configuration TIP You can use the MIB Tree panel to determine which objects are tabular and which are not: objects which are part of a table will descend from a blue folder (which will have a “T” on it, and a name which will almost always include the word “table”); objects which are not will descend directly from a yellow folder.
Alarm Configuration NOTE If you wish to set an alarm on an object whose instance is non-integral — for example, a Host Table object indexed by MAC address — or on an object with multiple indices, like a Matrix Table entry (which is indexed by a pair of MAC addresses), you must follow certain special procedures for defining the instance. For these OIDs, the instance definition must take the following format: table index.length(in bytes).
Alarm Configuration 7. Since the first sample taken can be misleading, you can use the selections in the Startup Alarm box to disable either the rising or the falling threshold for that sample only. If you would like to exclude the falling alarm, select the Rising option; the first sample taken will only generate a rising alarm, even if the sample value is at or below the falling threshold.
Alarm Configuration 13. Click Apply to set your changes. If you have made any errors in configuring alarm parameters (using an invalid value in any field, leaving a field blank, or selecting an alarm variable which is not resident on the device), an error window with the appropriate message displays. Correct the noted problem(s), and click Apply again.
Alarm Configuration TIP Whether you are modifying an existing event or creating a new one is determined solely by the assignment of the Index number: if you assign a previously unused index number, a new event instance will be created; if you use an existing index number, its associated event will be modified. Figure 3-5. The RMON Create/Edit Events Window 2. If you are creating a new event, use the Index field to assign a unique, currently unused index number to identify the event.
Alarm Configuration 3. Click in the Description text box to enter any text description you want to identify the event. This description displays in the Events Watch window and help you distinguish among the events you have configured. 4. Any value you enter in the Community field will be included in any trap messages issued by your SmartSwitch 2000 when this event is triggered; this value is also used to direct traps related to this event to the appropriate management workstation(s): a.
Alarm Configuration c. Select both Log and Trap to both log the event occurrence and generate the traps. If you select neither option, the event’s occurrences will neither be logged nor generate traps; unless the event includes an action or a series of actions, this effectively disables the event (since there will be no indication that it has been triggered).
Alarm Configuration Figure 3-6. The RMON Create/Edit Actions Window 2. The index number and description of the event with which the action or actions will be associated is displayed in the Event: field at the top of the window. Information in this field is not editable; to assign actions to a different event, double-click on the correct event in the Events Watch list; both the Create/Edit Events and Create/Edit Actions windows will update accordingly. 3.
Alarm Configuration 5. Once you have selected the object you wish to set, you must assign the appropriate instance value in the Instance field. If you’re not sure how the object you wish to set is instanced, you can use the MIB Tree utility (described in the Tools Guide) to query it; all available instances for the object will be displayed. 6. In the Value field, enter the value you wish to set for the selected object.
Alarm Configuration Figure 3-7. The Event Log Window The top portion of the window contains the device information boxes, as well as the event index number and the event description; the log itself includes the following fields: Index This index number is not the event’s index, but a separate index that uniquely identifies this occurrence of the event. Time Indicates the date and time of each event occurrence.
Alarm Configuration How Rising and Falling Thresholds Work Rising and falling thresholds are intended to be used in pairs, and can be used to provide notification of spikes or drops in a monitored value — either of which can indicate a network problem.
Alarm Configuration 3-28 How Rising and Falling Thresholds Work
Chapter 4 Statistics Accessing interface statistics from the Chassis View; available statistics windows Each port menu in the SmartSwitch 2000 Chassis View provides two statistics selections: Statistics and I/F Statistics.
Statistics NOTE If the selected interface displays MIB-II I/F Statistics and you were expecting to see RMON statistics, the RMON Default MIB component may be disabled; see the RMON User’s Guide for information on how to check (and if necessary, change) the admin status of the RMON Default MIB component. RMON Statistics The RMON Ethernet Statistics window (Figure 4-1) provides a detailed statistical breakdown of traffic on the monitored Ethernet network.
Statistics Ethernet statistics are: Bytes Displays the total number of bytes contained in packets processed on the network segment. This number includes bytes contained in error packets. Packets Displays the total number of packets processed on the network segment. Again, this number includes error packets. Drop Events This field indicates the number of times packets were dropped because the device could not keep up with the flow of traffic on the network.
Statistics Fragments Indicates the number of packets processed by the network segment that were undersized (less than 64 bytes in length; a runt packet) and had either a non-integral number of bytes (alignment error) or a bad frame check sequence (CRC error). Jabbers Indicates the number of packets processed by the network segment that were oversized (greater than 1518 bytes; a giant packet) and had either a non-integral number of bytes (alignment error) or a bad frame check sequence (CRC error).
Statistics The percentages displayed to the right of the numerical values for these fields indicate what percentage of all packets transmitted on the network segment were of the noted size. Unless the network segment has experienced a significant number of runts and/or giants (which are not counted in this group), these percentages will add up to 100.
Statistics To temporarily freeze the statistics display, select the Freeze Stats option; in this mode, statistics will continue to be collected, but the display will not update. To resume normal updates, click again to de-select the freeze option. Printing Statistics The Print button located at the bottom of the Statistics window allows you to print the current snapshot of statistical data. When you select Print, a standard Windows print window like the sample shown in Figure 4-2 opens. Figure 4-2.
Statistics Figure 4-3. The Interface Statistics Window Three informational fields appear in the upper portion of the window: Description Displays the interface description for the currently selected port: Enet Port. Address Displays the MAC (physical) address of the selected port. Type Displays the interface type of the selected port: ethernet-csmacd, atm, or fddi.
Statistics Discarded Displays the number of packets which were discarded even though they contained no errors that would prevent transmission. Good packets are typically discarded to free up buffer space when the network becomes very busy; if this is occurring routinely, it usually means that network traffic is overwhelming the device. To solve this problem, you may need to re-configure your bridging parameters, or perhaps re-configure your network to add additional bridges.
Chapter 5 Managing Ethernet MicroLAN Switches Viewing the Statistics, Timer Statistics, and Performance Graph windows; using the repeater, board, and port Alarm Limits windows; setting alarm limits; link state traps, segmentation traps, and source address traps The Repeater menu lets you access windows to monitor and manage repeated Ethernet networks supported by a SmartSwitch 2000 Ethernet MicroLAN Switch (e.g., the 2E43-51 or 2E43-51R).
Managing Ethernet MicroLAN Switches The Statistics Windows At the Statistics windows, you can view accumulated statistics and error breakdowns for each network supported by the Ethernet MicroLAN Switch, and for each individual module and port. A pie chart graphically depicts these statistics for quick visual reference.
Managing Ethernet MicroLAN Switches Figure 5-1. The Repeater Statistics Window To open the board-level Statistics window from the Chassis View window: 1. Click on the appropriate Module Index to display the Module menu. 2. Select the appropriate repeater channel (A - H) to reveal the board-level Repeater menu. 3. Click on Statistics. The board-level Statistics window opens. To access the port-level Statistics window: 1. Click on the appropriate Port to display the Port menu. 2. Click on Statistics.
Managing Ethernet MicroLAN Switches Statistics Defined The Statistics window displays the statistical counts accumulated since the Ethernet MicroLAN Module was last reset; the following information is displayed: Active Users Displays the number of users (identified by MAC [Ethernet] address) communicating via a port on the Ethernet MicroLAN Module. For an individual port, the number of Active Users can tell you whether the port is supporting a station or trunk connection.
Managing Ethernet MicroLAN Switches Soft Errors CRC Errors Displays the total number of packets with CRC (Cyclical Redundancy Check) errors that the repeater, board, or port has received from the network. CRC errors occur when packets are somehow damaged in transit. Alignment Errors Displays the total number of misaligned packets received by the repeater, board, or port. A misaligned packet is one that contains a non-integral number of bytes (that is, any unit of bits less than a byte).
Managing Ethernet MicroLAN Switches Timer Statistics You can use the Timer Statistics windows to gather statistical information concerning the repeater channels on your Ethernet MicroLAN Module and its boards and/or ports over a user-set time period. Statistics are displayed both numerically and graphically, using color-coded, dynamic bar charts. These bar charts display the elapsed, average, and peak values for percent load, percent collisions, and percent errors at the repeater, board, or port level.
Managing Ethernet MicroLAN Switches Figure 5-2. The Repeater Timer Statistics Window To open the board-level Timer Statistics window: 1. Click on the appropriate Module Index to display the Module menu. 2. Select the appropriate repeater channel (A - H) to reveal the board-level Repeater menu. 3. Click on Timer Statistics. The board-level Timer Statistics window opens. To access the port-level Timer Statistics window: 1. Click on the appropriate Port to display the Port menu. 2. Click on Timer Statistics.
Managing Ethernet MicroLAN Switches % Errors The percentage of errors processed by the selected repeater, board, or port during the user-defined time interval. Setting the Timer Statistics Interval To set the Timer Statistics time interval: 1. Click on the clock symbol ( ) next to the Interval text box. The New Timer Interval text box, Figure 5-3, opens. Figure 5-3. New Timer Interval Text Box 2.
Managing Ethernet MicroLAN Switches Accessing the Performance Graph Windows To access the repeater-level Performance Graph window: 1. Click on Repeater on the Chassis View menu bar; a menu listing active repeater channels opens. 2. Select the appropriate repeater channel (A - H) to reveal the Repeater menu. 3. Click on Performance Graph. The Performance Graph window, Figure 5-4, opens. Figure 5-4. The Repeater Performance Graph Window To access the board-level Performance Graph windows: 1.
Managing Ethernet MicroLAN Switches 2. Click on Performance Graph. The port-level Performance Graph window opens. The Board and Port Performance Graph windows are similar to the Repeater Performance Graph window displayed in Figure 5-4, except that they display statistics applicable to the board or port level. For each chosen statistic, Performance Graphs display both average and peak activity, as well as the date and time the peak values were recorded; average values are also displayed graphically.
Managing Ethernet MicroLAN Switches Runt Packets The number of runt packets detected by the selected repeater, board, or port. A runt frame is one that is less than the minimum Ethernet frame size of 64 bytes. Giant Packets The number of giant packets detected by the selected repeater, board, or port. A giant frame exceeds the maximum Ethernet frame size of 1518 bytes (excluding the preamble). Algn. Errors The number of misaligned packets detected by the selected repeater, board, or port.
Managing Ethernet MicroLAN Switches Figure 5-5. Detail Breakdown Window Frame Status Breakdown With the Detail Breakdown window, you can see the status of the frames passing through your each repeater channel and each board and port.
Managing Ethernet MicroLAN Switches Alarm Limits Using the Alarm Limits windows, you can configure alarm limits for the Ethernet MicroLAN Switch at the repeater, board, and port levels; these alarms will notify you – via traps sent to NetSight Element Manager’s alarm logging facility – that your system has experienced a certain percentage of collisions or errors, or a certain number of specific packet types, within a user-defined time interval.
Managing Ethernet MicroLAN Switches Figure 5-6. The Repeater Alarm Limits Window To access the board-level Alarm Limits window: 1. Click on the appropriate Module Index to display the Module menu. 2. Select the appropriate repeater channel (A - H), then right to reveal the board-level Repeater menu. 3. Click on Alarm Limits. The Board Alarm Limits window, Figure 5-7, opens.
Managing Ethernet MicroLAN Switches Figure 5-7. The Board Alarm Limits Window To access the port-level Alarm Limits window: 1. Click once on the appropriate Port to display the Port menu. 2. Click on Alarm Limits. The Port Alarm Limits window, Figure 5-8, opens.
Managing Ethernet MicroLAN Switches Figure 5-8. Port Alarm Limits Window The Alarm Limits window displays the following fields: Collisions Use the text box in this field to enter the number of collisions per good packet you wish to allow on the selected repeater, board, or port before an alarm is generated; allowable values are 1-15.
Managing Ethernet MicroLAN Switches Packets Use the text box in this field to determine the total number of packets (including all errors except collisions) that must be processed by the repeater, board, or port within the user-specified time before an alarm is triggered. Allowable values are 1 32 to Ý 4 billion (2 -1).
Managing Ethernet MicroLAN Switches within: This field displays the user-configurable alarm limit timer interval: the amount of time the selected statistics will be counted before being compared to the configured thresholds. The allowable values range from 10 seconds to 23 hrs/59 mins/59 secs. Configuring Alarms You configure alarms by choosing the alarm you wish to enable, setting the threshold to the desired level, and selecting a time interval within which that threshold must occur.
Managing Ethernet MicroLAN Switches Setting Alarm Limits To set repeater-, board-, or port-level alarms, first be sure you have opened the appropriate Alarm Limits window, then follow the steps outlined below: 1. Using the mouse, click and drag to highlight the text box in the alarm field you wish to configure (Collisions, Packets, Broadcast Packets, or % Errors). 2. Enter the desired threshold value, being sure to keep in mind the units and range limits described above. 3.
Managing Ethernet MicroLAN Switches NOTE In order for your device to issue any traps – and in order for your management workstation to receive those traps – your Ethernet MicroLAN Switch’s trap table must have been properly configured via Local Management; see the Ethernet MicroLAN Switch hardware manual or Local Management documentation for more information. Accessing the Trap Selection Windows To open the repeater-level Trap Selection window from the Chassis View: 1.
Managing Ethernet MicroLAN Switches The Board Trap Selection window is similar to the Repeater Trap Selection window displayed in Figure 5-10, and serves the same function (since, for the Ethernet MicroLAN Switch, a “board” is the equivalent of a repeater channel). If all port-level trap settings are uniform at the current level of device management (i.e.
Managing Ethernet MicroLAN Switches Information included in a Link State trap will include the board number and port number associated with the trap. Segmentation Traps Ethernet repeaters count collisions at each port. If a port experiences 32 consecutive collisions, or if the port’s collision detector is on for more than 2-3 µs, the repeater segments the port to isolate the source of the collisions from the rest of the network. When the repeater segments a port, it generates a portSegmenting trap.
Managing Ethernet MicroLAN Switches A lockStatusChanged trap is generated when the ports in the hub are locked or unlocked using the Lock/Unlock Ports option on the Repeater menus; the interesting information is the new lock status.
Managing Ethernet MicroLAN Switches 3. Click Apply. The device will now issue, or stop issuing, the indicated traps to your management workstation. Keep in mind, however, that no traps will be issued to your management station unless the Ethernet MicroLAN Switch’s trap table has been properly configured via Local Management. Consult your Local Management documentation for more information. 4.
Chapter 6 FDDI Applications Concentrator configuration; connection policy; station list; concentrator performance; FDDI statistics; frame translation The FDDI menu lets you access windows to view a SmartSwitch 2000’s FDDI configuration, connection policy, station list, and performance with respect to each Station Management (SMT) entity present on an installed HSIM-F6 High Speed Interface Module. You can also configure your module’s frame translation settings using the Frame Translation window.
FDDI Applications • Station List — With this window you can see the configuration of the ring on which the SMT entity resides, including number of nodes, node addresses (both Canonical and MAC), node class, and current ring topology • Performance — This window lets you view the number of frames transmitted and received on the ring as detected by the selected SMT entity, along with error and lost frames, and the number of ring initializations.
FDDI Applications Figure 6-2. The Concentrator Configuration Window MAC State This field indicates the current state of the MAC on the FDDI ring associated with the selected SMT entity. The RMT component of SMT monitors MAC operation and takes actions necessary to aid in achieving an operational ring.
FDDI Applications Non-Op-Dup The ring is not operational; the address of the MAC under control of the SMT entity has been found to duplicate that of another MAC on the ring. The duplicate address condition prevented ring recovery and initialization after a claim and beacon process. This state will not occur unless you are using locally- administered addresses, as factory-set MAC addresses are guaranteed to be unique.
FDDI Applications T-Req. (Requested Target Token Rotation Time) The token rotation time bid made by the selected SMT entity during ring initialization. Each station detecting that the ring must be initialized begins a claim token process and issues a stream of Claim Frames, which negotiate the value assigned to the Target Token Rotation Time (TTRT). The information field of these frames contains the issuing station’s bid for the value of TTRT.
FDDI Applications • Secondary 2 indicates that the Secondary 2 FDDI ring is being used. • Local means that the MAC is connected to one or more nodes but is not connected to the dual ring. • Isolated means that the MAC has no connection to the ring or other concentrator ports. • Unknown or ? indicates that your management application cannot determine the MAC path for the HSIM-F6. Ring Configuration The current configuration of the MAC and physical layers of the A and B ports.
FDDI Applications The following table summarizes the FDDI connection rules: Table 6-1. FDDI Connection Rules A B S M A V, U V V, U V, P B V V, U V, U V, P S V, U V, U V V M V V V X V — valid connection X — illegal connection U — undesirable (but legal) connection P — valid, but when both A and B are connected to M ports (a dual-homing configuration), only the B connection is used.
FDDI Applications TIP You can use any SNMP Set Request or MIB tool to edit the Connection Policy for your device by setting the fddimibSMTConnectionPolicy MIB OID (part of the MIBII FDDI Transmission MIB (RFC1512). fddimibSMTConnectionPolicy is simply a 16-bit integer value (ranging from 32768 to 65535) that corresponds to the connection policy (in the “Reject X-Y” format, where X represents a port on the FDDI Switch Module, and Y represents the attaching node).
FDDI Applications Figure 6-4. The Station List Window Address Mode Displays the current mode being used to display the addresses of the devices in the Station List. The two possible modes are Canonical (FDDI) or MAC (Ethernet). To change the current Address Mode, click on the Address Mode button at the bottom of the window. The current address mode will change in the Address Mode field and the Stations panel.
FDDI Applications MAC Address Displays the manufacturer-set MAC address of the node inserted into the ring. MAC addresses are hard-coded into the device and are not configurable. Node Class Displays the type of ring device. Possible values are: Station Indicates an FDDI node capable of transmitting, receiving, and repeating data. Concentrator Indicates an FDDI node that provides attachment points to the ring for stations that are not directly connected to the dual ring.
FDDI Applications Statistics are displayed in three ways: • By count (i.e., the number detected of each for the selected interval). • By rate (i.e., the number of each per second, as averaged over the selected interval). • Graphically, as a percentage of each with respect to total network load processed by the HSIM-F6 during the last interval. You can view the concentrator performance for three different intervals: • Absolute – Counts recorded since the device was last started.
FDDI Applications FDDI Statistics The FDDI Statistics window displays traffic statistics for the HSIM-F6’s SMT entity, including the number of frames and kilobytes per second (averaged over a defined poll rate), the peak number of kilobytes per second, and the module’s bandwidth utilization (expressed as a percentage) for the current poll interval. To access the FDDI Statistics window: 1. In the Chassis View window, click on Device to display the Device menu. 2. Click on FDDI Statistics.
FDDI Applications %Util The percentage of utilization of available bandwidth by the indicated SMT over the current poll interval; the percentage is calculated by dividing the actual number of transmitted bytes/sec into the maximum number of bytes/sec that could be transmitted (125,000,000 bytes/sec potential on a 100 Megabit/second ring). Setting the FDDI Statistics Poll Rate 1. Click on the clock symbol ( ) next to the Poll Rate (sec) text box. The New Timer Interval text box, Figure 6-7, will appear.
FDDI Applications Figure 6-8. The Frame Translation Window Information about Ethernet and FDDI Frame Types There are four frame types which can be transmitted on an IEEE 802.3/Ethernet network – Ethernet II, Ethernet 802.2, Ethernet 802.3 (or Raw Ethernet), and Ethernet SNAP; there two frame types which can be transmitted on an FDDI network: FDDI 802.2 and FDDI SNAP. Each of these frame types is described in more detail in the sections that follow. Bridges connecting IEEE 802.
FDDI Applications If the frame is exiting the FDDI ring through another FDDI/Ethernet bridge, the FDDI frame must be converted back into an IEEE 802.3/Ethernet frame. As there are four potential Ethernet frame types to which the two FDDI frame types can be translated, you must determine which translation options you want in effect — depending on which network protocols and applications are being run on the destination network.
FDDI Applications This is the default frame type for Novell NetWare software version 3.12 and beyond; it is also used for OSI packets on IEEE 802.x LAN networks. Ethernet 802.3 (Ethernet Raw) The Ethernet 802.3 frame format has an 802.3 MAC layer header (as do Ethernet 802.2 frames); however, it does not contain an 802.2 LLC header. Instead, Novell IPX is fixed within the packet as the network layer protocol. This frame type – also known as Raw 802.
FDDI Applications There is no FDDI equivalent for Ethernet 802.3 Raw frames or Ethernet II frames. Enterasys’ Ethernet/FDDI bridges will automatically translate Ethernet II frames into FDDI SNAP frames, by identifying it as a SNAP frame in the LLC header, and inserting a SNAP header with the Ethernet Type field. By default, Enterasys’ Ethernet-to- FDDI bridges will translate an 802.3 Raw frame into an FDDI MAC frame – although you can use the FDDI Frame Translation window to alter the default translation.
FDDI Applications 802.2, FDDI SNAP (generally used when bridging to an AppleTalk environment on an FDDI ring), or FDDI MAC (the default option, which translates the frame into an FDDI MAC frame – which will not recognized as a data frame on an FDDI ring, but will be recognized by an Enterasys Ethernet/FDDI bridge). Translate all Novell FDDI SNAP frames to This selection box lets you set the translation parameters for Novell IPX FDDI SNAP frames.
Chapter 7 ATM Configuration Viewing connection data; configuring Permanent Virtual Circuits (PVCs); adding and deleting connection entries The ATM Connections option is available when you have an HSIM-A6DP installed and enabled in your SmartSwitch 2000. The ATM HSIM-A6DP provides the connectivity that allows you to merge ATM network segments with traditional LAN technologies.
ATM Configuration Figure 7-1. Current ATM Connections Window The Current ATM Connections window provides the following information about the device’s ATM connections: Connection Data The Connection Data fields provide the following information about each ATM interface available on the device: I/F Displays the index number assigned to each ATM interface present on the selected module. The HSIM-A6DP will provide a single ATM interface, indexed 27.
ATM Configuration VPI Displays the Virtual Path Identifier assigned to the connection. Virtual Path Identifiers are used to group virtual connections, allowing for channel trunking between ATM switches. Each VPI can be configured to carry many different channels (designated by VCIs) between two points. VCI Displays the Virtual Channel Identifier assigned to the connection; allowable values are 0 - 1023 for each VPI.
ATM Configuration Configuring Connections Adding a New Connection To configure new Permanent Virtual Circuits (PVCs), enter the following information in the text fields which appear just below the settings list box: 1. In the I/F text box, click on the down-arrow to the right of the text field, and select the interface for which you wish to configure a connection. All available ATM interfaces will be listed in this menu. 2.
Chapter 8 HSIM-W87 Configuration Configuring the T3 interface; configuring T1 connections; setting priority IP Addresses The HSIM-W87 is a High Speed Interface Module that provides Wide Area Network (WAN) services. The HSIM has a DS3 interface (T3), providing up to 28 separate DS1 connections (T1). The HSIM-W87 design provides WAN connectivity to any SmartSwitch that supports HSIM connections. The HSIM-W87 operates in a switching/bridging mode.
HSIM-W87 Configuration Click here to select or deselect an option button. Figure 8-1. The T3 Config Window The T3 Config window provides the following information about the device’s T3 configuration and allows you to set certain values: Time Elapsed Indicates the number of seconds that have elapsed since the beginning of the near end current error-measurement period. To update this field you must close and reopen the window.
HSIM-W87 Configuration Line Status This field indicates the line status of the interface. It contains loopback state and failure state information. Scroll to view all of the status information, if necessary. T3 Line Type Select the type of DS3 or C-bit application implementing this interface: M23 or CbitParity. The type of interface affects the interpretation of the usage and error statistics. T3 Loop Back Select the loopback configuration of the T3 interface. Options are: No Loop Not in a loopback state.
HSIM-W87 Configuration Click here to select or deselect an option. Figure 8-2. The T1 Config Window At the top of the T1 Config window a list box displays configuration information for each T1 connection (line). When you highlight a specific T1 line by clicking on it, the fields below the list box display the current values for that line, and allow you to change those values.
HSIM-W87 Configuration Valid Intervals Displays the number of previous intervals for which valid data was collected. The value will be 96 unless the interface was brought online within the last 24 hours, in which case the value will be the number of complete 15-minute intervals since the interface has been online. T1 Frame Type Displays the type of service you are using over your T1 line.
HSIM-W87 Configuration Configuring IP Priority The IP Priority Configuration window allows you to assign priority transmission to up to 16 IP addresses communicating across the HSIM-W87. To access the IP Priority Config window: 1. Click on the appropriate Module Index to access the Module menu. 2. Select IP Priority Config. The IP Priority Config window, Figure 8-3, opens. Figure 8-3.
HSIM-W87 Configuration Number of Entries Displays the number of Priority IP addresses currently configured. This number will change each time you add or delete an IP address in the list box. Below these two fields is a list box displaying the currently configured IP Priority Addresses. Each address is automatically assigned an Address ID when it is configured. The lower the ID number, the higher the priority.
HSIM-W87 Configuration 8-8 Configuring IP Priority
Index Symbols % Load 4-3 % of Tot. Errors 4-4 Numerics 802.1d 2-59, 2-64 802.1Q 1-1 1d Trunk 2-59, 2-64 1Q Trunk 2-59, 2-64 Default VLAN 2-61 Egress List 2-59 Egress List Configuration 2-66 frame discard format 2-65 Hybrid 2-60, 2-65 Ingress List 2-59 Ingress List Configuration 2-63 Port Discard 2-66 port types 2-59 Tagged frames 2-59 Untagged frames 2-59 VLAN Configuration 2-60 VLAN ID 2-61, 2-64 VLAN name 2-61 802.
Index command buttons 1-9 community names 3-7 in traps 3-7 Concentrator 6-10 Concentrator Configuration window 6-2 Concentrator M Ports 6-5 Concentrator Non-M Ports 6-5 Configuration 6-1 Connection Management 6-1 Connection Policy 6-1 Connection Policy window 6-6 Connection Rules 6-7 Connection Status 2-2 Count 6-11 CRC Errors 5-5, 5-10, 5-17 CRC/Alignment 4-3 Cumulative 6-11 D Default VLAN 2-61 Delta 4-5, 5-5, 6-11 Delta Values 3-2, 3-5, 3-7, 3-12, 3-19, 4-2 Detect 6-3 Device Date 2-71 Device Menu 2-5 De
Index H Hard Errors 5-4 Help button 1-9, 1-10 Help Menu 2-9 HSIM-A6DP 2-58, 7-1 HSIM-F6 6-6, 6-11 HSIM-W87 8-1 hysteresis 3-10, 3-27 Local-Timing 8-3 Location 1-9 lockStatusChanged (trap) 5-23 Log Events 3-22 Log/Trap 3-5 Logical Status 2-20 Loop-Timing 8-3 Lost Frames 6-11 I M I/F Summary interface performance statistics 2-20 I/F Summary window 2-19 IEEE 802.
Index Oversized 4-4 Owner 3-15, 3-22 P packet capture events 3-1 Packet count 5-17 Packet Type 4-3 Packets 4-3, 5-19 Packets Received 2-23, 4-8 Packets Transmitted 2-24, 4-8 Payload 8-3, 8-5 Peak Values 4-2, 4-4, 4-5, 5-6 Percent Load 5-10 Performance 6-2 Permanent Virtual Circuits (PVCs) 7-1 Physical Status 2-20 Polling Interval 3-5 Port Assignment 2-15, 2-63 port display, color codes 2-2 Port Menus 2-10 Port Number 1-9, 3-4 Port Operational Modes 2-66 Port Priority Configuration window 2-48 assigning tr
Index Stations Panel 6-9 Statistics, Ethernet 4-2 Status (alarm) 3-4 Switched Virtual Circuits (SVCs) 7-1 T T1 Configuration 8-3 T1 Frame Type 8-5 T1 Line BuildOut 8-5 T1 Line Number 8-4 T1 Loop Back 8-5 T3 Configuration 8-1 T3 Line Type 8-3 T3 Loop Back 8-3 Tag Header 2-47, 2-58, 2-59 tagging 2-47 technical support 1-10 Test Results 2-44 threshold pairs 3-27 threshold value 5-19 Time Elapsed 8-2, 8-4 time interval 5-18 Timer Statistics time interval 5-8 T-Neg.
Index Index-6