
Operator`s manual


Among the hallmarks of this fine amp are painstaking workmanship and finishing as
well as rigorously tested and carefully selected quality components. You'll find
guidelines on care and maintenance of tube amps on page 25. Under the heading Tips
from the designer, you'll come across practical tips on the aforementioned features
throughout the manual. All critical information concerning the operation of this amp
is preceded by "NOTE", "CAUTION", "Read and heed" or some other eye-catching
comment. We're calling your attention to these remarks for reasons of safety or other
compelling motives, so please give them due consideration.
Everyone at ENGL is confident that the
and are sure to delight you:
Though this amp head is relatively easy to handle and you're probably raring to give it
a go, I recommend that you read the owner's manual thoroughly before you power it
up. It is equipped with several safety features that require further explanation to
prevent malfunctions.
1. ENGL Steve Morse Signature Tube Amp Head;
2. mains cord;
3. this manual;
4. a pamphlet entitled
.
At the back of the manual, you'll find fold-out diagrams of the front and rear panels.
As you're reading the descriptions of the amp's features, you'll gain a better
understanding of the topic of discussion if you unfold and refer to them as we go!
Steve Morse Signature tube amp's
extraordinary versatility outstanding features Simply
plug in, play and be inspired by the tone of your new ENGL amp!
A few words of wisdom from the designer:
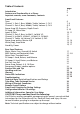
Contents:
Instructions for the Prevention of Fire,
Electrical Shock and Injury
Front Panel Features
The voicing feature operates globally. It affects all three channels, but achieves
different results in each. In Channel 1, boosts the preamp's upper high-frequency
range, much like a Bright control. Channel 2 delivers powerful midrange response
when is deactivated; engaging it scoops these mids. In Channel 3, Tone subtly
influences the frequency range of the four Mid knobs.
The red LED above this button lights up to indicate the Tone function is on. This feature
can also be switched via MIDI program change, MIDI Controller #29 or the Custom Z-9
Footswitch.
Activating the Tone button for Channel 1 yields crisp, glassier sounds. It's a great
antidote to the muddy tone of some humbucking pick-ups.
I matched to suit the three channels' Gain characteristics, which is why you get
different sounds when you activate it. Its effect is strongest in Channel 1's Lo Gain
range. As the name would indicate, the amp's gain level is lowest at this setting, so you
1 Tone
Tone
Tone
Tone
A tip from the designer:
6