Steve Morse Signature 100 3 Channel Full Tube Guitar Amplifier Operator´s Manual Please, first read this manual carefully!
Tube Amp Technology
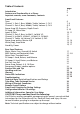
Table of Contents Introduction Features and Functionality at a Glance Impotant remarks, some comments, Contents page: 4 5 6 Front Panel Features: Tone Channel 1: Gain 1, Bass, Middle, Treble, Volume 1, CH 1 Channel 2: Gain 2, Bass, Middle, Treble, Volume 2, CH 2 Power Amp EQ: Presence, Depth Punch FX Loop I/II, Noise Gate Input, Hi Gain Channel 3: Gain 3, Bass, Lo Mid 1, Lo Mid 1/2 Channel 3: Lo Mid 2, Hi Mid 1, Hi Mid 1/2, Hi Mid 2 Channel 3: Treble, Lo Volume 3, Hi Volume 3, CH3 Power Amp section: Maste
Congratulations on your great choice of amp, the Steve Morse Signature Tube Head from ! Steve: "I've liked every ENGL Stack I've played through and this one suits my playing style the best!" Guitarist extraordinaire Steve Morse and ENGL amp designer Horst Langer teamed up to create groundbreaking features and painstakingly crafted, tube-driven sound. The two met up on several occasions to tweak this amp until it delivered what Steve wants and you expect – to-die-for, top-drawer tube tone.
This affords you: 1. a logical control feature array, utmost ease of use and remarkably intuitive handling; 2. excellent sound-shaping options and greatest flexibility courtesy of the many voicing options and special features, and 128 MIDI presets offering a bevy of programming options; 3. fundamental sounds in excellent tube quality: Clean, Crunch, and Lead. Two Gain stages in every channel double the count of instant-access sounds.
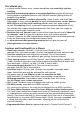
Among the hallmarks of this fine amp are painstaking workmanship and finishing as well as rigorously tested and carefully selected quality components. You'll find guidelines on care and maintenance of tube amps on page 25. Under the heading Tips from the designer, you'll come across practical tips on the aforementioned features throughout the manual. All critical information concerning the operation of this amp is preceded by "NOTE", "CAUTION", "Read and heed" or some other eye-catching comment.
can activate Tone to conjure sparkling clean sounds with Treble and Presence settings as low as the 12 o'clock position. In Channel 1's Hi Gain range Tone active delivers a rich, pleasing overtone spectrum in finest tube-approved quality.
range is recommended). You will find that grittier tones generally sound better with a touch less treble because preamp saturation makes higher frequencies figure more prominently in the signal. Bear in mind that you also have the Tone (1) button, as well as the power amp Presence (14) an Depth Punch (15) knobs, at your disposal for shaping the frequency range. I suggest you get into the habit of dialing in lower Treble settings.
prevent the pickups and speakers from generating feedback (a setting in the 10-to -1 o'clock range is recommended). Each channel is equipped with a dedicated EQ so you can tweak its sound separately to suit your taste and the given sonic scenario. Bear in mind that you also have the Tone (1) button, as well as the two power amp Presence (14) and Depth Punch (15) knobs, at your disposal for shaping the frequency range.
17 Noise Gate Press this button to activate an onboard Noise Gate and suppress excess noise in channel 2 and 3. Control the Noise Gate using the Level Threshold (48) knob on the back of the amp. The LED above the button lights up to indicate the Noise Gate is activated. This feature can also be switched via MIDI program change, MIDI Controller #24 or the ENGL Custom Z-9 Footswitch.
19 Hi Gain Pressing this button ups input sensitivity, thereby increasing the amplification factor and the amount of distortion in all three preamp channels CH1, CH2 and CH3. The LED above this button lights up to indicate Hi Gain is active. This feature can also be switched via MIDI program change,MIDI Controller #22 or Custom Z-9 Footswitch. A tip from the designer: Obviously, the difference between Lo and High Gain is the latter gives you more preamp juice.
24 Lo Mid 2 Mid knob #2 in preamp Channel 3's passive voicing section shapes the low mids. The Tone button (1) setting subtly influences the Low Mid 2 circuit's frequency range and bandwidth. Tip from the designer: I decided to assign different frequency ranges and bandwidths to the two Lo Mid 1 and Lo Mid 2 knobs to give you the greatest possible latitude for shaping sounds as you see fit. In practice, this means identical settings on the two knobs yield different tonal results.
equation and you end up with amazing tonal flexibility. You'll like having sounds of such diversity and quality at your disposal. And you'll love being able to access such a broad spectrum so easily on stage. 28 Treble This is the preamp voicing section's passive high-frequency EQ for Channel 3. A tip from the designer: To help you get acquainted with the amp's fundamental sounds, I recommend that you set all tone controls to about the center or 12 o'clock position.
MIDI or the Z-9. To learn how to do this, see section 36 and section 45, page 18 in the Rear Panel Features chapter. 33 Master B Master B volume knob. Located post effect loops, it controls power amp output. The green LED to the right of the knob lights up to indicate Master B is enabled and determining the master level. You can also set the master level to 0 (Amp Mute) via MIDI or the Z-9. To learn how to do this, see section 36 and section 45, page 18 in the Rear Panel Features chapter.
must hold it down for about a second until the Status LED flashes three times in rapid succession. This mechanism is designed to prevent inadvertent programming. You can cancel the programming process at any time before the Status LED first illuminates by releasing the Write button. Again, the preset will only be programmed successfully if you press and hold the button until the Status LED flashes three times.
37 Stand By Power amp standby switch: Use this switch to silence (0 position) the amp when you take longer break. The amp's tubes stay nice and toasty, and the amp is ready to roll immediately when you ramp it back up to full power. Amp Mute activates as soon as you set the Standby switch to the 0 position and the Amp Mute LED (36) shows this status by lighting up. You can easily program the Amp Mute function to MIDI presets to mute the amp using a simple MIDI footboard.
you flip the Standby switch because the tubes are already warm and don't require time to heat up. For breaks of 30 minutes and longer, I recommend that you switch the amp off in order to conserve energy. 38 Power Mains power on/off. Rear Panel Features At the back of the manual you'll find a folded page offering diagrams of the front and rear panels.
Switch no. 44 lets you activate the amp's power supply if you have an ENGL MIDI foot controller connected to this port. CAUTION: Before you connect any other MIDI footswitch or effects device, always make sure that switch no. 44 is set to the right to avoid damaging the device. 44 Power Supply For The ENGL Midi Footcontroller This selector activates a MIDI In port power supply for connected ENGL MIDI foot boards. Power is fed to the board via the MIDI circuit.
MIDI channel assignment using the encoding buttons: MIDI-channel: S 1 S2 S3 OMNI OFF XX XX CH 1 ON OFF OFF CH 2 ON OFF OFF CH 3 ON OFF OFF CH 4 ON OFF OFF CH 5 ON OFF ON CH 6 ON OFF ON CH 7 ON OFF ON CH 8 ON OFF ON CH 9 ON ON OFF CH 10 ON ON OFF CH 11 ON ON OFF CH 12 ON ON OFF CH 13 ON ON ON CH 14 ON ON ON CH 15 ON ON ON CH 16 ON ON ON MIDI Controller setup configuration: enabled XX XX XX disabled XX XX XX S4 XX OFF OFF ON ON OFF OFF ON ON OFF OFF ON ON OFF OFF ON ON S5 XX OFF ON OFF ON OFF ON OFF ON OFF
manual. To learn if a given feature may be controlled remotely, refer to its description herein. The MIDI In port is disabled when the Z-9 Footswitch is connected. A configuration table for the functions of the Steve Morse Signature amp is printed on page 34. CAUTION: Connect only the ENGL Z-9 Footswitch to this 6.
The Lo and Hi Gain options generate different levels of noise, and I tuned the SM Signature Amp's Noise Gate accordingly. However, there is some minor matching variance between the two. Hi Gain stands to benefit most from the Noise Gate, so I suggest that you tweak its two knobs for this mode. 49 FX Loop I Send Connect this FX Loop I output to a signal processor's input/return jack using the shortest possible shielded cord equipped with 1/4" plugs.
55 Pre Out This is the SM Signature's preamp auxiliary out. It delivers a signal with almost the same level and frequency response as the signal patched into the amp's input. A lowimpedance circuit, Pre Out is great for applications like addressing a guitar tuner. The Pre Out signal is patched out to jack 55 even when Amp Mute is engaged. It can also serve as an effect device send, whereby the amp's preamp (and EQ and gain stages) is bypassed.
5. One 16-ohm cabinet connected to the 16-ohm jack; Summary: 16 Z -> connected to 16-ohm output. 6. An 8-ohm cabinet connected to one of the 4-ohm jacks in combination with a 16-ohm cabinet connected to one of the 8-ohm jacks Summary: 8 Z + 16 Z -> connected to 4-ohm + 8-ohm output.
though, that as sophisticated as these features may be, they can't relieve you of all responsibility. For example, the system can't detect if a cabinet is connected to the other end of the cord. Please make a habit of checking this before powering the amp up. As a rule, always exercise due caution when operating this baby. Programming sounds (settings, actually) to MIDI presets: For reasons of convenience and handling ease, we made programming sounds to MIDI presets a piece of cake.
Handling and Care: Keep the amp safe from hard knocks and shocks. Tubes are fragile and tend to suffer when exposed to mechanical stress! Let the amp cool down before you transport it. Ten 10 minutes or so will do to spare the tubes. Tubes take some 20 seconds to warm up after you switch the power on, and about two to three minutes before they are able to pump out full power. Make a habit of giving your amp plenty of time to get toasty and of flipping the Standby switch for short breaks.
MIDI Channel: MIDI specifications define 16 channels for sending and receiving MIDI data. The encoding buttons on the back of the amp determine the MIDI data receiver channel. MIDI channels: 1 to 16, or OMNI (meaning that all 16 channels receive MIDI data). MIDI Controller: You can control the programmable functions Tone, FX Loop I/II, Noise Gate, Hi Gain , Lo Mid 1/2, Hi Mid 1/2 and Master A/B as well as Amp Mute directly using MIDI controller commands with fixed MIDI controller number assignments.
Indication: LED flashes in 2 short bursts; What to do: Activate and deactivate Standby; further information on page 28. 7. Power Tube Monitor: A problem or overload in power tube V3 Indication: LED flashes in 3 short bursts; What to do: Activate and deactivate Standby; further information on page 28. 8. Power Tube Monitor: A problem or overload in power tube V4; Indication: LED flashes in 4 short bursts; What to do: Activate and deactivate Standby; further information on page 28.
the Threshold (48) knob set to a high value? Deactivate the Noise Gate (17) for a quick check. -> Are the active Master knob and the Gain and Volume knobs set to a value greater than 0? If any of these knobs is set to 0, no signal is routed to the amp's outputs. -> Did you select a MIDI preset programmed with Amp Mute enabled? The front panel Amp Mute LED (36) lights up to indicate Amp Mute is active.
Technical Data Output power: Input sensitivity Input: Effect Return: Output level SEND, level range: Pre Out: Line Out: Power consumption: Fuses: external: at 230/240 mains voltage at 100/115/120 mains voltage internal: at 230/240 mains voltage at 100/115/120 mains voltage Important: Tubes: V1, V2, V3, V4: V5: V6, V7: V8: Consult Tube Map to view tube array Logic control system: Processor, software Memory: System interfaces: MIDI: Serial Amp Control (S.A.C.): Dimensions: Weight: approx.
Tube Map, ENGL - Steve Morse Signature Amp: E656 chassis as viewed from above Output Transformer LED LED LED LED V1 V2 V3 V4 V5 V6 V7 Input Lead FX buffer & driver & & P.A. 2.stage 3.stage driver Power transformer V8 phase shift converter Frontpanel Tube replacement report: 1.
Wiring of Principal Connectors MIDI IN (43), DIN connector Pin 3 - N.C. Pin 1 - power supply approx.11 volts AC *1 Pin 5 - MIDI-data wire Pin 4 - MIDI-data wire Pin 2 power supply page: 17 approx.11 volts AC * *1: AC voltage is routed to pin 1 and 2 only when button 44 is set to ENGL MIDI Footcontroller.
Options for controlling the ENGL - Steve Morse Signature amp remotely: CAUTION ! REPLACE FUSE ONLY WITH SAME TYPE AND RATING ! ! R DO NOT OPEN ! RISK OF ELECTRIC SHOCK ! DO NOT EXPOSE THIS EQUIPMENT TO RAIN OR MOISTURE ! Tube Noise Gate FX Loop I Amp All-tube Guitar Head Amp FX Loop II Steve Morse Signature 100 Footswitch Ground Floated Signal Outputs Poweramp Output Type E656 Amp Design by Horst Langer 1 2 3 4 5 6 Ground Midi Thru Ground Lift Switch Midi In Midi Channel Midi Foot& Contr
Noting Settings: Gain 1 Tube Bass Middle Treble Volume 1 Gain 2 Bass Middle Treble Volume 2 CH 1 Tone Presence Depth Punch FX Loop I / II CH 2 Noise Gate Steve Morse Signature 100 Amp Gain 3 Input Bass Lo Mid 1 Lo Mid 2 Hi Mid 1 Lo Mid 1/2 Hi Gain Hi Mid 2 Treble Lo Volume 3 Hi Volume 3 Hi Mid 1 /2 Master A Master B Amp Mute Master Write / A/B Copy CH 3 Stand By Power Amp Mute Sound title: _ _ _ _ _ _ _ _ _ _ _ _ _ _ _ _ _ _ _ _ _ _ Preset: _ _ _ _ _ _ _ _ _ comment: _
Configuration table for assigning the ENGL Steve Morse Signature Amp's sound-shaping and special functions to the Z-9 Custom Footswitch's Functions 1 and 2 : Button Function 1 Function 1 Function 1 Function 1 Function 1 Function 1 Function 1 Function 1 Function 2 Function 2 Function 2 Function 2 Function 2 Function 2 Function 2 Function 2 Functions at the amp Master A/B no no no no Hi Gain Lo Mid Noise Gate no no Hi Mid Amp Mute no Tone FX Loop I/II no Setup 1: Channel 1 1: Channel 2 1: Channel 3 1: Chann
Additional information The following refers to section 38 "Power" on page 17 Please note: ensure that the Stand By switch (31) is set to Stand By (0 position) before you switch the amp on. Let the tubes heat up for about 30 seconds before you activate the power amp. This procedure spares the tubes.
Page: >6< <----------------------- 7 -----------------------> 1 <---------------------------------- 8 ----------------------------------> 2 3 4 5 6 7 Gain 1 Bass Middle Treble Volume 1 9 10 11 12 Gain 2 Bass Middle Treble Volume 2 13 CH 1 Tone Tube <----------------------- 9 -----------------------> >10< 8 14 15 Presence Depth Punch 16 17 FX Loop I / II CH 2 Noise Gate Signature 100 Amp Gain 3 Input Bass Lo Mid 1 Lo Mid 2 Hi Mid 1 Lo Mid 1/2 Hi Gain Hi Mid 2
R Tube Amp Technology Gerätebau GmbH Germany Internet: http://www.engl-amps.