
Operator`s manual

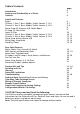
Contents:
1. ENGL InVader Tube Amp Head;
2. mains cord;
3. this manual;
4. a pamphlet entitled
.
At the back of the manual, you'll find fold-out diagrams of the front and rear panels.
As you're reading the descriptions of the amp's features, you'll gain a better
understanding of the topic of discussion if you unfold and refer to them as we go!
Channel 1 Gain control. This knob determines the preamp's input sensitivity for
Channel 1; use it to set the desired input level.
The amount of distortion depends on your guitar's pickups and the Gain (19) setting.
In Channel 1, single-coil pickups may begin saturating the preamp when the knob is set
to about the two o'clock position; pickups with very high output levels (humbuckers or
active pickups) will evoke mild overdrive at even lower settings. If you want squeaky
clean tone, simply back off the Gain knob accordingly.
If your guitar sports single-coils and you want to add some grit to your tone and bite to
your riffs, set the knob somewhere between 11 and 3 o'clock. For higher output pick-
Instructions for the Prevention of Fire,
Electrical Shock and Injury
Front Panel Features
A tip from the designer:
1 Bright
2 Gain 1
This feature boosts the upper end of the high frequency range in Channel 1 and
Channel 2. The red LED above this button lights up to indicate the Bright function is on.
This feature can also be switched via MIDI program change or Custom Z-9 Footswitch.
For a very crisp or glassy tone, activate the Bright feature. This setting brightens the
sound of humbucking or muddy pickups.
I matched to suit the two channels' Gain characteristics, which is why you get
different sounds when you activate it. Its effect is strongest in Channel 1's Lo Gain
range. As the name would indicate, the amp's gain level is lowest at this setting, so you
can activate to conjure sparkling clean sounds with Treble and Presence settings
as low as the 12 o'clock position.
This voicing option ups the twang factor inherent in certain types of guitars, and lets
you put a set of sonic cow horns on those that lack it.
is not nearly as aggressive in Channel 1's Hi Gain range. I toned it down to
prevent saturated sounds from growing too cutting or harsh, and tweaked it to deliver
a rich, pleasing overtone spectrum in finest tube-approved quality.
I also matched to Channel 2's tonal structure: Deactivate it for a more
pronounced midrange; activate it – particularly in Lo Gain mode – for a sweet, riff-
approved sound with a distinctively vintage tone!
The Bright functions in Channels 1 and 2, in combination with the two Gain choices Lo
and Hi, give you eight markedly different sounds, all accessible via MIDI!
A tip from the designer:
Bright
Bright
Bright
Bright
6