
Specifications

4.3.1 IP Phone
The DEVICE PHONE MANAGEMENT page lets the administrator to create IP Phone devices. Before
a device can be reached from the IP PBX, the same account information has to be programmed into
the device through the configuration interface enabled by the device. Select Device -> IP Phone to
add, edit, and delete devices. Go to Service -> IP PBX Service, and click RELOAD to activate
changes.
4.3.1.1 Add a Device
1. Enter a device name in the Device ID box, and a URL in the Device Administration URL box.
2. Click ADD to see the newly added device in the Device ID.
4.3.1.2 Edit a Device
Once create the device, you can modify its information through the following steps.
1. Modify the Device Administration URL and click LINK as a shortcut to the device administration
URL.
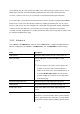
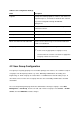
2. Click EDIT to see the Enable Automatic Client Configuration (ACC) page. Table 4.3.1 is a
reference for detailed ACC settings which is used for auto-configuring IP phones. One can
specify the MAC address and audio preferences of the phone. Note that for phones using HTTP
for auto-configuring, DHCP setting needs a new option 151 with a value of http://<IP PBX LAN
IP>/tftpboot/ in the Code,Value box in Service -> DHCP Service. No extra settings needed if the
phone uses TFTP for auto-configuring.
3. Click ENABLE to see Enable shows in the Auto Client Conf column. Click EDIT and then
DISABLE to disable the function.
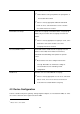
4.3.1.3 Delete a Device
1. Select a Device ID.
2. Click DEL to remove the device from the Device ID.
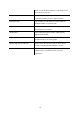
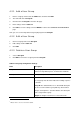
Table 4.3.1 ACC (Automatic Client Configuration) Settings
Field Description
A unique ID containing alphabets, numbers, and underscore
only without spaces; 32 characters maximum.
Device
Vendor Prefix Ask your IP Phone vendor for the Prefix.
MAC Address MAC address of the device.
Supplementary Configuration Specify if provided by the phone.
23