
Specifications

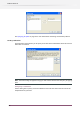


1. Select the flows you want to mark.
2. Choose the Set marker menu item in the context menu of the Flows pane, and select one of
the markers in the submenu.
Clear a marker for a flow
To clear the marker for one or more flows, perform the following steps:
1. Select the flows for which you want to clear the marker.
2. Choose the Set marker menu item in the context menu of the Flows pane, and select "No
marker" the submenu.
Marker for a group
Marker cannot be set for a group. It is determined automatically from the markers for its children,
as follows:
• If none of the children have a marker, the parent has no marker.
• If all of the children that have a marker have the same marker then the parent displays that
marker.
• Otherwise (i.e. if the children have a mix of markers) then the parent has no marker.
Changing flow properties
To view the properties of a flow, select the flow in the Flows pane and make sure that none of
the flow elements in the canvas are selected. This ensures that the Properties pane displays the
flow's properties (rather than the flow element's properties)
You can now change the flow's properties by editing the values in the Properties pane; see
Working with properties on page 85.
Renaming a flow
You can also change a flow's name by clicking on the name field in the Flows pane after the
flow was already selected, and then typing the new name.
Choosing images
You can also change the background and header image by choosing the corresponding menu
item in the contextual menu of canvas.
Allowing advanced performance tuning (PowerSwitch only)
You can unlock two addiitonal performance properties on flow elements that support processing
jobs concurrently.
When set to Yes, you will be able to change the default number of slots and the idle time-out
for those elements. See "Default number of slots for concurrent processing" in Processing on
page 187
Adding and removing flows
The Flows pane lists all flows known to Switch at the present time.
70
Enfocus Switch 10