
Specifications
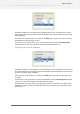


When user click OK button in this dialog box, jobs are processed. If users click Cancel button in
this dialog box, they are reverted to the Submit job pane.
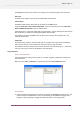
Submitting a job
To submit a job to a particular Submit point:
1. Click the Submit folder or Submit file button
2. Browse for a job with the appropriate file system dialog box
3. Select a Submit point from the dropdown menu.
4. If the Submit point defines any data fields, complete the values for these fields in the Metadata
properties section.
5. Click the OK button.
Working with Checkpoints
Refer to designing a flow for some background information on Checkpoints.
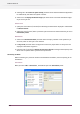
Viewing jobs
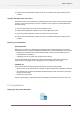
Jobs button
When user selects the Jobs icon in the task bar, the SwitchClient window adjusts to show a list
of jobs issued by the PowerSwitch/ FullSwitch server and by the various processes it controls.
Using the Toggle Display button, choose between list view or Job Card view:
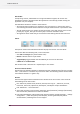
The table view in SwitchClient offers filters and sort features. Now, it also offers creating a
"customized content pane" tailored to the need of every SwitchClient user.
Jobs can now be grouped in a multi level tree based on these items/ columns:
Job name, Status, Refreshed, Server, Type, Size, Files, Pages, Dimensions, Modified, Flow, On
hold since, User, Submit point, Initiated, Checkpoint, On alert since, Transferred, State, In state
since, Metadata, Locked state and Family starter.
Groups are created via a contextual window – Group. This is similar to "show columns" where
the user can check or uncheck a column to group on. It is possible to create multiple levels/
159
Enfocus Switch 10