
Assembly Instructions

1
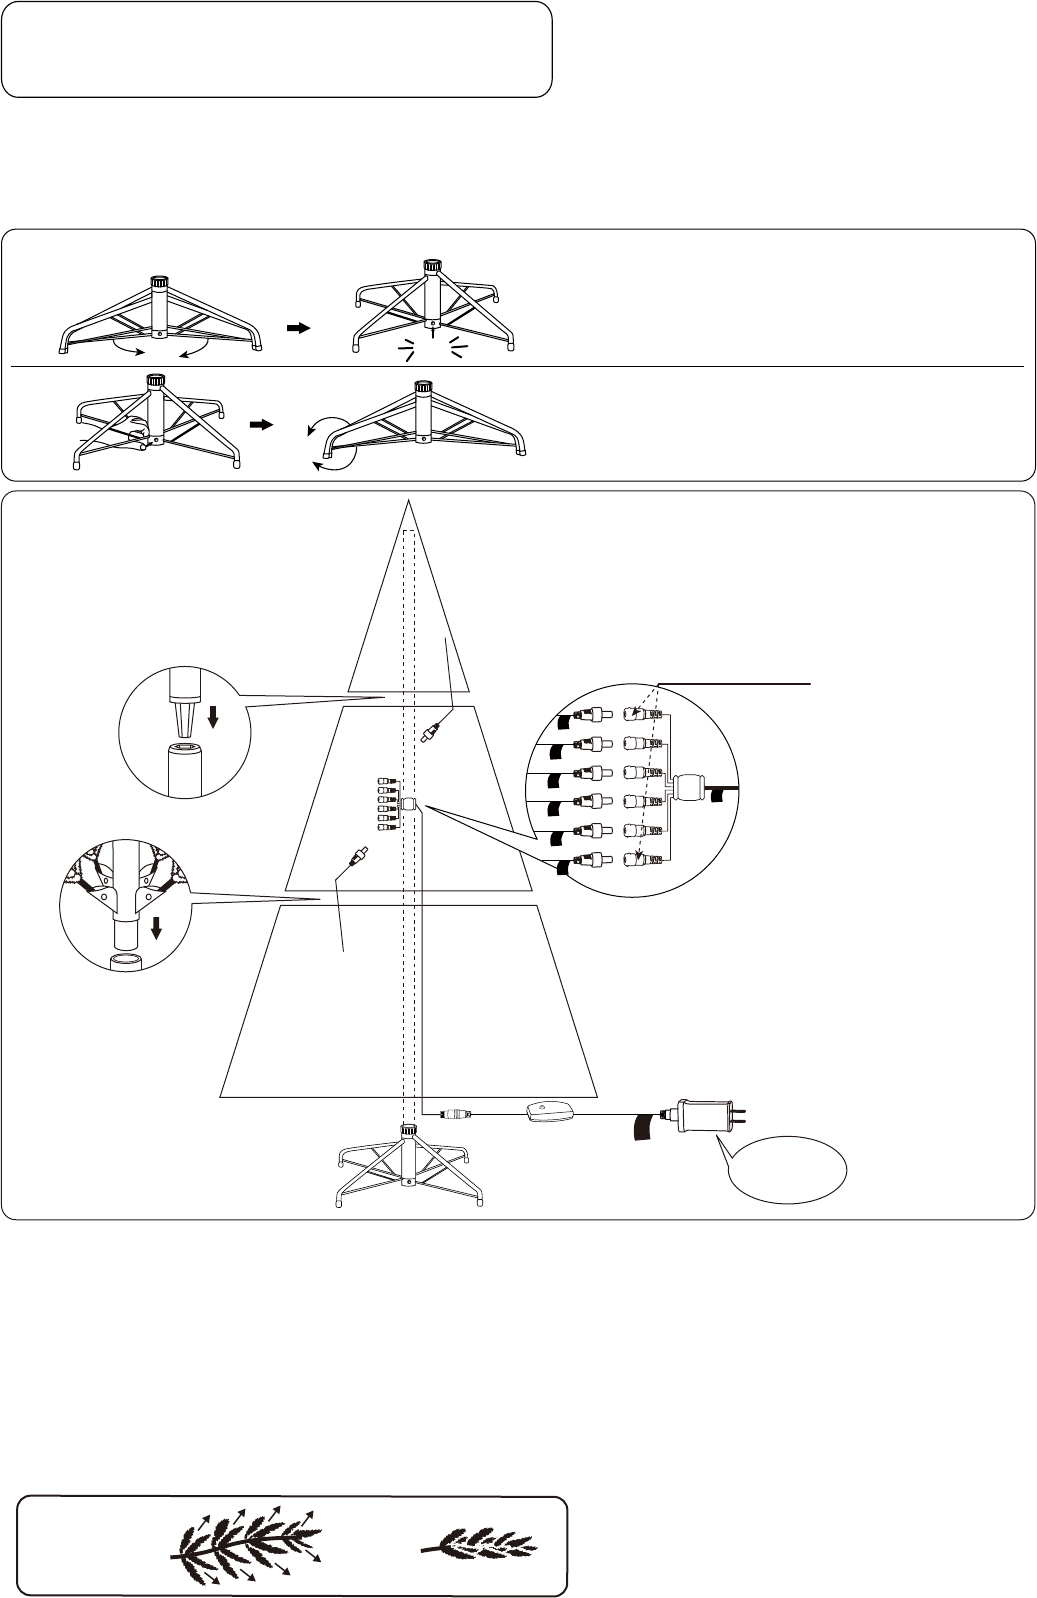
Tree top
Section 2
Section 1
Control box
Plug Adapter
Into Wall
Outlet
Insert Green
Label Extension
Cord into Adapter
Insert Red Label
Plugs Into Red
Labeled Extension Cord
*Electrical Rating For The Tree
(For Indoor Use Only)
Input: 120V, 60Hz, 0.35A
Output: 29V DC 0.45A
Fig. B - Tree and Light Assembly
MODEL #: TG70P4370D00
3. Each tree section is numbered with a sticker. Please identify all sections before assembling.
4. Assemble the tree from the bottom to the top. Start with the bottom section and remove protective cap before inserting into the
assembled stand. Make sure the pole is firmly inserted and secured into the stand.
5. Continue by inserting the upper tree section(s) to the lower section(s) until inserting the tree top.
6. Allow branches to fall into place or gently pull up and out. When adjusting branches, be sure that all wires are free of branch hinges.
7. Connect the plug(s) securely to the extension cord(s) as per the color labels indicated in Fig. B and insert the adapter into the wall
outlet. Your entire tree should now be lit. If some bulbs do not light or flickers, search for any loose plugs and/or broken, loose or
missing bulbs. Connecting the plugs or replace the bad bulbs promptly in order to maintain the performance and life expectancy of
your pre-lit tree.
8. Begin to shape the branches and tips working from the bottom to the top. Start with tips farthest from the pole and fan
out one to the right, one to the left and one at the center of the main stem. (See Fig. C)
1. Before you start to assemble your tree, choose an appropriate location near a wall outlet.
2. Assemble the tree stand and place on a level surface. (See Fig. A)
Congratulations on purchasing your new tree from Polygroup®! Carefully follow the instructions below on how to quickly
and easily set up your new tree.
TREE ASSEMBLY INSTRUCTIONS
Top view
Side view
Fig. C
NEED HELP?
DO NOT RETURN TO STORE. PLEASE VISIT US AT:
www.polygroupstore.com OR 1-888-919-0070
Fig. A - Tree Stand Assembly
Click
Pull apart the legs of the stand so that they
are snapped into an x-shape, place the tree
stand on a level surface.
To close the stand, press the metal button
and fold the legs together.