
Instruction Manual


Instruction Manual
D100422X012
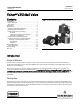
V250 Valve
September 2013
7
Perform this procedure if there is leakage around the follower shaft (key 7). Such leakage is an indication that the shaft
seal, which includes the seal and a backup ring, (key 16) mustbereplaced.Thefollowingproceduremaybeperformed
with the valve in the pipeline.
1. Isolatethecontrolvalvefromthelinepressure,releasepressure from both sides of valve, and drain the process
media from both sides of the valve. For dual seal valve constructions, remove pressure and drain the valve interior
cavity. Shut off and disconnect all lines from the power actuator.
WARNING
Refer to the WARNING at the beginning of the Maintenance section in this instruction manual.
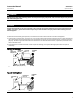
2. Unscrew the hex nuts (key 8) and remove the seal carrier (key 3) and shaft seal (key 16). Inspect and clean all parts
and sealing surfaces on the seal carrier and follower shaft (key 7). Also, inspect and replace the O-ring (key 23) if
necessary.
3. Install the new backup ring and shaft seal in the seal carrier.
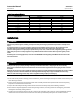
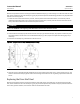
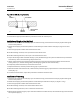
Figure 3. Optional Shaft-to-Body Bonding Strap Assembly
A7101
4. Align the drive pin (key 28) with the drilled hole on the inner surface of the seal carrier, replace the seal carrier, and
secure it with the hex nuts (key 8). Be careful not to damagetheshaftsealorO-ringduring replacement of the seal
carrier.
Replacing the Drive Shaft Seal
Perform this procedure if there is leakage around the drive shaft (key 6). Such leakage is an indication that the shaft
seal, which includes the seal and a backup ring, (key 16) must be replaced. This procedure may be performed with the
valveinthepipeline.However,theactuatormustberemovedfromthevalve.