
15" LCD Desktop Touchmonitors with Magnetic Swipe Reader (USB) User Guide 1525L


Appendix A. Installation and Setup
143
1. Either accept the default selection for the virtual Port Name or select the desired port
(COM5-COM15) to be associated with the device from the Port Name combo box and
modify the device’s friendly name if the default is not acceptable.
2. Select the port to which the device is connected (see General Notes in Installing Device
Drivers (W95/98/ME) above) from the Connect to combo box.
3. Click on the Test button to validate the port settings and verify the device’s presence.
(The Test function only works on virtual COM ports 5 through 10. The test will fail on
COM11-15 but the device will still be accessible from any application.)
4. Click OK to save the settings.
5. If the computer displays a message stating ‘The specified “Connect To” port is used by
another device…’ make sure the "Connect To" port settings is correct. If it is (multiple
devices can share a single port, but only one at a time can be selected), click on the OK
button to finish the installation. Otherwise, click on the Cancel to change the port.
Modifying A Device Driver's Settings (W95/98/ME)
To modify the device driver’s settings, perform the following steps:
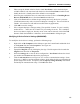
1. Right-click on My Computer on the desktop or open the Control Panel and double click
on the System icon then select Properties. See Figure A-1.
2. Select the Device Manager tab.
3. Expand the MagTek class by clicking the plus sign. Find the required device under the
MagTek class then click on Properties.
4. Select the Settings tab to view the driver configuration. Port Name indicates the virtual
port number and Connect to indicates the physical port.
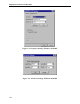
5. Click the Advanced button (see Figure A-2) to view the communication settings. Some
devices (e.g., MICR+) support automatic settings, which allow the driver to determine the
present setup of the device. If required, click the Specify settings manually radio button
and modify the communication setup. Click OK when done.