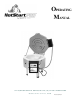
OPERATING MANUAL 6441 SE JOHNSON CREEK BLVD. PORTLAND, OR 97206 (503) 774--6000 SKUTT@SKUTT.COM W W W . G L A S S K I L N S .
TABLE OF CONTENTS Glass Master Operating Manual WELCOME ............................................................................................................4 Be Safe ................................................................................ 5 BEFORE YOU START ..............................................................................................5 Set Up and Location ........................................................... 6 INSPECT THE KILN .....................................
TABLE OF CONTENTS ADVANCED PROGRAMING .....................................................................................18 Ramp & Hold Programing (PRO Mode) .......................... 18 Checking the Program ...................................................... 20 VIEW SEGMENT ..........................................................................20 REVIEW ......................................................................................20 Edit Mode Features ....................................
STARTING WELCOME 4 WELCOME TO THE WORLD OF GLASS FUSING! Congratulations on the purchase of your new HotStart PRO glass fusing kiln. Finally a kiln has been developed with the needs of the beginning fuser in mind. We hope you get years of enjoyment with this kiln and it serves as a springboard in developing your skills as a glass artist.
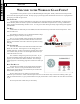
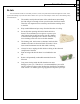
Be Safe Tens of thousands of kilns are used safely in homes, schools, and professional studios throughout the world. With a good understanding of your kiln and a little common sense you can avoid mishaps. Please observe the following safety recommendations: ♦ The stainless steel jacket and some of the other fixtures surrounding the kiln will get hot enough to burn your skin when the kiln is heated. Therefore it is important to be extremely careful when working close to the kiln.
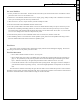
STARTING 6 BEFORE YOU START Set Up and Location INSPECT THE KILN Carefully remove the kiln and accessories from the Hot Start Kiln box. The box should include the following if purchased with an accessory kit. Hot Start Kiln 2 Stand Halves Operating Manual Lid Brace 8 oz. (.25kg) Kiln Wash* 4 Stand Feet 13” (33cm) Shelf* Fiber Shelf Paper (rolled)* 3 - 1” (2.5cm) Posts* Stand Hardware Pkg. Warranty Card Peep Plug *Included when HotStart is purchased with Accessory Kit.
LOCATING THE KILN 1. Locate your kiln near a 120V outlet. Position the kiln to the left of your electrical outlet so the cord will have a direct path to the outlet. Never use an extension cord. 2. Install it in a well ventilated, sheltered area such as a carport, garage, utility or hobby room. It should be convenient to where you are working, and out of the way of traffic areas. 3. Allow at least 18” (46 cm) of space between your kiln and adjacent walls. 4.
STARTING 8 UNDERSTANDING THE CONTROLLER 3 Programming Levels There are 3 different skill levels that you can set on your Hot Start Pro controller. Each level increases the programming options as well as the complexity of the controller. As your needs grow your controller can grow with you. ◊ Beginner ◊ Beginner Plus MGF ◊ Advanced BEGINNER LEVEL All HotStarts are shipped from the factory set in the Beginner Level.
Five Programming Modes The GlassMaster LT now has Five programming modes. Each controller is shipped from the factory in “AUTO” mode. When your skills improve you can access the advanced modes simply by pressing the Up Arrow key for 4 seconds. Press the Down Arrow key while in Idle state for 4 seconds to return to the Beginner Level.
STARTING 10 UNDERSTANDING THE CONTROLLER Key Press Description The GlassMaster LT has a 7 segment LED display. This sometimes requires creative ways for representing letters. For example the number “5” is also used to represent the letter “S”. See page 11 for a complete list of all the display messages along with a description of their meaning. Your GlassMaster LT has 3 buttons that are used to access all of the features and settings available.
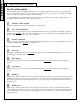
Display Messages The GlassMaster LT has a 7 segment LED display. This sometimes requires creative ways for representing letters. For ex� tion of their meaning. °F This represents degrees Fahrenheit. When it appears the controller is asking you to enter a Temperature or select a temperature scale. °c This represents degrees Celsius. When it appears the controller is asking you to enter a Temperature or select a temperature scale.
STARTING 12 UNDERSTANDING THE CONTROLLER Display Messages (continued) SSEG This message indicates Skip Segment. (See “Skip Segment” pg. 21) StOP This message represents STOP. It indicates that the program has been stopped. It will only briefly show on the display. tME This message represents Add Time. (See “Add Time” pg. 21) tMP This message represents Add Temperature. (See “Add Temperature” pg.
BASIC FIRING STEPS 13 To make things easy to understand we have identified 6 steps to fusing and slumping in your Hot Start Kiln. Here are a few tips which should help you get started. 1 - LOADING SHELVES Never place the kiln shelf directly on the bottom slab. It will act as a heat sink and may cause your piece to heat unevenly. THINFIRE SHELF PAPER Your accessory kit included both kiln wash and thin shelf paper.
BEGINNER BASIC FIRING STEPS 14 2 - AUTO MODE (GLASSFIRE) The GlassMaster LT controller is designed with the beginning fuser in mind. It is important to have a good general understanding of the principals of glass before programming your kiln. Therefore we recommend reading the General Firing Guidelines section of this manual before programming the kiln. STEP 1 - START IN IDLE STATE To start programming the kiln must be in an IdLE state.
BASIC FIRING STEPS 15 STEP 4 - VERIFY SETTINGS The next two entries allow you to modify the ending temperature and hold time of the factory-set programs. For d� � Glass Fire Mode) to verify the temperature. Press to verify the hold time. BEGINNER Press STEP 5 - START The kiln is now ready to be started and will flash rEDI. Press to start the program. When the program advances or is advanced from the Process phase it enters the Pre- Annealing cooling segment.
BEGINNER BASIC FIRING STEPS 16 6 - MODIFYING GLASSFIRE PROGRAMS As mentioned earlier, after visual inspection of your glass you may decide you want to modify your process temperature values to create more or less heatwork in your next firing. In GlassFire Mode you can only change the Process values. The Process Values include the peak temperature and hold time at peak temperature in the program. In order to make these changes you must first toggle the Modify Glass Fire Mode Feature to the on position.
BASIC FIRING STEPS 17 6 - MODIFYING GLASSFIRE PROGRAMS (CONTINUED) CHANGING THE PROCESS HOLD TIME After you have entered the Process Temperature in a program and have pressed Enter, the kiln will flash the current Process Hold Time alternately with HLd. Single presses (pressing and letting go) will now adjust the Hold Time up After the desired Hold Time has been reached Press or down . to lock in the Hold Time and continue programming. If large changes in time are required you can hold either or down.
ADVANCED 18 ADVANCED PROGRAMING RAMP & HOLD PROGRAMING (PRO MODE) With PRO Mode you can design and run Ramp and Hold programs that meet the specific needs of your glass. You can program up to 8 segments and store up to 5 programs. For more information regarding defining and designing Ramp and Hold Programs consult the Glass 101 section of this manual. STEP 1 - SET CONTROLLER TO ADVANCED LEVEL The Controller ships from the factory set at the beginning level.
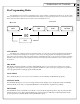
ADVANCED PROGRAMING 19 STEP 5 - SELECT NUMBER OF SEGMENTS The display should be flashing “SEG” alternately with the current segment setting. Press or to select the number of segment you wish to use in your program. You may choose a value of up to 8 segments Press to enter the segment number. STEP 6 - ENTER RATE, TEMPERATURE, AND HOLD TIME FOR EACH SEGMENT Rate The display should now be flashing “rA 1” alternately with the value that is currently entered for the temperature rate for segment 1.
ADVANCED ADVANCED PROGRAMING 20 CHECKING THE PROGRAM VIEW SEGMENT The View Segment feature is used to view which segment of the program the kiln is currently running. This feature is particularly useful when used in conjunction with the Skip Segment function to determine that the correct segment is currently running. It is also helpful if you are trying to determine if the kiln is in a heating segment or a cooling segment. While the kiln is firing Press .
ADVANCED PROGRAMMING 21 EDIT MODE FEATURES The Edit Mode Features were designed to allow the artist to adjust the program while it is running. These features are � accessed from both a GlassFire program and a Ramp and Hold Program. Inspecting the glass while it is firing allows you to make certain adjustments on the very first firing however there are some precautions that should be observed. The first is of course safety.
ADVANCED ADVANCED PROGRAMMING 22 ADD TEMPERATURE The Add Temperature feature adds temperature in 5 °F (3 °C) increments to the temperature in segment two. This is considered the Process Temperature since it is holding at the peak temperature of the program. You will only be able to access this feature when the program is currently in the Segment 2 Hold. To verify the current segment, use the View Segment Feature. It should display HLd2. Press while the program is in Hold 2.
GLASS 101 23 The following guidelines just scratch the surface of the knowledge base associated with firing glass. We highly suggest you take a firing class from your local dealer. If classes are not available in your area there are numerous books available on the subject that can be found at bookstores and on the internet. What is a Firing Program? Glass is very sensitive to changes in temperature below 1000 °F.
GLASS 101 24 GLASS 101 Critical Temperature Ranges A “Critical Temperature Range” is any temperature or temperature range in the firing cycle that has a high level of potential for limiting the success of the project. Limited success can be expressed as overfired, underfired, breakage, devitrification or bubbles, just to name a few. It can be argued that there are numerous critical temperature ranges.
GLASS 101 25 FUSING Fusing is the process of joining 2 or more pieces of glass together by the application of heat. The glass may be in the form of sheets, stringers, frit or a host of other forms. There are different degrees of fusing. You may want to fuse glass so it sticks to another piece of glass without deforming. This is known as a “Fuse to Stick”. If you were to apply more heatwork to the piece the edges would round slightly. This is known as a “Tack Fuse”.
GLASS 101 GLASS 101 26 The Basics By Lisa Vogt Glass fusing is simply the process of stacking two or more layers of compatible glass together to make a design. The stacked glass is placed in the super heated environment of a kiln where it melts together. THE FUSING PROCESS There are two basic fusing stages; heating and cooling. During the heating process the fusible glass is slowly taken from room temperature up to 1300 – 1500 °F, depending upon the finished “look” we desire.
GLASS 101 27 Frequently Asked Questions Q. Do you have to re-coat the kiln shelf with primer every time you use it? A. If the shelf primer is in good condition it can be used more than one time. The shelf should be scraped, sanded or washed clean with clear water and re-coated when the primer shows signs of wear. It’s time to re prime when the coating becomes thin (usually where a project rested) has cracks, or begins to flake off. Q. Why does kiln wash stick to the back of a project? A.
GLASS 101 28 GLASS FUSING 101 Frequently Asked Questions Q. What causes sharp edges on the project? A. Dragging is usually caused by over firing a project that is resting on fiber paper. As the glass contracts and draws in on itself the paper resists, sharp edges are the result. This edge can be made safe with file a or grinder. After grinding the project can be put back in the kiln and heat until the ground edge is polished. Q. Why is there debris between the glass layers? A. Too much glue.
GLASS FUSING 101 29 Stainless Steel Forms: • Stainless steel forms come in a variety of shapes and sizes as well. They have to be primed also. The slick surface makes priming difficult. The form can be sanded, sandblasted or heated to make the priming process easier. • Stainless steel forms are extremely durable “forever” molds. But they tend to be several times more expensive than ceramic molds. • Steel forms should also be sanded and re-primed if there are pits or cracks in the coating.
GENERAL GENERAL INFORMATION 30 Troubleshooting If you find yourself in this section of the manual please remember that Skutt and your Hot Start Kiln Dealer are here to help you as long as you own your kiln. If you are unable to determine the problem, or just need to order parts, please let us know. KILN WILL NOT START If there is no display, check to see if the kiln is plugged in and the breaker has not tripped. If there is a display, double check your programming instructions.
GENERAL INFORMATION 31 HOW DO I...? How Do I Go Back A Step When I Make A Mistake In Programming? You can’t go back a step but you can start over at any point by holding down the ENTER key until it beeps. This will take you back to IDLE MODE. If you have unlocked the Advanced level Press ENTER again and use the arrows to select your desired programming mode. How Do I Make The Kiln Fire Hotter or Cooler In Glass Fire Mode (AUTO)? Follow the instructions in this manual for turning on Modify GlassFire Mode.
GENERAL 32 GENERAL INFORMATION GlassFire Programs Slow Rate Soak Temp Hold Length 250°F/Hour 300°F 10 minutes 400°F/Hour By Process By Process 9999°F/Hour 950°F 60 minutes 100°F/Hour 800°F 15 minutes Rate Soak Temp Hold Length 350°F/Hour 300°F 10 minutes 600°F/Hour By Process By Process 9999°F/Hour 950°F 30 minutes 150°F/Hour 800°F 10 minutes Rate Soak Temp Hold Length 500°F/Hour 300°F 5 minutes 800°F/Hour By Process By Process 9999°F/Hour 950°F 30 minutes 175°F
GENERAL INFORMATION My Programs PROGRAM 1 33 SEG 1 SEG 2 SEG 3 SEG 4 SEG 5 SEG 6 SEG 7 SEG 8 SEG 1 SEG 2 SEG 3 SEG 4 SEG 5 SEG 6 SEG 7 SEG 8 SEG 1 SEG 2 SEG 3 SEG 4 SEG 5 SEG 6 SEG 7 SEG 8 SEG 1 SEG 2 SEG 3 SEG 4 SEG 5 SEG 6 SEG 7 SEG 8 RATE TEMP HOLD PROGRAM 2 RATE TEMP HOLD PROGRAM 3 RATE TEMP HOLD PROGRAM 4 RATE TEMP HOLD Factory Set Casting Program PROGRAM 5 SEG 2 250F/hr 1500F 00:05 SEG 3 1000F/hr 950F 02:30 SEG 4 30F/hr 750F 00:20 SEG 5 SEG 6 SEG 7 SEG 8 RAT
GENERAL 34 GENERAL INFORMATION Warranty & Repairs All Skutt Kilns come with a 2 year warranty. This warranty is included in the bag that contained this manual. For details regarding what is covered in the warranty and how to obtain warranty service, please consult the warranty. There are certain repairs that can be done fairly easily. All parts come with a complete set of instructions. The following are repairs that can be done by most kiln owners.
GENERAL INFORMATION 35 Electrical Requirements & Wiring Diagram The chart below shows the recommended electrical specification for the Hot Start Kiln. If you are uncertain about your existing power, have it checked by an electrician. If you are installing a new kiln, have the electrician follow this guide. Electrical Requirements Voltage Amp Watts Wire Size* Breaker Max Size Temp NEMA Receptacle 115 1690 12 20 5-15 15 1650 *For each additional 50 feet use heavier wire.
6441 SE JOHNSON CREEK BLVD. PORTLAND, OR 97206 (503) 774--6000 SKUTT@SKUTT.