
Installation Instructions
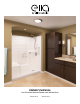

3P Shower Installation Instructions
Gelcoat & Solid Surface Bathware
ellasbubbles.com | 6
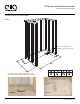
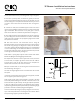
16. Measure, and mark locations for mounting holes on the
anges of the wall panels. Mark horizontal so each hole matches
up with a stud, (16” on center). Mark every 8” on center for the
vertical anges at the front of the unit. Drill a 1/8” diameter screw
hole at each mark.
Use 6D fastener screws to draw nailing ange to wood studs. Shim
where necessary.
RECOMMENDED CAULKING
ALL GELCOAT FINISH MODELS:
100% RTV silicone adhesive caulk- clear, or matching white or
bone for inside the seam.
ALL SOLID SURFACE FINISH MODELS:
Two caulks recommended for best results: For seams (areas that
will not be visible) 100% RTV clear silicone adhesive. The function
of this caulk is to mechanically bind the shower parts together.
For Visible Surfaces - premium color matching caulk for cosmetic
function to blend with surface and erase seams.
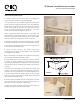
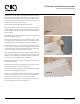
17. Surface caulk all joints with a premium color match caulk
wiping all surface excess clean.
See caulk instructions for proper curing time before use of shower.
See Figure 12. See close up view in Figure 13
Assure that the vertical and horizontal grout lines remain in
alignment. Fasten the vertical anges at the front on both walls.
Install nish trim around the water control valve, per the
manufacturers provided instructions.
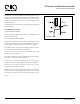
18. Apply premium color matching surface caulk to nish seams.
Smooth caulk and clean away excess before cure. See caulk
directions for curing time. Do not use shower until caulk is cured.
© 2016
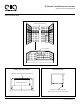
FIGURE 14