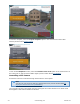
To save the snapshot, select the Export snapshot option in the context menu of the video camera (see the section Frame export). To turn off the Snapshot function, select the Resume video mode option in the context menu of the viewing tile or click the time indicator again (see the section titled Time Display). Controlling a PTZ Camera A PTZ video camera is controlled through the PTZ device control panel.
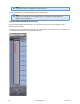
The following actions can be performed using the PTZ device control panel: 1. 2. 3. 4. Use presets. Modify the parameters of the iris, focus, and optical zoom. Modify the horizontal and vertical tilt angle of the video camera. Starting/stopping patrol mode. Note Setting presets is described in detail in the section The PTZ Control Panel. Control Using the Presets List To switch a PTZ camera to a preset, you can use the presets list. To do this, left-click the corresponding line in the given presets list.
Control Using the Dialer Panel To switch a PTZ camera to a preset, you can use the dialer panel. To display the dialer panel, click the Dialer button. To switch to a preset using the dialer panel, you must perform the following steps: 1. Using the numeric buttons (0-9), enter the number of the preset to which you want to switch. The dialed number is displayed in a special field. To delete the last digit dialed, click the button. 2. Click the button to switch to the preset with the number entered.
Note If the video camera cannot be controlled by a virtual joystick, intuitive buttons for PTZ control are displayed instead Virtual joysticks are controlled as follows: 1. Click and hold down the left mouse button in the central (blue) portion of the joystick. 2. Drag the joystick in the necessary direction. Note You can also move the joystick by clicking and holding the left mouse button outside of the joystick border.
To control a relay, select Show relay in the context menu of the viewing title. Note You must first activate an object before you can control its relay. The relay control button will now be displayed. Note To hide the relay control button, select Hide relay in the context menu of the viewing tile. When the relay control button is clicked, the relay shifts from one status to the other.
viewing tile are shown at their original size. Autozoom stops when a viewing tile is selected and resumes when the viewing tile is no longer active. To enable autozoom, in the viewing tile context menu, select Enable autozoom.
The viewing tile will then appear in archive mode. If archive mode is selected as the default video mode for a camera in a layout, when you switch to that layout, the camera is immediately in archive mode. Video Surveillance Functions Available in Archive Mode In archive mode the following video surveillance functions are accessible: 1. Selecting an archive for viewing of recordings. 2. Synchronized playback of archives. 207 eLineTechnology.com 303.938.
3. 4. 5. 6. 7. 8. 9. 10. 11. 12. Compressed playback of archives. Tracking objects. Autozoom. Scaling the viewing tile. Digitally zooming video images. Processing video images. Taking snapshots. Navigating through the archive. Playing back recordings. Displaying why situation analysis detection units have been triggered.
Note The selected archive is displayed in bold in the list. The selected archive will now be displayed in the viewing tile. Note If there is no recording in the selected archive, a message to that effect will appear in the viewing tile. Synchronized playback of archives Synchronized playback of archives lets you play back archives from several different video cameras simultaneously. To enable synchronized playback, switch a few video cameras into archive mode.
Synchronized archive playback is controlled through the playback panel in the same way as playback for a single archive. Compressed playback of archives (Time Compressor) During compressed playback (Time Compressor), the viewing tile simultaneously displays tracked objects from different moments in time within the selected portion of the archive. This lets you quickly look through the archive to find important events and investigate them in more detail.
Note To return to standard archive viewing mode, go to the tab . Playback control Playback control in Time Compressor mode is managed using the advanced navigation panel and the playback panel (buttons for jumping to the previous/next frame/fragment are not available in this mode). To set the desired number of tracked objects to be simultaneously displayed, set the slider in the appropriate position (1).
interval, click the button (2). Switching back to the original recording of an object To leave Time Compressor mode to go back to the original recording of an object, left-click the object. The system will now automatically switch back to the original recording of the object in standard archive playback mode. Playback of the recording will be paused, and the beginning of the recording will correspond to the moment at which the object was selected.
5. Playback panel 6. Time indicator You can also navigate through the archive by easily flipping through recordings. Navigating Using the Timeline Note Use of the timeline is described in detail in the section The Timeline. You can select recordings in the archive for playback in a viewing tile by using the timeline, in one of two ways: 1. Left-click the indicator (1) and drag it to the corresponding position on the timeline. Alternatively, you can left-click the left portion of the timeline.
To play back the selected recording, use the playback panel (see the section titled Navigating Using the Playback Panel). Navigation using the advanced panel You can use the advanced navigation panel to select recordings in the archive for playback in the viewing tile. To do this, complete one of the following two actions: 1. Left-click the timeline (1) and hold down the button while dragging the scale to the desired position. 2. Left-click the desired moment in time on the timeline.
To control playback, use the playback panel (see the section titled Navigating Using the Playback Panel) or the advanced navigation panel.
For details, see the section titled The alarms List. Navigating Using the Playback Panel To navigate in the archive using the playback panel, you must first select a recording for playback. Once a recording is selected, the following operations are accessible: 1. Play recording: 2. Pause/Stop playback: 3. Go to the preceding frame 4. Go to the next frame . . 5. Go to the previous recording 6. Go to the next recording 216 . . eLineTechnology.com 303.938.
It is possible to change the mode (forward/reverse) and speed of playback. To do this, use the slider. Rapid reverse playback of an entry: Rapid forward playback of an entry: For reverse playback of a recording, move the slider to the left of the position corresponding to zero playback speed (the center of the slider); for forward playback, move it to the right. The current playback speed is displayed under the slider.
You are then taken to the specified point in the archive. If one video camera is in archive mode and you try to navigate to a point for which there is no video, you will be automatically taken to the video for the closest point in time. If two or more video cameras are in archive mode, you will not be taken to the video for the closest point in time; the message No archive will be shown on screen. Keyboard navigation You can use keyboard shortcuts to navigate through an archive and control video playback.
Page down Switches to the next recording Switches to the next recording Flip-through navigation of recordings The viewing tile lets you easily flip through recordings. Use the buttons on the sides of the viewing tile to flip through recordings. Click the button on the left side of the viewing tile to play the preceding recording (1), and click the button on the right side of the viewing tile to play the next recording (2).
Video surveillance in Alarm Management mode Video surveillance functions available in Alarm Management mode The following video surveillance functions are available in Alarm Management mode: 1. 2. 3. 4. 5. 6. Scaling the viewing tile. Digitally zooming video images. Processing video images. Taking snapshots. Forwarding and reversing playback of an alarm at various speeds. Evaluating alarms (assigning a status).
2. In the lower-left corner of the viewing tile, click the button. 3. An alarm will then be initiated in the system and the viewing tile will automatically switch to alarm mode for evaluation of the situation. Note When in Alarm Management mode, the user that initiated the alarm will be indicated at the bottom of the viewing tile. Manual initiation of an alarm is now complete.
If an alarm is initiated automatically, a color-coded indicator will appear on the Alarms tab and the alarm preview tile will be displayed in the bottom left corner of the viewing tile (the video recording of the beginning of the alarm event plays repeatedly) while the rest of the viewing tile will be dimmed. To evaluate the situation, go to the Alarms tab or left-click the alarm preview tile and then accept the event for processing (see the section titled Accepting an alarm for processing).
The alarm handling tile will then appear. Note The Alarm Management tile will be displayed if you click the alarm preview tile. 223 eLineTechnology.com 303.938.
Switch to Alarm Management mode When an alarm is initiated, the system switches to alarm mode automatically at the moment the event is accepted for processing. Video surveillance functions available in Alarm Management mode To switch the viewing tile back from a different surveillance mode to Alarm Management mode, click the button in the lower-right corner of the tile. Note In Live Video mode, if the viewing tile is not active, the tabs for switching to other modes are not displayed.
Note The button becomes red, indicating Alarm Management mode: . Working with the Alarm Management window Alarm Handling Tile Interface Elements The alarm handling tile is a viewing tile which, besides the standard interface elements (context menu, time indicator, etc.), also contains elements for alarm playback and evaluation: 1. Playback panel 2. Timeline 3. A button for quick positioning of the timeline indicator in the position corresponding to the beginning of the alarm.
If the alarm was initiated automatically, the visual element set for the detection tool which initiated the alarm will be displayed in the viewing tile: or a detection area or virtual tripwire , which triggers the detection tool when it is crossed. The object which caused the trigger will be outlined with a red frame. Display of an Area visual element: Display of a Line visual element: 226 eLineTechnology.com 303.938.
The name of the detection unit that initiated the alarm is displayed in the lower portion of the viewing tile. To go to the desired segment of the alarm event to replay it, left-click the timeline indicator and drag it to the corresponding position. Note To go to the required video fragment, you can also left-click in the corresponding area of the timeline. To switch to the previous result, click indicator to the following position: 227 on the playback control panel or move the timeline .
Once a segment is selected for replay, the following operations are accessible: 1. Play recording: 2. Pause/Stop playback: 3. Go to the preceding frame 4. go to the next frame . . It is possible to change the mode (forward/reverse) and speed of playback. To do this, use the slider.
switches to Live Video mode. The alarm is no longer in the Alarms tab. Attention! In the case of multi-user event processing, only the first operator to switch to alarm mode may process the alarm (if he or she has the appropriate permissions). For the rest of the operators, the Alarm Management buttons are not displayed.
2. Switch to the Alarms tab and select the alarm from the alarms list. In Alarm Management mode with limited functions, the Alarm Management buttons are not displayed. Instead, the name of the operator who is currently processing the alarm is displayed. The other functions of the alarm handling tile remain unchanged. After processing of the alarm on another client, on the given client the status assigned to the alarm is displayed in place of the name of the operator. 230 eLineTechnology.com 303.938.
If a user has accepted an alarm for processing and leaves Alarm Management mode (going to Live Video mode, Archive or Archive Search mode, the viewing tile for another camera, etc.), after an amount of time equal to the operator's idle time after leaving, other users will also have the opportunity to accept the alarm for processing. If more than one alarm appears for one camera, any operator may access all alarms not yet accepted for processing.
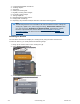
Archive Search mode interface The visual layout of Archive Search mode is divided into the following 4 components: 1. Viewing tile (1) 2. Search control panel (2) 3. Search results panel (3) 4. archive navigation panel (4) The viewing tile and archive navigation panel are described in their respective sections (see Viewi ng Tile и The Archive Navigation Panel). The search control panel consists of three tabs that handle different types of searches: 1. Events Search (2). 2. Forensic Search.
3. Time Search. The search results panel displays the precise moments in an archive that correspond to the defined search criteria. The precise time of each moment is displayed underneath (1). The specific moments correspond to the beginnings of the video fragments. 233 eLineTechnology.com 303.938.
A scroll bar is located on the right side of the search results panel (2). Beneath is a time scale adjuster (3). Video surveillance functions available in Archive Search mode In Archive Search mode, the following video surveillance functions are available: 1. 2. 3. 4. 5. 6. 7. 8. 9. 10. 11. 12. 13. 14. 234 Selecting an archive for video recording analysis. Tracking objects. Autozoom. Scaling the viewing tile. Digitally zooming video images. Processing video images. Taking snapshots.
Note The following functions are accessible in all video surveillance modes: scaling the viewing tile, digital zoom, video image processing, Select video camera functio ns in the current tile, Snapshot and Object tracking. A description of these functions is provided in the section titled Functions Available in All Video Surveillance Modes.
b. Select the events you need to search. Select the appropriate check boxes (see table below and 2 on the picture above). Note You can select an unlimited number of events.
Note To zoom objects that caused an alarm or triggered a detection unit, select the Ex pand alarm object check box in the lower portion of the search results panel. Forensic Search for Fragments Forensic Search lets you search for moments in the archive using the following criteria: 1. 2. 3. 4. 5.
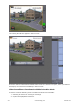
3. – Loitering in an area 4. – Multiple simultaneous objects in an area 5. – Moving from area to area When you click a tab’s icon, the tab expands and the previously expanded tab collapses. One of the tabs is always expanded; the expanded tab is colored light gray. Editing visual elements The visual element needed for searching a selected criterion is automatically displayed in the viewing tile.
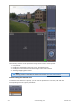
Line The visual element Line is needed for searching the archive by the criterion Object trajectory crossing a virtual line. This visual element sets a virtual line in the field of view of a video camera; instances of something crossing this line will be found in the archive. The end points of the line are connected by a two-colored dotted line. The direction of the object's motion across the line is indicated by dotted arrows.
1. Motion in an area 2. Loitering in an area 3. Multiple simultaneous objects in an area This visual element specifies the area in a video camera’s field of view that is to be analyzed when searching by the selected criterion. The nodes of an area are connected by a two-colored dotted line. By default, an area is defined by 4 nodes with the coordinates (30%, 30%), (70%, 30%), (70%, 70%) and (30%, 70%) as percentages of the width and height of the frame, respectively.
his visual element defines two areas in the video camera's field of view; instances of something moving between them (from one to the other) can be found in the archive. The nodes of each area are connected by a two-colored dotted line. The direction of motion between the areas is indicated by a dotted arrow. By default, each area is defined by 4 nodes.
Motion in an area When configuring the Motion in an area criterion, you can set one or more of the following parameters: 1. 2. 3. 4. 5. 6. 7. 8.
Note The first method lets you roughly configure the size, and the second method allows you to set the size precisely. a. Position the cursor on a visual element node and hold down the left mouse button while moving the mouse. b. Set the width and height of an object of the minimum (maximum) size using the ar rows in the upper and lower margins, respectively. The dimensions of a visual element in the viewing tile can be changed in a similar manner. The minimum (maximum) size of an object is now set.
3. Use the palette to set the color range to be searched. The range is selected using drag and drop (click and hold either mouse button, move the mouse, then release the button). Attention! Any click on the palette is interpreted as the beginning of a new range; the previous range will disappear. The color of a moving object will then be set. By default, when searching the archive, the system searches for motion in all directions.
3. Click with either mouse button on the direction that motion search is to be performed. The sector corresponding to that direction will then be colored green. If necessary, repeat this action for other directions. To reactivate searches for a disabled direction, click it again with either mouse button. The required directions of an object’s movement are now set.
3. The minimum (maximum) speed of a moving object can be set using any of the following methods: Note The first method lets you roughly configure the speed, and the second method allows you to set the speed precisely. a. Position the cursor on an end point of the arrow and hold down either mouse button while you move the mouse. The length of the arrow will correspond to the minimum (maximum) displacement of the object per second. b.
You have set the way an object may appear in the area. Complete the following steps to set how an object leaves the area:: 1. Click . 2. Choose how an object leaves the area: leaves the area (crosses the area's borderlines) or disappears (doesn't cross the area's borderlines). You have set the way an object may leave the area.
The procedures for setting parameters for the Objective Trajectory Crossing a Virtual Line cri terion are described in the section titled Motion in an area. Loitering of an object in an area When configuring the Object's Loitering in the Area criterion, you can set one or several of the following parameters: 1. 2. 3. 4.
This completes configuration of the duration that will be interpreted as loitering in an area. Simultaneous presence of a large number of objects in an area When configuring the Multiple Simultaneous Objects in the Area criterion, you can set one or several of the following parameters: 1. 2. 3. 4.
The minimum number of objects in an area is now set. Motion from area to area When configuring the Motion from one area to another criterion, you can set one or several of the following parameters: 1. 2. 3. 4. 5. Minimum size of an object Maximum size of an object An object’s color Minimum speed of an object Maximum object speed The procedures for setting parameters for the Moving from area to area criterion are similar to those described in the section titled Motion in an area.
Attention! The search will be performed for the time period displayed on the timeline. The search results panel will display the specific moments found. Time search for video fragments A time search lets you divide a selected portion of the archive into equally sized fragments with a certain interval between them. A time search is performed as follows: 1. Set the search interval (see Setting a search interval). 2. Click the Search button. 251 eLineTechnology.com 303.938.
This starts a search for video fragments based on the defined criteria. The search results panel displays frames that match moments in time that are equally spaced from each other; the search control panel shows the number of fragments found.
Note If object tracking is activated in the viewing tile, then the properties of tracked objects (width and height as a percentage of the width or height of the frame) are displayed when viewing video fragments found through forensic search. Note To switch between video fragments, use the corresponding buttons on the playback panel or on the advanced navigation panel (see the sections titled Navig ation using the advanced panel and Navigating Using the Playback Panel).
set apart from this moment until the next found moment. Important Double-clicking the found moment will also cause a repeated search within the selected time interval for export. 2. Export the video (see Exporting Video Recordings). Working with fisheye cameras EyStream allows viewing the video stream and video archive from fisheye cameras, dewarping the video image into one of the following formats: 1. 360 panoramaо. 2. Regional view.
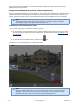
In both viewing modes, all standard video surveillance functions are available for the fisheye camera. Fisheye cameras on an interactive map Viewing video and controlling a fisheye camera from the map If a fisheye camera is ceiling-mounted (this position is selected in the video camera settings, see Configuring fisheye cameras) and a 360о field of view is specified for it on the map, the video from the camera is displayed on the map in real time.
Note If the viewing tile for the fisheye camera is inactive when it is clicked, the first click on the video on the map activates the viewing tile. The second click activates the Point & Click function Fisheye cameras in immersive mode In immersive mode (see Immersive mode), the video from a fisheye camera is displayed on the entirety of the video surveillance screen, above the map display, as virtual telemetry (see Viewing modes for video from fisheye cameras).
Note In Archive mode and Archive Search mode, an audio recording can be played back only from the microphone corresponding to the currently selected video camera, and only in forward playback mode at a speed of 1x. Activating audio monitoring Attention! The Microphone object must be enabled (see the section titled The Microphone Object). To activate audio monitoring in any surveillance mode, left-click the speaker icon in the viewing tile. The volume icon and volume adjuster now become active.
The Map will open in a 3 D view while the current layout contracts to fit the screen area over the map. To exit Map View click . Changing the map tilt You can change the tilt of the map in any mode. You can change the tilt of the map in one of two ways: 1. By using the slider or buttons for adjusting tilt (1). 2. By adjusting the border of the area of the map and the layout (2). 258 eLineTechnology.com 303.938.
To switch to 2D map viewing mode and close the layout, select the button. To return to the layout, point the cursor at the pop-up Layout button and click it. Scaling and focusing of map Map scale and focus can be changed both manually and automatically. Automatic adjustment of map scale and focus occurs when a video camera alarm occurs, if no video camera icon is selected on the map. 259 eLineTechnology.com 303.938.
In this case, the map is scaled and refocused to center the icon for the alarm camera on the map. If alarms occur for several video cameras simultaneously, the map scale and position are adjusted to show all icons for the relevant video cameras. After a video camera alarm ends and there are no alarms for other video cameras, the map scale and position return to their initial status.
In immersive mode you can view video from only one video camera at a time. To select another video camera, do one of the following: 1. In a viewing tile, select the necessary video camera (see Selecting a video camera). 2. Click the video camera icon or its field of view on the map, if possible. 3. Exit immersive mode and select the necessary video camera on the map. To exit immersive mode, do one of the following: 1. Click the button. 2. Minimize the viewing tile by clicking the button. 3.
Note If many maps have been created, some tabs may not fit on the screen. If this happens, click the select a map. button. In the drop-down menu that opens, 2. By left-clicking a map icon for switching, if it has been created (see Adding switches to another map). The icon header shows the name of the destination map. 262 eLineTechnology.com 303.938.
Controlling devices from the map You can manage devices on the map (video cameras, relays) by using the context menus of the corresponding icons. You can control devices in all modes. Commands for controlling video cameras are given in the table below. Command (context menu item) Condition Icon status after the command is performed Arm The camera is disarmed Disarm Camera armed Commands for controlling relays are given in the table below.
Relay in normal status The table below possible status states of the sensor icon are described in the following list. Map icon Sensor status Video camera is armed, sensor is in normal status Video camera is armed, sensor is in alarm status Video camera is disarmed, sensor is in normal status Video camera is disarmed, sensor is in alarm status Exporting Frames and Video Recordings Frame export Export of frames is accessible in all viewing tile modes.
A digital signature is added to exported frames. Digital signatures are verified using the corresponding utility (see Digital Signature Verification Utility). Exporting Video Recordings Video export is available in archive and archive analysis modes. To export a video recording (fragment): 1. Go to archive mode or archive analysis mode (see the sections Switching to Archive Mode a nd Switching to Archive Search mode). 2.
5. Click the Export button. The export process begins. Its status is shown in a message below the layouts ribbon. If several export processes are ongoing, use the buttons to switch between them. The following information is displayed between them: number of the current export operation / total number of export operations (export progress for all operations). To cancel a current export, click the button. When an export operation finishes, the selected video fragment is saved in .
Note Configuration of logging to external files is carried out through the log management utility (see the section Log Management Utility). Control in Live Video Mode Messages about system errors which have occurred are displayed in real time on a dynamic error panel. When there are no unaccepted errors, this panel is not displayed; when there are such errors, it is displayed in EyStream's Layouts and Alarms tabs.
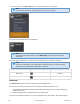
Search filters can be set as follows: 1. In the To and From fields (1) you can enter the date and time of the beginning and end of the period during which the events you are searching for were recorded. Note The date format is DD-MM-YYYY and the time format is HH:MM:SS.XXX. Note By default, the event search period is defined as the past 24 hours. 2. Select the type of event to search for in the Event type list (2). To search for all event types, select an empty line. 3.
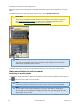
When you do that, a search results table appears (2). To accept all errors and close the error panel, click the Clear button (3). Refreshing Event Search Results You can automatically refresh the event search results table, i.e., add events to it which happened after the search was started (see the section Event search procedure). To do this, select the Add new events to the results of the search check box. Viewing Event Search Results System log event search results are displayed in a table (1).
Table column Contents of column Switching to archive video of specific events Date & time Date and time the event was recorded in the system in the format DD.MM.YYYY HH:MM:SS Event type Event type (information, alarm, debug, error) Description System description of the event The search results table may be more than one page. To navigate through a table which is more than one page, use the following buttons (2): 1. Back Goes back to the previous page of the table. 2.
Switching to archive video of specific events To switch to archive video of specific events, click the the relevant row. icon next to the event or double-click The system will now switch to archive mode and fetch the video of the selected event. Working with EyStream Through the Web Client Starting the web client Use of EyStream through a web client takes place remotely, through a web browser and the TCP/IP protocol. Remote video surveillance via a web browser does not require installation of EyStream.
Important As of the writing of this documentation, the web client is not supported in Internet Explorer or Opera. To start the web client: 1. Start a web browser. 2. In the address bar, type the address of the EyStream server in the following format: :/. 3. Enter a user name and password for connecting to the EyStream web server. The web client interface is then displayed. 272 eLineTechnology.com 303.938.
The web client interface has the following interface elements: 1. 2. 3. 4. Video camera selection panel with window for previewing available cameras (1) Slider for changing the size of preview windows (2) Field for searching by camera name (3) Message window (4) Searching for video cameras in the web client A search for video cameras is performed as follows: 1. In the Search by name field, type part of a camera's name (1). 2.
To view video from surveillance cameras in real time: 1. In the list of available cameras, select the relevant camera (1). 2. Click the Live button (2). 3. A web client viewing tile is then displayed (3). Note After a viewing tile is opened, the video camera selection panel is minimized. To expand the video camera selection panel , click the button Viewing video archives through the web client To view archived video for a video camera: 1.
2. Click the Archive button (2). 3. The archive navigation panel is then displayed, with the following interface features: a. Timeline (3). Archive navigation via the timeline in the web client is the same as when working in the EyStream client (see Navigating Using the Timeline). b. Playback control panel (4). Archive navigation via the playback panel in the web client is the same as when working in the EyStream client (see Navigating Using the Playback Panel). c. Archive position selection panel.
2. To set the playback position to the current time and date, click the Now button and go to step 6 (2). 3. Use the and buttons to select a month (3). 4. Click the necessary date on the calendar to select a day (4). 5. Use the Hours, Minutes, and Seconds sliders to set the time. 6. To set the playback position, click the Set button (5). The time position in the archive is now chosen.
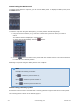
Controlling PTZ cameras through the web client A PTZ video camera is controlled through the PTZ device control panel. The following actions can be performed using the PTZ device control panel: 1. Use presets. 2. Adjust optical zoom and positioning speed of the video camera. 3. Modify the horizontal and vertical tilt angle of the video camera. Controlling a PTZ camera through the web client by using presets To go to a preset, select the relevant line in the list of presets.
– increase image – reduce image – field for displaying speed at which the camera changes the zoom scale Changing the positioning speed of a PTZ camera in the web client To change the positioning speed of a PTZ camera, use the buttons in the Speed group. – increase positioning speed – reduce positioning speed – field displaying the current positioning speed Changing the tilt of a PTZ camera in the web client To change the tilt of a PTZ camera, use the arrows in the PTZ Control group.
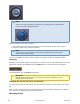
To close the message window, click the button. To clear the message window, click the button. Description of utilities Activation Utility License activation for the EyStream software package is carried out through the product activation utility. You can launch the product activation utility from the Windows Start menu: Start -> All Programs -> EyStream -> Utilities -> Program Activation. Note The product activation utility program file LicenseTool.
To activate EyStream, please refer to the document titled Activation Guide, step-by-step instructions on activating, updating and upgrading EyStream . which presents It is also recommended that you use the prompts displayed in the product activation utility's dialog boxes. EyStream Support Tool Purpose of the Support.exe Utility The Support.exe utility is designed to collect information about the configuration and operating status of hardware, the Windows operating system, and the EyStream software.
Note The Support.exe utility is located in the folder \AxxonNext\Support The Support.exe utility dialog box will then be displayed. To close the Support.exe utility, click the Cancel button or . Description of the Support.exe utility interface The Support.exe user interface includes the following elements: 1. 2. 3. 4. Summary of installed software (1). Short instructions on how to use the Support.exe utility (2). Check boxes for configuring data collection (3).
The Processes Service The Processes service is used for detailed analysis of a situation. To launch it, click the Start the Processes service button; the Processes window will then appear, displaying information about processes running on the computer initiated by the Support.exe utility. Note Selecting the Display information about all system processes check box enables viewing of all processes running on the computer. 282 eLineTechnology.com 303.938.
Click the button to close the Processes window. Collecting Data on the Configuration of Servers and Clients Using the Support To collect data using the Support.exe utility, perform the following: 1. Launch the Support.exe utility (see the section Launching and Closing the Utility). 2. Select check boxes as necessary to collect information about the system (1).
The data collection process will begin. The table that displays the progress of data collection includes two columns: Step and Status. In the Step column, a brief description of the stage of information collection is displayed. In the Status column, a progress indicator and the time spent on executing the stage are displayed. 4. When information collection is complete, click the Next button. 284 eLineTechnology.com 303.938.
5. A window containing information about the generated archive support_[date]_[time].7z will then appear. You can access the folder containing this archive by clicking the Open directory with file button. Note The archive is located in the folder :\Documents and Settings\\My Documents if you're using Windows XP, or in the folder :\Users\\Documents if you're using Windows Vista 6. Send an email with the attached support_[date]_[time].
Log Management Utility By default, information about all system events is recorded in the EyStream system log, which is stored in a local database of the server. It is possible to record information about desired events in external logs, which are log files stored in local directories of a server. Log data is archived at set intervals and moved to the log archive. Configuration of these capabilities is carried out through the log management utility.
To close the log management utility, click the Cancel button or utility). (accessible in both tabs of the Configuring a Log Archive Configuring a log archive is carried out in the Settings tab of the log management utility. To configure a log archive, you must perform the following steps: 1. In the Archive location field (1), enter the complete path to the directory to which the event logs should be moved after archiving. Note To set the path using standard Windows methods, click 2.
Note If it is not necessary to impose any limitations on log retention period and/or size, clear the corresponding check boxes in the Log restrictions ( 3-4) 4. Click OK (5) to save changes. Configuration of the log archive is now complete. Configuring Logging Levels Logging levels differ in the list of events to be recorded in external logs, as well as the level of event specification (low, medium, high). Configuration of levels is carried out in the Logging levels tab of the log management utility.
Debug Medium level of detail - logs debugging events, informational messages, system warnings, and system errors Trace High specification level – all system events are logged 2. Click OK (2) to save changes. Configuration of loging levels is complete. Digital Signature Verification Utility This utility verifies the digital signature that is added during export of video and snapshots from EyStream.
If it is not valid, the utility will show the message: Signature check: Invalid signature! Note During verification of a digital signature, the thumbnail of a snapshot is shown in the utility window. Videos cannot be previewed during the verification process Digital signature verification is now complete. To quit the utility, click the button. Appendices Appendix 1. Glossary Active viewing tile - viewing tile currently in use by the user.
computer with EyStream software installed. Archive – all audio/video files stored on a hard disk that can be played and exported to supported formats. Default archive of a video camera – the archive to which images from a given video camera are recorded during user-initiated alarms. Audio detection tool – a detection tool is triggered used to analyze the audio signal from a microphone. Audio recording – 1. the process of recording a digitized audio signal on a hard disk. 2.
area of a video camera's field of view. Stopping detection– a detection tool is triggered by the cessation of motion in a set area of a video camera's field of view. Noise detection– a detection tool which is triggered by an decrease in the signal/noise ratio below a set level. EyStream Domain – a selected group of computers on which the server configuration of the EyStream software package is installed.
Note Also used to designate a physical device The PTZ subsystem encompasses all the tools that provide for remote control of a PTZ device and the lens of a video camera. The analytics subsystem encompasses all the tools that provide for automatic analysis of incoming video and audio data. The Forensic Search in archive subsystem is a set of tools for searching video recordings in the archive by using video image metadata.
Appendix 2. Known issues in the EyStream Software Package Possible Errors During Installation On page: Error starting NGP Host Service Errors Connecting to the Postgres Database Error starting NGP Host Service If port 49999 is busy during installation of EyStream (for example, because of nethost.exe processes that have not been unloaded since removal of the previous version), an error message regarding the launch of NGP Host Service appears. To continue installation, free up port 49999 and try again.
Similarly, if an activation key allows using archives with a total size of an amount less than the current one, you are advised to correct the archive size to the required amount and then restart the server.
Note A log database (Postgres) is used for storing system events eyStream is provided by : eLine Technology 1070 W 124th Ave Suite 100 Westminster CO 80234 eyStream technical Support National =1-800-683-6835 Local = 303-938-1133 FAX = 303-938-8062 Email = support@el-usa.com Website = www.el-usa.com 296 eLineTechnology.com 303.938.