Quick Guide
1. 2. 3. 4. 5. 6. Quick Start Guide. Introduction ......................................................................... 3 Installing the EyStream Software Package........................................................... 3 Licensing the Software package ......................................................................... 4 Starting and closing the EyStream software......................................................... 6 Configuring the EyStream software package ................................
Quick Start Guide. Introduction On page: Document purpose Purpose of the EyStream software package Document purpose This document, titled Quick Start Guide, is intended to be used as a concise guide for installing and starting the EyStream software package as well as for configuring and using its main functions (video surveillance, audio surveillance, pan/tilt/zoom devices management).
Note Refer to the document titled Recommended Platforms for obtaining detailed information on recommended EyStream hardware and software platform When working with EyStream, the user must keep in mind the limitations that the developer imposed on the system in order to ensure its operability. The most important limitations are as follows: 1. Use only Latin characters, Arabic numerals and the minus sign ( - ) to name your computer with EyStream will be installed. 2.
package distribute the license file in the system. Data on the types of EyStream licenses is presented below.
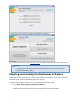
The main page of the product activation utility will then appears. It is recommended that you read Activation guide providing step by step activation instructions. Note To read this manual click the link in the bottom-left corner on the main page of the product activation utility Starting and closing the EyStream software Check readiness for operation of the entire communication environment, cameras, microphones and other system components before starting the system.
2. Enter your user name and password and click Connect. Note If a remote user is accessing the software, the name of the computer with which the connection is being established should be indicated in the Computer field Note When logging into the system for the first time, use the user name root, which has administrator permissions. Enter "root" into the User name and Password f ields. The administrator then needs to configure the system for multi-user access.
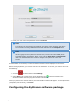
On page: Prior device configuration Procedure for Configuring System Objects Devices Detectors Archives Roles and Users The EyStream software package's interface consists of three expanding menus: 1. Layouts 2. Alerts 3. Settings . . . Use the Settings menu to configure EyStream. Prior device configuration The following prior operations are to be performed at the first launch of EyStream software package: 1. select IP-devices for registration as Objects; 2.
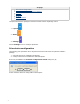
Launch of this configuration wizard is followed by auto search of connected IP devices. Found devices are displayed in Select devices for activation list. Set checkboxes next to those devices that should be registered as EyStream software objects in Select devices for activation list. Click Apply. Click Search to start the IP devices search again. After clicking the Apply button the user will be suggested to configure archives on default for video cameras (IP devices) selected at the first step.
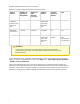
Identifying and managing devices physically connected to a server, creating users with varying permissions, and creating rules and automatic reponses are just a few of the things the user can do by creating and configuring system objects. The procedure for working with system objects varies slightly depending on their type, but generally you should adhere to the following sequence of actions: 1. 2. 3. 4. 5. Create an object. Configure its parameters. Save changes. Edit the values of parameters.
You can also create objects in EyStream either using the above the object tree or using the configure the objects and save changes. tools located button, depending on the object type. You can then Detectors In the EyStream software package, several types of detectors process incoming data: 1. 2. 3. 4. 5. Situation analysis detectors. Video detectors. Audio detectors. Detectors embedded in a video camera: Detectors which process signals from the video camera's sensor.
You can access them using the Layouts menu. Note The viewing tile can be displayed on the Alerts menu to evaluate alert events occurred Viewing tile The viewing tile is used to display video stream on the computer monitor with specific parameters and to monitor the forensic search in archive. The viewing tile also has a function which allows the generation and evaluation of alert events in the process of video monitoring of a guarded location.
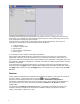
operate in a user-defined mode or a standard mode of operation. By default, the user mode is enabled for the layouts ribbon. The operating mode of the layouts ribbon can be specified in the Settings Options User interface tab. The Archive Navigation Panel The archive navigation panel is automatically displayed in the right-hand part of the screen when you switch the viewing tile to archive mode or forensic search in archive.
11:50:00 AM 11:55:00 AM 12:00:00 PM 12:05:00 PM 12:10:00 PM 12:15:00 PM 14
The archive navigation panel is used for the following functions: 1. 2. 3. 4. 5. 6. Navigating in the archive. Playback of recordings. Selecting playback mode: forward or backward. Setting playback speed. Selecting alerts for display on the timeline and in the alert events list. Viewing the list of the alert events of the selected type. The archive search mode The archive search mode is used to search the video fragments in the archive and to analyse them.
The PTZ control panel is used for the following functions: 1. Controlling PTZ video cameras. 2. Setting and switching to camera presets. 3. Launching/stopping patrolling.