
User manual


Bijou
77
in the fixture’s documentation or on the web.
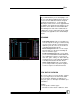
2. Enter the screen. The yellow pointer is
pointing to the Type number and name. Posi-
tion the yellow arrow by using the [Next] and
[Last] keys.
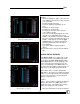
3. Naming the Type. Type in the fixture’s
name. Hit next and the arrow will point to
attribute 1
Example:
> Number: 1
> Name: Scan 250
4. Naming the Attribute. Type in the attribute
type’s name using the keyboard.
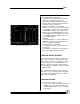
5. Enter the attribute names in order with the
optional computer keyboard. (see Table 1)
6. Verify that the width of the attributes is
correct. If the attribute has values of 0-255
the width is 8-bit. If the attribute has values of
0-65535 the width is 16-bit. The values come
up as 8-bit automatically so you only have to
change them if 16-bit is needed. (see Table
2)
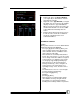
7. Use the F1 key to select the width as needed
8. Type 8 or 16.
9. Press the [Enter] key. The mastering value is
used to tie multiple devices together.
10. Use [Next] and [Last] to select an attribute (if
not already selected).
11. Press [F2] to select mastering. (This is a way
of linking multiple fixtures through their type.
For more information on mastering turn to
page 81) You have three choices: none,
straight, and inverted The value of the [F]
keys changes to the three mastering types.
11. Press the [F] key with the desired type (e.g.
[F3] for inverted).
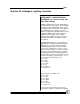
ASSIGNING ATTRIBUTES TO WHEELS
Assign each attribute to a wheel on the Bijou
Plus/Control Freak. The Bijou Plus/Control Freak
has a trackball with two axes. The X-axis is hori-
zontal. The Y-axis is vertical. There are also 4
wheels labeled A, B, C, and D. The following is
an example on how to structure your attributes on
the controls