
Specifications


48
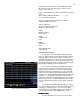
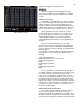
Figure 36 Macro Screen
This will load a yellow 01 on the E/Pg: line directly above
a yellow 24 on the Sub: line of the Submaster control section
of the STAGE screen. Any yellow numbers in this section
indicates that an effect has been loaded to operate with that
Submaster.
To run the effect you can fade it up at any rate you wish
using the Submaster fader or you can turn it on instantly using
the Submasters bump button. (The instant on bump button
option is best when using a Single Mode Effect as lightening.)
Effects will run as long as you have the Submaster up or the
bump button pressed. You can only load one effect per
Submaster fader, but you can run any or all of them at any
one time.
You can have the Submaster fader control only an Effect
by loading it to a Submaster fader that has no prerecorded
memory. Or you can load an Effect onto a prerecorded
Submaster memory and run them together. A case where
you may want to combine them would be an effect created to
flicker lights used to simulate a fire combined with fixtures
focused to give the impression of the general warm glow from
the fire.
TO CLEAR AN EFFECT OFF OF A SUBMASTER
TO CLEAR AN EFFECT OFF OF A SUBMASTERTO CLEAR AN EFFECT OFF OF A SUBMASTER
TO CLEAR AN EFFECT OFF OF A SUBMASTER
To remove an effect from a Submaster all you have to
do is press [Sub-master] [#] number of Sub to be cleared
[Effect] [Enter].
MACROS
MACROSMACROS
MACROS
A macro is a way to reduce the number of key strokes it
takes to do a repetitive operation. The Bijou has a MACRO
screen [Effect/Macro] that allows you to see the key strokes
that make up a macro. To look at a different macro you can
use the [Next] [Last] keys to step threw all recorded macros
or, if you know which macro you want to see, you can press
[Macro #] [#] number of the macro [Enter] which will jump you
to the desired screen.
CREATING A MACRO
CREATING A MACROCREATING A MACRO
CREATING A MACRO
A macro can be created from any screen but if it is a
macro you intend to use from a specific screen it is always
best to start at that screen. To create a macro press [Create
Macro] followed by the number you want it to be [1] to
[2][5][0][0] then press [Enter]. At this point you should see in
the top center of your screen a flashing red MACRO
indicating that every keystroke you press from this point on
will be part of your macro.
As an example of a useful macro enter the following
keystrokes; [Create Macro] [1] [Enter] [Setup] [Next] [Next]
[Next] [8] [Create Macro]
The final [Create Macro] ends the record sequence,
removes the flashing red MACRO from the top of the screen
and completes the macro. Now go back to the stage screen.