
Specifications
32
second fade. If you were to stop here and ended the
command with [Enter] Cue 2 would be recorded with an Up
TIME of 3 seconds and a Down TIME of 3 seconds.
But lets make the cue more complex by making the
down time an 8 count. So your next keystroke is [Time] and
now you will see the command line reads; RECORD CUE 2
TIME (UP/DOWN ARROW) 3 TIME (DOWN ARROW). This
signifies that the next # you input will be the Fade Down time
so press [8] [Enter].
[Record] [2] [Time] [3] [Time] [8] [Enter]
Now if you press [CUE LIST] twice you will see that you
have recorded a Cue 2 with different Up and Down fade
rates. Return to [Stage] and using the AB [Load] cue [2]
[Enter] and you will be ready to fade into Cue 2 in time. Note
that the fade Up count is displayed for Cue 2 and the fade
Down count is now displayed on Cue 1. Press [Go] to fade
to Cue 2 in time.
CREATING A CUE WITH DELAYS
CREATING A CUE WITH DELAYSCREATING A CUE WITH DELAYS
CREATING A CUE WITH DELAYS
Sometimes putting a delay on the Up or Down starting
time can assist with dramatic impact. Every time you push
the [Go] button it is a go for both the Up and the Down times.
So if you want to create the look of tightly cued, separate
actions, you can either make multiple cues and hit the [Go]
precisely. Or you can use the board’s ability to use delays to
create the affect you are after.
Example: You may want a fully lit stage to fade to
almost blackout on an 8 count and then have a bright special
POP on a character on stage. To do that you would create
Cue 3 with just the special. So clear the AB cross fader by
pressing [Load] [Enter]. Now make sure that all
Channel/faders are down and off. Push Channel/fader 26 up
to full. Press [Record] cue [3] [Time] up [1] [Time] down [8]
[Time] delay on up [7] [Time] delay on the down [0] [Enter].
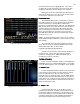
To see how this operates push the Channel/fader 26
down to off. [Load] [1] [Enter] [Go] that will fade you into Cue
1 in time. Press [Go] again, which will cross fade you from
Cue 1 into Cue 2. Now look at the TIME window in the cross
fader display. The TIME for CUE is displayed in brown
instead of the white you have seen up to now.
The brown indicates to you that the cue has a ‘Delay’
associated with its timing so you will not be taken off guard by
the cue actions. Now press the [Go] one more time to watch
how the delay affected you cues. You will see what happens
if you focus on channels 1 & 26 on the display screen as
CHN1 is part of the fade down time and CHN 26 is part of the
fade up time with the delay on the up.
SETTING LEVELS VIA THE KEY PAD (DATA ENTRY) &
SETTING LEVELS VIA THE KEY PAD (DATA ENTRY) &SETTING LEVELS VIA THE KEY PAD (DATA ENTRY) &
SETTING LEVELS VIA THE KEY PAD (DATA ENTRY) &
THE ENCODER WHEEL
THE ENCODER WHEELTHE ENCODER WHEEL
THE ENCODER WHEEL
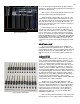
Channel levels do not have to be set via the
Channel/faders. All 512 channels can be addressed through
the Action and Number Keys. If you are working through this
manual in order you should now have Cue 3 on stage and on