
Specifications
27
If you are going to do the cross fade in time the operator
should be given a WARNING CUE #, then a READY CUE #
ON A 3 COUNT and finally a CUE # ON A 3 COUNT…GO.
The operator would then count back in time as the cross
fader is moved; 3 (on the go) one thousand, 2 one thousand,
1 one thousand, COMPLETE.
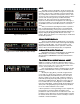
Now that the XY cross fader is in the up or X position
you can set the next set of Channel/fader levels for the next
cue on the bottom Y row of faders. So on the bottom row of
Channel/faders set faders 6 - 10 at full (10). Again note that
there is no indication on the display screen that you did this
as you have not cross over to that side. To go from the top
scene (Scene 1) to the bottom scene (Scene 2) move the XY
cross fader down to the Y side. As you do the cross fade the
channel levels for channels 1-5 will fade out and the levels for
channels 6 - 10 will fade up to full all at the same time. You
have now created and faded into two cues. To do a show
with many cues you would continue by now resetting the
Channel/faders on the top (X) row, fading across to those
levels then resetting the bottom (Y) row, fade across to it,
reset the top row, fade into it, reset the bottom…………etc.
until you have created and written down all of the looks you
need for your show.
It must be remembered that in 2 Scene Preset, 1 Scene
Preset, and for that matter the manual use of Submasters,
the output levels are set by your hand and not recorded into
the board. So you will have to write (pencil is best, directors
and designers always change their minds) out all of the Cue
#’s with their associated Channel/fader levels, cross fade time
and which bank of faders the cue is set on, top X or bottom Y.
Remember a written HARD copy of cue information is a good
idea even in memory mode of operation. Computer disks can
be erased, overwritten or damaged and power surges due to
lightening can scramble a boards, on board, memory. So
learning to use written Cue Sheets is a good idea that may
save your show in future.
TO OPERATE IN 1 SCENE MANUAL MODE
TO OPERATE IN 1 SCENE MANUAL MODETO OPERATE IN 1 SCENE MANUAL MODE
TO OPERATE IN 1 SCENE MANUAL MODE
Well 2 Scene preset operation is used primarily for
running a sequence of predetermined cues in a production, 1
Scene operation is more often used for creating looks “On
The Fly”. By switching to 1 Scene operation you double the
number of manual Channel/faders you have at you finger tips
allowing greater flexibility of control. Many times this
operation is combined with the use of Submasters (see latter
section) and bump buttons for performances with little or no
prior rehearsal time. In this form of operation a chart (jazz
term) or magic sheet (lighting term) is created that tells the
operator what area of the stage (Down Left, Down Center, Up
Center, Podium, Drummer, etc.) and what color of light each
channel controls. Then as those areas are used on the stage
the operator can quickly access the correct lights for the area
and turn them on to an appropriate level. All of this take
practice and experience to be done well, but in live music
performance it is a proven and well used way of doing shows.