
User's Manual


6
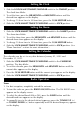
5. A weather icon appears on the display showing the weather with one of five
different icons from Sunny to Stormy. These icons project the next six hours
of weather and weather trends. The weather center must be acclimated to
the local area and altitude.
This process takes 48 hours.
Notes:
• The first weather reading will not be accurate.
• For more details on weather forecast icons and features, refer to the section entitled,
“Weather Forecast.”
6. To set the clock, slide the
LOCK/ALMSET/TIMESET/CALENDAR switch to
the
TIMESET position. The clock time blinks. Press the HR/MONTH and
MIN/DATE buttons until the desired time appears on the display. Slide the
LOCK/ALMSET/TIMESET/CALENDAR switch to the LOCK position.
7. To set the alarm time, slide the
LOCK/ALMSET/TIMESET/CALENDAR switch
to the
ALMSET position. The alarm time blinks. Press the HR/MONTH and
MIN/DATE buttons until the desired alarm time appears on the display. Slide
the
LOCK/ALMSET/TIMESET/CALENDAR switch to the LOCK position. (See
“Alarm Functions” section for more information.)
8. To set the calendar, slide the
LOCK/ALMSET/TIMESET/CALENDAR switch to
the
CALENDAR position. The date blinks. Press the HR/MONTH and MIN/DATE
buttons until the current date appears on the display. Slide the LOCK/ALM-
SET/TIMESET/CALENDAR
switch to the LOCK position.
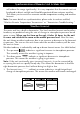
Synchronization of Remote Unit & Main Unit
1. After inserting the batteries into the main unit and remote unit, plug in the
main unit using the 10.5V adapter. The LCD on the unit shows the indoor
temperature and, within minutes, shows the outdoor temperature — the same
temperature that appears on the remote unit. If at least 10 minutes pass and
the outside temperature field displays “---,” ensure that there is a temperature
appearing on the remote unit. If a temperature does appear on the remote
unit, press the
RE-SYNC button on the main unit and the RESET button on
the remote unit. The temperature will appear within a few minutes.
2. Once the units are in sync, place the remote unit in a desired outdoor location
within 100 feet of the main unit. Once you have located a place for the out-
door unit, ensure that the main unit continues to show an outdoor tempera-
ture. If it is not showing an outdoor temperature, the remote unit has been
placed either too far away or in an area where there is interference blocking
the signal. The outdoor unit should be placed as close as possible to the main
unit with as little interference as possible (walls, appliances, computers, etc.
Quick Start