
Installation guide


5
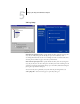
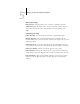
5-5 General Setup options
NOTE: Do not use the device name (DC12 or DC2000) as the server name. If you have
more than one Fiery, do not give them the same name. Windows NT 4.0 does not
support more than one computer with the same name in the same workgroup or
domain.
Date and Time—Specify the system date and time, which are recorded on the Job Log.
Enable Printed Queue—Specify whether to enable the Printed Queue, a storage
location on the Fiery disk for recently printed jobs. You can reprint jobs from the
Printed queue without resending them to the Fiery. If the Printed queue is not
enabled, jobs are deleted from the Fiery disk immediately after they are printed.
Jobs Saved in Printed Queue—Specify the number of jobs to be stored in the Printed
Queue. Jobs in the Printed queue take up space on the Fiery hard disk.
Delete Scan Jobs—Specify how often to delete scan jobs from the Fiery hard disk.
Choose Manually to delete scan jobs manually on a job-by-job basis. Click Delete Scan
Jobs Now to delete scan all jobs immediately.
Use Character Set—Specify whether the Control Panel and the job management tools
should use the Macintosh, DOS, or Windows character set for displaying file names.
This is important if a file name includes accented or composite characters (such as é
or æ). For mixed-platform networks, select the setting that gives the best overall
representation of the special characters you use.
Print Start Page—Specify whether the Fiery should print a start page when it is turned
on or restarted. The Start Page displays information about the Fiery, including server
name, current date and time, amount of memory installed, network protocols enabled,
and print connections published.
Support—Enter names, phone numbers, and e-mail addresses of contact people at
your organization who provide support for the Fiery and the copier/printer. In remote
Setup, use the Support tab.
EX12