
Technical data


3
3-26 Performing Setup from the Control Panel
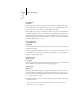
Bindery Setup options
Bindery Setup menu
NOTE: If you change your mind about any of the menus you have selected, you can use
the Menu button to escape and return to the main Bindery Setup menu. To cancel all
changes you must exit Network Setup and select No to Save Changes.
Network Setup
Service Setup
PServer Setup
Bindery Setup
Use Bindery Setup if you have already configured one or more bindery servers (file
servers running NetWare 3.x or NetWare 4.x in bindery emulation) with a Print
Server and a Print Queue for Fiery jobs. Before entering bindery settings, be sure
the Fiery is connected to the network and the NetWare file server is running. If
Guest Login is not supported, you need a valid user name and password.
NOTE: The terms NetWare server, Novell server, and IPX file server are in common
use and are used here interchangeably to mean the server on an IPX network
running Novell NetWare networking software.
Because you can set up more than one Novell server to handle Fiery print jobs, an
additional menu is displayed for this purpose. The options are:
• Add File Server—creates a new file server connection to the Fiery. You can set up
a maximum of eight file server connections. After you have finished adding a new
server, you return to the Bindery Setup menu, and you can set up another server
if you wish.
• View Server List—displays the list of file servers that have already been selected to
communicate with the Fiery.
• Edit Connection—lets you change the NetWare Print Server that will print to the
Fiery.
• Remove File Server—lets you disconnect the Fiery from a file server to which it is
currently connected. Remove a file server when you want to reduce the number
of connections to the Fiery or re-assign the connection to a different NetWare file
server.
• Exit Bindery Setup—after you added all servers, viewed a list of file servers, or
removed a file server from the list.
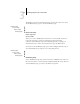
Exit Bindery Setup
Add File Server
View Server List
Edit Connection
Bindery Setup
Remove File Server
Bindery Setup