
User manual


chapter 4 patch 35
Assigning a profile to a dimmer
Dimmer profiles allow you to select one of ten output curves (profiles) and
assign it to a dimmer. These profiles allow you to compensate for non-
linear light outputs from certain types of fixtures or incorporate a preferred
response in a fade. The ten curves are listed below.
If you do not select a profile, all dimmers use profile zero; a linear fade.
Follow these instructions to assign a profile to a dimmer:
Note: To reset profile to a linear fade, assign profile zero to the dimmer.
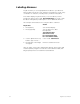
Dimmer profiles
0 - Linear
1 - IES square
2 - Slow bottom
3 - Fast bottom
4 - Slow top
5 - Fast top
6 - Full at 1%*
7 - Preheat 5%
†¶
8 - Preheat 10%
†¶
9 - Hot patch
‡¶
* Dimmer intensity jumps from 0% to 100% at 1% output.
† Dimmer at 5% or 10% whenever console power is on. Dimmer inten-
sity increases when output exceeds 5% or 10%.
‡ Dimmer at full whenever console power is on.
¶ Affected by [Blackout] but not by Grandmaster.
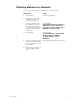
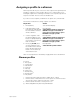
Keystrokes:
Action:
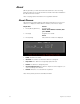
1. Press [Patch].
Selects Patch display
2. If the [Dim] LED is unlit,
press [Dim] to indicate that
the next number entered
will be a dimmer.
Prompt reads:
Select dimmer numbers, then press
ENTER to assign to a channel, or
press AT to assign a level, or press
PROFILE to assign a profile
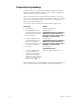
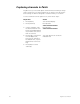
3. Use the keypad to enter
the desired dimmer num-
ber(s) Use [And] and [Thru]
if you want to select more
than one dimmer.
Prompt reads:
Select dimmer numbers, then press
ENTER to assign to a channel, or
press AT to assign a level, or press
PROFILE to assign a profile
4. Press [S7], Profile, then
use the keypad to enter
the number of the desired
profile. Profile numbers are
listed on menu at the top
of the Patch screen
.
Prompt reads:
Select dimmer profile number