
User manual

298 Insight 2x user manual
Installing Designer’s Worksheet
Designer’s Worksheet is a remote digitizer tablet available for use with
ETC consoles
.
Two different models of Kurta digitizers have been used as
Designer’s Worksheets, and each has a different configuration procedure,
described below. Refer to Kurta digitizer tablet documentation if you need
additional information
.
See
Designer’s Worksheet
on page 207 for opera-
tion instructions.
Installing the Kurta XGT
The Kurta XGT digitizer tablet is shipped with current Designer’s Work-
sheet systems.
Follow these steps to install and configure your Kurta XGT Designer’s
Worksheet:
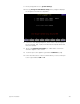
1. Turn off your console or Remote Interface.
2. Plug the 9-pin serial connector on the interface cable into the console
or Remote Interface connector labeled Digitizer.
3. Plug the other end of the interface cable into the interface connector
on the back panel of the XGT. There is a small arrow or dimple on the
plug. It should face up.
4. Plug the transformer cable into the DC connector on the interface
cable’s serial connector (plugged into the back panel of the console or
Remote Interface).
5. Plug the transformer into an electrical outlet or a surge protecting
power strip.
6. Turn on your console or Remote Interface. The XGT also turns on. The
red power on LED in the back left corner should blink off and then on
again. If it doesn’t, check to be sure all cables are properly connected.
7. The XGT shipped with a page of instructions called
Configuring the
Designer's Worksheet for use with Expression 2 line consoles.
Follow
the instructions on that page now.
8. The digitizer is now configured properly. Remove the configuration
page, store it in a safe place, and place one of the standard ETC tem-
plate sheets under the clear plastic flap on the digitizer.
Note: Additional pads of Designer’s Worksheet templates are available
from your dealer or ETC.