Use _ Care Guide Wine Coole_ / Beverage Cente_ Ouia de Oso y Cuidado Refrigerador de Vinos / Centro Guide D'utilisation Ref_oidisseur _ Vin de Bebidas et D'entretien / Centre de Boissons
i_iiii_iiii_iiii_i_!iiii!!@i!_!i!@i!iii!i!iii!;!iii@i_!:!:!i!ili Finding information : Please Read and Save This Product Registration GU i de The package conta n ng th s manua a so nc udes your product regBtratlon mformatlon. Warranty coverage begins at the time your Electrolux wine cooler / beve rag e cent e r was pu rcha sed. . . Thank you Torcnoosmg Elec!ro,ux, the new loremlum brand m home a pphanc es.
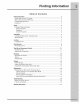
iii_;ii_;ii_!!_i!i_i_ Finding information 7able of Contents F_nd_ngh, formation ................................................................................. 2 PleaseReadand SaveThis Guide ......................................................................................2 Makea RecordforQuickReference ...................................................................................2 ProductRegistrationCard ..........................................................................................
s foty _mportantsafety _nstruotions SafetyPrecautions Do notattemptto install oroperateyourunit until you have read the safety precautions in this manual. Safety items throughout this manual are labeled with a Danger Warning orCaution based onthe risktype. Definitions _::_Thisisthesafetyalertsymbol. ltisusedto alertyoutopotential personal injuryhazards. Obey all safety messages that followthis symbol to avoid possible injuryordeath. General Precautions .........
Installation _nsta_ling the Wine Coo_er / Beverage Center Your Electrolux wine cooler / beverage center has been designed for either free-standing or built-in installation. When built-in, your wine cooler does not require additional air space for top, sides or rear. In either case, the front grille must NOT be obstructed.
!i@;!i@iii;i@;i;!;i@i{iii_{iii_{iii_i_i!i!!ii;iliiiii!i installation S it @ P_ @pa r a ti @ n 1 Position the uniton a fiat level surface Wpeout nsdeofuntwthadampcoth 7 Be sure to install the Anti-Tip bracket. Follow capabb ofsupporting theentire weight orthe the_nstructbns provided w_th theAnt_-T_p unit. Rememberthe unitwii[ be significantly heavieronce [tisfuiiyioaded. bracketkit. 2 -rh_s unitrequires agrounded andpolarized lt5VAC, 60Hz, 15Acircuit(normai householdcurrent).
Leveling Leveling the Unit Position the unit on a flat, level surface capable of supporting the entire weight of the unit when full. This unit contains four (4) adjustable leveling legs. Turn the legs clockwise to raise and counterclockwise to lower.
iiii!:,iii!:,iii!:iii!i_i_i!ii_i!iiii_i;i_i;i_i;i ¸i_!i!zi,li!@:!ii!ii;ii!ii;i!i!!!iii!i;i;i;@!i ¸i!ili;ili:i: Door Reversal Re v @r S in _ th @ DCO r 4 Remove upper r ght-hand (RH) hngebracket by loosening four (4) Torx screws. Be careful to support the door while loosening and removing the upper hinge bracket. .... io reverse [ne aoor: 1 Disconnect power to the wine cooler/ beverage center.
Door Reversal 6 Remove access cover by removing two (2) Philips screws. 7 Shift door harness from one side to the other. 9 Install metal left-hand (LH) door stop by installing hex head screw. 10 Install plastic LH door stop by installing hex head screw. 11 Remove lower RH door hinge by removing two (2) hex head screws. 12 Install lower LH door closer in lower LH door Replace access cover.
i_i!_!_i!i_ii_!i!_!_i!i_ii_!i!_!_i!i_ii_!i!_!_i!i_ii_!i!_!_i!i_ii_!i!_!_i!i_ii_!i!_!_i!i_ii_!i!_!_i!i_ii_!i!_!_i!i_ii_!i!_!_i!i_ii_!i!_!_i!i_i Toe Grille 15 install upper LH hinge bracket by installing four (4) Torx screws. Install Left Hand Hing ; (some models) ) _lnstaH Upper _Left Hand Hin I , 18 Reapply power.
StartStarting p and Temperature Control the Unit Your wine cooler/beverage center is shipped in the ON position; however, you may turn it ON or OFF by pressing and holding the ON/OFF for three (3) seconds and then releasing the key. Adjusting the Temperature To accurately check the temperature, insert a reliable thermometer into a plastic (non-breakable) bottle, partially filled with water. Tighten the bottle cap securely. Place the bottle in the desired area for 24 hours.
ii!i!ii!iiiiiii_ii!;!iii!;!iiiiiiiii!_i!ii!i_i!_i_i_iii_i_iiiiil ¸iiii_ii;!iii,li;!_iil _I ¸iii:;_iiiiii!:i:!_i_ii!iii!iii!ii_!!i!!!i!!!!!!ii opo,.tio,, i i Desc'p'o vacationmode ;; :::: .......... mule sennas ::: o eaues Conservesenergybydisablinginterior lights and keypad inputs. a doer ajar If thedoorhasbeenleftopenforfive(5)minutes, anaudiblealarmwillsound andthedoor ajar indicator willilluminate ontherightsideofthe display. Themute sounds indicator willblink.
Storage Proper Storage The wine cooler w[[[ accommodate 46 bottles (750 ml size), There are five (5) upper racks that wi[[ hold eight (8) bottles each and one lower display rack that will hold six (6) bottles. Specially designed wine racks allow for proper horizontal storage of the wine. The cork remains moist which keeps air from entering the bottle. The beverage center will accommodate six (6) bottles on the lower rack. Additional storage capacity is provided on the glass shelves above the racks.
i;i_;i;!_i;;!_i;;!_;_;i;!_!!!_z_i_i_i!_i_!_i_i!_!!i!iiii;i_!:!_!_!_i_;:!_!i;ii_iii!iiii!ii!i!_!_i!ii:i;i_i_!i!_;!_!i_;i!i_ii!_ aooo Maintainingvo.rwin÷ cook÷r/ nte.o C e.n n.-o..eqo ed n nt r _ _ v_ _ Periodiccleaningandpropermaintenancewill ensure efficiency, top performance, and long life. The maintenance intervals listed are based on normalconditions.You maywanttoshorten the intervals if you have petsorotherspecial considerations.
aintenance Glass Shelf (Beverage Removal/Installation Center Only) 1 Open door fully. 2 Method 1 - removal of entire shelf assembly: a. Lift up on front edge and rear portion of shelf. Cantilever brackets will disengage from ladder. b. To reinstall, slide shelf into cabinet ensuring the cantilever brackets engage fully in the proper holes. It may help to extend the glass portion. Method 2 - glass sheff removal: a. Extend shelf fully. b.
i;i!i_i_!ii;i!ii;i!i;:ill ¸i¸i!ii!:!iii:!iii:!!!i ¸ii_iii!i ¸II!I ¸_!_i_i;!;!i_ii;i_i_;_i_;_i_ii_i_ii_i_ii_i_i;_ii_;!i_!i_i_!i_i_!i_i_!i_i_!i_i_i!:iii Troubleshooting :: :: [ Before You Call fo_" Se_'vice _f Service is Required _ftheunitappears tobemalfunctioning, read Contact thedea_er where youpurchased theunit through this manual first. If the problem persists, check the Troubleshooting Guide below. Locate the problem in the guide and refer to the cause and its remedy before calling for service.
Warranty information Major Appliance Warranty Information Your appliance is covered by a one year limited warranty. For one year from your original date of purchase, Electrolux will repair or replace any parts of this appliance that prove to be defective in materials or workmanship when such appliance is installed, used, and maintained in accordance with the provided instructions.