Use & Care Guide Built-In Coffee Maker Single Double Espresso Espresso E24CM75GSS E24CM76GSS Single Latté Double Latté Decaf Coffee Large Coffee Hot Cappuccino Water Steamer 102220 Rev D-2
Finding Information PLEASE READ AND SAVE THIS GUIDE Thank you for choosing Electrolux, the new premium brand in home appliances. This Use & Care Guide is part of our commitment to customer satisfaction and product quality throughout the service life of your new coffee maker. We view your purchase as the beginning of a relationship. To ensure our ability to continue serving you, please use this page to record key product information.
Finding Information Product Registration Card The package containing this manual also includes your product registration information. Warranty coverage begins at the time your Electrolux coffee maker was purchased. If you received a damaged product, immediately contact your dealer or builder. Do not install or use a damaged appliance. Note Registering your product with Electrolux enhances our ability to serve you.
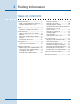
Finding Information Table of Contents Finding Information................................................ 2 Make a Quick Reference Record.......2 Product Registration Card...................3 Safety............................................................................ 5 Important Safety Instructions............5 Feature Overview..................................................... 9 Types of Drinks You Can Make...........9 Exterior.....................................................
Safety Important Safety Instructions Safety Precautions Do not attempt to install or operate this appliance until you read the safety precautions in this guide. Safety items throughout this guide are labeled with a WARNING or CAUTION based on the risk type. Definitions This symbol is the safety alert symbol. It is used to alert you to potential personal injury hazards. Obey all safety messages that follow it to avoid possible injury or death.
Safety General Precautions Warning To reduce the risk of fire, electrical shock, or injury when using your coffee maker, follow basic precautions including the following: Read all instructions before operating the coffee maker. IMPORTANT: Before performing any type of service or installation, make sure that electric power to the coffee maker is disconnected.
Safety Warning • DO NOT PUSH ANY BUTTONS ON THE CONTROL PANEL UNTIL ALL BODY PARTS AND CLOTHING ARE CLEAR OF THE BREWING COMPARTMENT. KEEP ALL BODY PARTS AWAY FROM THE BREWING COMPARTMENT DURING OR IMMEDIATELY AFTER DRINK DISPENSING. HOT LIQUIDS AND STEAM CAN CAUSE SEVERE BURNS. • Make sure individuals who use the coffee maker are able to operate it properly. • Never allow anyone, including children to sit, stand or climb on any part of the coffee maker.
Safety General Precautions (continued) caution • To prevent jamming of the grinding mechanism, use only the types of coffee beans specified in this manual. • Remove the drip tray before closing the front panel door. Closing the front panel door without the drip tray removed could damage parts of the coffee maker. • To prevent clogging of the internal parts, use only filtered water as specified below. Do not used distilled water. • Do not put any part of your coffee maker in a dishwasher.
Feature Overview Types of Drinks You Can Make Your coffee maker comes from the factory set up to make the types of drinks listed below. See the Operating Instructions section for step by step instructions. Espresso One “shot” of espresso is a little over one ounce of strong coffee. The Single Espresso button brews one shot of espresso. The Double Espresso button brews two shots. Cafe Latté Cafe latte is a large espresso (about three ounces) with six ounces of steamed milk.
Feature Overview Exterior Front Panel The front panel has buttons across it that are used to operate your coffee maker. It also has a display which provides useful information. The front panel opens up to allow cleaning, maintenance and programming*. Display The display tells you valuable information about your coffee maker when the power switch is turned on. The brewing compartment is the area where drinks and water are dispensed.
Feature Overview Front Panel Ground Coffee Chute Single Espress o Double Espress o Single Latté Water Tank Double Latté Decaf Coffee Large Coffee 11 Coffee Bean Container Hot Ca ppuccin Water Steamer o Display Brewing Compartment Lock Steam/Hot Water Wand Door Release Button Drip Tray Power Switch Coffee Dispenser Light Switch How Your Coffee Maker Works The coffee maker heats water from the water tank or water supply line (depending on the model) to brew coffee drinks.
Feature Overview Interior Your coffee maker requires periodic cleaning and maintenance. See the Care and Cleaning section for more information. Brewing Unit Door Open the brewing unit door to clean the inside of your coffee maker and make certain types of adjustments. Piston Assembly The piston assembly is used by the coffee maker to help make coffee. It requires occasional cleaning.
Feature Overview Front Panel (open) Serial Number Label Piston Assembly Brewing Unit Door Used Coffee Ground Bin Caution • To open the front panel see page 27 for directions. • To prevent damage to the door, do not close the front panel without first removing the drip tray.
Getting Started Preparing For Installation Before Installing Your Coffee Maker... 1. Call your local water company. Ask them for the water hardness level of the water supplied to the building where your coffee maker will be installed. 2. If the water hardness level is above four grains per gallon (4 gpg): ◊ If you are installing model E24CM76GSS (plumbed model), contact a water treatment specialist and have a water treatment system installed to reduce the water hardness level to 4 gpg or less.
Getting Started 2. Gently move the coffee dispenser up or down until it is at the desired height. 3. Turn on the power switch according to page 17, wait for the message “Machine Ready” to appear on the display. 4. Flush the coffee maker according to the Flushing Out the Coffee Maker section on page 39. Warning • To avoid sickness, flush the coffee maker out before operating it for the first time according to the Flushing Out the Coffee Maker section on page 39.
Operating Instructions Before Using Your Coffee Maker Warning DO NOT PUSH ANY BUTTONS ON THE CONTROL PANEL UNTIL ALL BODY PARTS AND CLOTHING ARE CLEAR OF THE BREWING COMPARTMENT. KEEP ALL BODY PARTS AWAY FROM THE BREWING COMPARTMENT DURING OR IMMEDIATELY AFTER DRINK DISPENSING. HOT LIQUIDS AND STEAM CAN CAUSE SEVERE BURNS. Caution Use only filtered water with a hardness of 4 gpg or lower. See Before Installing Your Coffee Maker on page 14.
Operating Instructions Turning On Your Coffee Maker Turn on the power switch. It is located on the ceiling of the brewing compartment, below the front panel. You will hear the brewing motor prepare to make drinks. “Please Wait..Heating” will appear on the display for a few minutes until the unit is ready to operate. NOTE Electrolux highly recommends turing off the main power switch when the unit is not in use. “Machine Ready” will appear on the display when the unit is ready to make drinks.
Operating Instructions Loading Your Coffee Maker Warning • To prevent personal injury, keep your hands out of the coffee bean compartment and the ground coffee chute. • Some of the metal surfaces behind the front panel are hot when the power switch is on. Avoid contact with these surfaces. • Do not pour flavored, un-roasted, partial coffee beans or ground coffee into the coffee bean container. Doing so may cause the coffee grinding mechanism to jam.
Operating Instructions 19 Making Espresso Warning BURN WARNING: HOT LIQUIDS CAN CAUSE SEVERE BURNS. KEEP ALL BODY PARTS AND CLOTHING CLEAR OF THE BREWING COMPARTMENT DURING OPERATION. Your coffee maker can make one or two cups of espresso at a time. One “shot” of espresso is a little over one ounce of strong coffee. 1. For one cup of espresso, center a small cup under the coffee dispenser. For two cups, put two cups side by side under the coffee dispenser. One Cup of Espresso Two Cups of Espresso 2.
e o 20 Operating Instructions Making Cafe Latté Your coffee maker can make one or two cups of cafe latte at a time. Cafe latte is a large espresso (about three ounces) with six ounces of steamed milk. Warning BURN WARNING: HOT LIQUIDS CAN CAUSE SEVERE BURNS. KEEP ALL BODY PARTS AND CLOTHING CLEAR OF THE BREWING COMPARTMENT DURING OPERATION. 1. Steam a pitcher of milk, six ounces for a single cafe latte or 12 ounces for a double. See page 25. Single Latté Double Latté 2.
Operating Instructions 21 Making Regular Coffee Warning BURN WARNING: HOT LIQUIDS CAN CAUSE SEVERE BURNS. KEEP ALL BODY PARTS AND CLOTHING CLEAR OF THE BREWING COMPARTMENT DURING OPERATION. Your coffee maker can make one or two cups of coffee at a time. NOTE A “Large” coffee as programmed in this machine is approximately 10 fluid ounces, or 300 ml. This requires a standard coffee mug rather than a formal type dinner cup.
Operating Instructions Decaffeinated And Ground Coffee You can use your coffee maker to make pre-ground coffee drinks, one cup at a time. It is an ideal way to make decaffeinated coffee or flavored coffee drinks. Warning BURN WARNING: HOT LIQUIDS CAN CAUSE SEVERE BURNS. KEEP ALL BODY PARTS AND CLOTHING CLEAR OF THE BREWING COMPARTMENT DURING OPERATION. 1. Make sure the power switch is on. 2. Pull the coffee maker out from the cabinet. Ground Coffee Chute 3.
Operating Instructions 23 Hot Water For Tea Or Other Drinks Warning BURN WARNING: HOT LIQUIDS CAN CAUSE SEVERE BURNS. KEEP ALL BODY PARTS AND CLOTHING CLEAR OF THE BREWING COMPARTMENT DURING OPERATION. Use the Hot Water button to brew tea and other hot flavored drinks. The coffee maker dispenses about four ounces of hot water at a time. 1. Put the proper amount of tea or mix for your hot drink into a cup or glass. 2.
Operating Instructions Making A Cappuccino Cappuccino is a coffee drink with about one ounce of espresso with one ounce of foamed milk on top. To make a cup of cappuccino: Warning BURN WARNING: HOT LIQUIDS CAN CAUSE SEVERE BURNS. KEEP ALL BODY PARTS AND CLOTHING CLEAR OF THE BREWING COMPARTMENT DURING OPERATION. 1. Prepare an ounce of foamed milk according to page 26. To make two cappuccinos or a large cappuccino, prepare two ounces of foamed milk. 2. Pour the foamed milk in to a large cup.
Operating Instructions Steaming Milk Steamed milk is milk that is heated with few bubbles using the cappuccino steamer. Warning BURN WARNING: STEAM AND HOT LIQUIDS CAN CAUSE SEVERE BURNS. KEEP ALL BODY PARTS AND CLOTHING CLEAR OF THE STEAM WAND AND THE MOUTH OF THE MUG OR PITCHER DURING OPERATION. 1. Measure out the amount of milk you want to steam into a large mug. You may also use narrow mouthed stainless steel pitcher to minimize splatter. 2.
Operating Instructions Hot Cappuccino Water Steamer Foaming Milk Foamed milk is hot milk with large bubbles. Use the cappuccino steamer to created foamed milk. Warning BURN WARNING: STEAM AND HOT LIQUIDS CAN CAUSE SEVERE BURNS. KEEP ALL BODY PARTS AND CLOTHING CLEAR OF THE STEAM WAND AND THE MOUTH OF THE MUG OR PITCHER DURING OPERATION. 1. To create foamed milk, measure out the amount of milk you foam into a large mug. You may also use narrow-mouthed stainless steel pitcher to minimize splatter. 2.
Operating Instructions Opening The Front Panel To Open the Front Panel 1. Turn off the power switch. 2. Pull the coffee maker out from the cabinet. 3. Remove the drip tray. 4. Unlock the front panel. 5. Push the front panel release button to open the front panel. Continued...
Operating Instructions 6. If you need to open the brewing unit door, grasp it under the right side and swing it open. To Close the Front Panel 1. Close the brewing unit door if it is open. 2. Make sure the drip tray is removed. 3. Close the front panel and lock it with the key. 4. Replace the drip tray. Caution To prevent damage to the front panel, make sure the drip tray is removed before closing it.
Care and Cleaning Adjusting The Coffee Grinder The mesh of the coffee grinder blades is pre-set at the factory. Adjust the grinder blades only if the quality of the coffee changes. The finer the coffee is ground, the stronger it will be. Warning • Coffee will pour into a cup you put under the coffee dispenser tube during the adjustment process. To avoid burns, keep body parts and clothing clear of the dispenser and drip tray areas. • Do not attempt to adjust the grinder when the grinder is not on.
Care & Cleaning Cleaning Schedule Coffee Maker Cleaning Schedule Water Tank (E24CM75GSS) Daily Every 30 cycles (or once a week) Monthly Every 2500 cycles (Approx.
Care & Cleaning Cleaning The Water Tank E24CM75GSS Only In the interest of safety, clean the water tank daily to prevent bacteria build-up. What to Use • Filtered Water (4 gpg maximum water hardness...DO NOT use distilled water) To Clean the Water Tank: 1. Slide the coffee maker out of the cabinet and remove the water tank from the top of the unit. 2. Empty and rinse out the water tank. 3. Fill the tank with filtered water and put it back in the top of the unit. The water tank is now clean.
Care & Cleaning Routine Cleaning Instructions The message “Clean Group” appears on the display every 30 cycles to inform you that the system needs a routine cleaning. The routine cleaning process involves cleaning the coffee dispenser, the drip tray and surrounding areas and a system flush. The “Clean Group” message will disappear after the cleaning is done.
Care & Cleaning 33 6. Remove and empty the used coffee grounds bin. IMportant The power switch must be on while dumping out the used coffee grounds bin for the “Drawer Full” message to clear from the display. Remove Used Coffee Grounds Bin 7. Use the provided cleaning brush to remove any residual coffee grounds from the piston assembly and the inside of the brewing unit.
Care & Cleaning Cleaning The Outside Surfaces CAUTION • To prevent damage to stainless steel surfaces, always wipe in the direction of the grain. • Use only the cleaners indicated. Chlorine or chlorine compounds in some cleaners are corrosive to stainless steel. • DO NOT use abrasives to clean stainless steel surfaces. • Never allow beverage stains, creamers or sugar to remain on stainless steel for any length of time.
Care & Cleaning Decalcification for Model E24CM76GSS (Plumbed Version) with Electrolux ACCFILT-24 water filter system installed. Warning In case of power loss, or if the appliance is accidentally switched off during cleaning: • Turn the coffee maker switch back on. • The appliance display will read “Please Wait Heating”. • When “Machine Ready” appears on the display, push the Decaf Coffee button again to finish the cleaning cycle.
Operating Instructions Decalcification (CONTINUED) 4. Turn the water supply on the filter head off. Large Coffee Filter Head 5. Push the Hot Water button on the coffee Hot Cappuccinosystem to relieve the water pressure. Water Steamer 6. Grasp the filter cartridge and rotate it clockwise until it stops. Firmly pull the filter down and out of the filter head. Some water drain off will occur. 7. Install the flushing cartridge. Push in firmly and rotate it counter-clockwise.
Care & Cleaning 37 Decalcification for Model E24CM76GSS (Plumbed Version) with a generic or no filter system 1. For Model E24CM76GSS to be decalcified, the water line must be in an accessible location. The type of fittings and hoses required to connect it depend on the type of installation. 2. Use an Electrolux ACCFILT-24 filter kit and an Electrolux ACCKITA-24 flushing cartridge. 3. When the coffee system is pulled out all the way, there is approximately a three inch space to reach behind.
Care & Cleaning Decalcification instructions (Cont.) 14. Put a 2-quart sauce pan on the drip tray under the hot water and coffee dispenser to collect wash and rinse water. Point the hot water wand into the pan. 15. Push the Hot Water button. Wait for the water to stop. Repeat this process twice to remove air. 16. Put one detergent tablet in the ground coffee chute. 17. Push and hold the Decaf Coffee button until “Insert Cleanser“ appears on the display. 18.
Care & Cleaning 3. Pour a packet of Puly Decalcifying Powder into a 16 ounce bottle. Fill the bottle with warm filtered water and shake well until the powder is dissolved. 4. Pour the mixture into the water tank. 5. Fill the tank with filtered water until it is half full. 6. Push and hold the Decaf Coffee button until “Insert Cleanser“ appears on the display. 7. Push Decaf Coffee again to immediately start the cleaning cycle.
Solutions to Common Problems Check these points to help save time and money. Problem Possible Solution Nothing works. • Connect coffee maker power plug to dedicated, grounded power receptacle. • Turn power on at junction box. Check for tripped circuit breaker or blown fuse. • Turn on power switch. See Operating Instructions section. • Power outage. Contact power company. • See Nothing works above. • Turn on light switch. • Lights burned out. Call for service.
Solutions to Common Problems Problem Possible Solution Amount of coffee made is too small. • Coffee maker will not make • coffee drinks from ground coffee. Normal size of a cup of espresso is about one ounce. Push espresso or double espresso button multiple times. Put pre-ground coffee in ground coffee chute before the power switch is turned on. Display reads: “Please Wait Heating” • Appliance still heating up. Wait until display reads “Machine Ready” (3-5 minutes).
Notes
Warranty Information 43 COFFEE MAKER WARRANTY Your coffee maker is protected by this warranty WARRANTY PERIOD FULL ONE-YEAR WARRANTY One year from original purchase date LIMITED WARRANTY Time periods listed (Applicable to the state above. of Alaska) THROUGH OUR AUTHORIZED SERVICES WE WILL: Pay all costs for repairing or replacing any parts of this product which prove to be defective in materials or workmanship.
® 1-877-4Electrolux www.electroluxusa.com www.electroluxca.