
User Manual


7
– I/O CONNECTIONS –
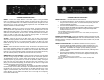
INPUT – Connect the output of your instrument or another effects pedal to this
jack.
SEND / RETURN – An optional effects loop can be used to add additional effects
pedals between the STM’s preamp and filter sections without any alteration to the
instrument’s original dynamics. The external effect(s) will be active in the wet mix of
the STM’s output, and will be bypassed when the STM is itself in bypass mode.
Connect the SEND jack to the external effect’s input; connect the RETURN jack to
the external effect’s output.
MONO/L and R OUTPUTS – The STM can be operated in mono (single output) or
stereo (dual output) configuration. In stereo configuration, VOICE modes WAH, BB,
AH-OO, AH, OW-EE produce a pan sweep in sync with the filters; VOICE modes EE,
EE-ER, AH-I, I-A shift the filters differently for each output to produce a wide, lush
sound field. Connect the MONO/L jack to the input of your primary amp. For stereo,
connect the R jack to the input of your secondary amp.
EXP PEDAL – An optional expression pedal* can be plugged into this jack for
manual control of the STM’s filters, enabling interaction similar to that of a wah-wah
pedal. The SENSITIVITY knob will still allow the envelope generator to sweep the
filters based on the dynamics of the instrument, so the knob should be turned to 12
o’clock to disable the envelope response. If the auxiliary functions are enabled, the
LFO may also modulate the filters while sweeping the expression pedal. The toe/heel
positions can be swapped by moving the SENSITIVITY knob slightly into the
negative range.
*The expression pedal must have a Tip-Ring-Sleeve connection. It is important that the
expression pedal have the correct polarity. The tip of the plug must be connected to the wiper
of the potentiometer inside the expression pedal. If you are not sure what type of expression
pedal to use, try one with a polarity switch so that it will work with many different types of
instruments. Some suggested Expression Pedals: M-Audio EX-P, Moog EP-2, Roland EV-5 or
Boss FV-500L. You may also connect a control voltage to the jack. The Control Voltage range
must be between 0 V to 5 V.
– POWER –
Use the supplied AC adaptor to power the STM. Plug the barrel connector of the
adaptor into the 9V power jack located at the top of the unit. The STM requires 9 –
9.6VDC at 200mA with a center negative plug. The STM accepts Boss™ style AC
adaptors. The actual current draw of the STM is 185mA.
– TECHNICAL SPECIFICATIONS –
Sample Rate: 46875 Hz
A/D and D/A Conversion Bit Resolution: 24 bits
Processed Audio Bit Resolution: 32 bits
Input Jack Impedance Output Jack Impedance
INPUT: 2.2 MΩ MONO/L: 220 Ω
RETURN: 2.2 MΩ R: 1.1 kΩ
SEND: 1.1 kΩ
8
– PRESETS –
The STM has nine fully programmable presets. Saving a preset will capture the
setting of each of the five black knobs and the auxiliary function settings. Once a
preset is saved, the STM will remember its settings after power has been
disconnected. You may write the name of the preset in the white painted block that
each number is located in; we recommend dry erase marker.
Preset Save Procedure
1. Once you have created a sound you want to save or if you want to save an
edited preset, turn the PRESETS knob to light the preset LED number
where you want to save the setting to.
2. Press down and hold the PRESETS knob for 3 seconds. The LED ladder will
blink to indicate save completion.
3. After the LEDs stop blinking, release the PRESETS knob. The PRESET LED
will light up solid.
4. Your preset is now saved.
Preset Load Procedure
There are two options for loading presets:
A. Press and release the PRESET footswitch repeatedly until the preset you
want to load is selected. Make sure the PRESET LED is lit to indicate your
preset is loaded. Please Note: The current knob positions are no longer
valid.
B. Use the PRESETS knob and the PRESET footswitch.
1. Turn the PRESETS knob so the preset number where the preset was
saved is selected.
2. Press and release the PRESET footswitch. The PRESET LED will light up
to indicate that the preset is loaded. Please Note: The current knob
positions are no longer valid.
Upon loading a preset, an LED in the LED ladder will blink briefly indicating the
VOICE mode that was recalled with the preset. After loading a preset, if you move a
knob, the knob’s new location will supersede the preset’s stored value for that knob.
At this point, the PRESET LED will blink rapidly to indicate that a knob has been
moved, though a preset is still loaded.
Preset Unload Procedure
A preset can be unloaded to restore the current knob positions. Turn the PRESETS
knob clockwise until no LEDs in the LED ladder are lit to unload the current preset
and restore the sound to the current knob settings. This will also revert the auxiliary
functions to their prior, non-preset settings. If Preset 9 is loaded, upon pressing the
PRESET footswitch, the STM will cycle back to the unloaded setting, where no preset
is loaded. Press the PRESET footswitch again and Preset 1 will load.
Factory Preset Restore Procedure
1. Press and hold down the PRESETS knob and the PRESET footswitch while
applying power.
2. After applying power, continue to hold down both switches until you see
the LED ladder blink rapidly. At this point you can release the switches; the
factory presets have been restored.