
Installation and Operation Manual


Use this method only if required by local code otherwise use the Electrify America
app to set the amperage configuration.
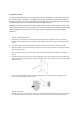
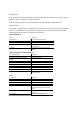
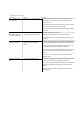
The amperage of the charger can be manually set by configuring the dipswitches as shown below. It is always
preferable to configure the amperage via the Electrify America App.
NOTE:
The circuit breaker must be rated for 125% of the chosen operating current.
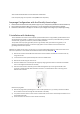
Reattach the Cover
1. Secure the middle cover with the screws removed in the previous steps.
2. Attach the cosmetic cover by placing the top edge of the cosmetic cover over the middle cover and gently
pushing the cosmetic cover into place.
3. Secure the cover with the T20 Torx screws.
Amperage Configuration with the Electrify America App
1. Download and install the Electrify America App on your smartphone (available for iOS and Android).
2. Ensure that your phone’s Wi-Fi is turned on. It is not required to be connected to a network.
3. Follow the instructions in the App to connect to your charger and configure your amperage setting.
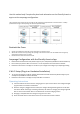
4 Wi-Fi Setup (Plug-in or Hardwired Installation)
4. To connect the charger to a Wi-Fi network, download and install the Electrify America App on your
smartphone (available for iOS and Android).
5. Follow the instructions in the App to setup with Wi-Fi connection.
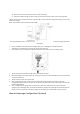
Operating Instructions
1) Insert the vehicle connector into the charging port on your electric vehicle. The charger will light
up green when a connection is detected.
2) Once the charger is plugged into the vehicle, the charger will begin flashing blue as it links with
the vehicle. When the charger is flashing solid blue, the vehicle is charging. The charger light will
dim on the front and remain blue on the bottom for the entire charging session.
3) Charging is complete when the charger turns green once more.
4) Press the thumb lever on the vehicle connector to disconnect from the vehicle.